Installation instructions – Brandmotion 1009-6504 User Manual
Page 4
INSTALLATION INSTRUCTIONS
6504 Instructions 2-4-14.Doc
Page 4 of 6
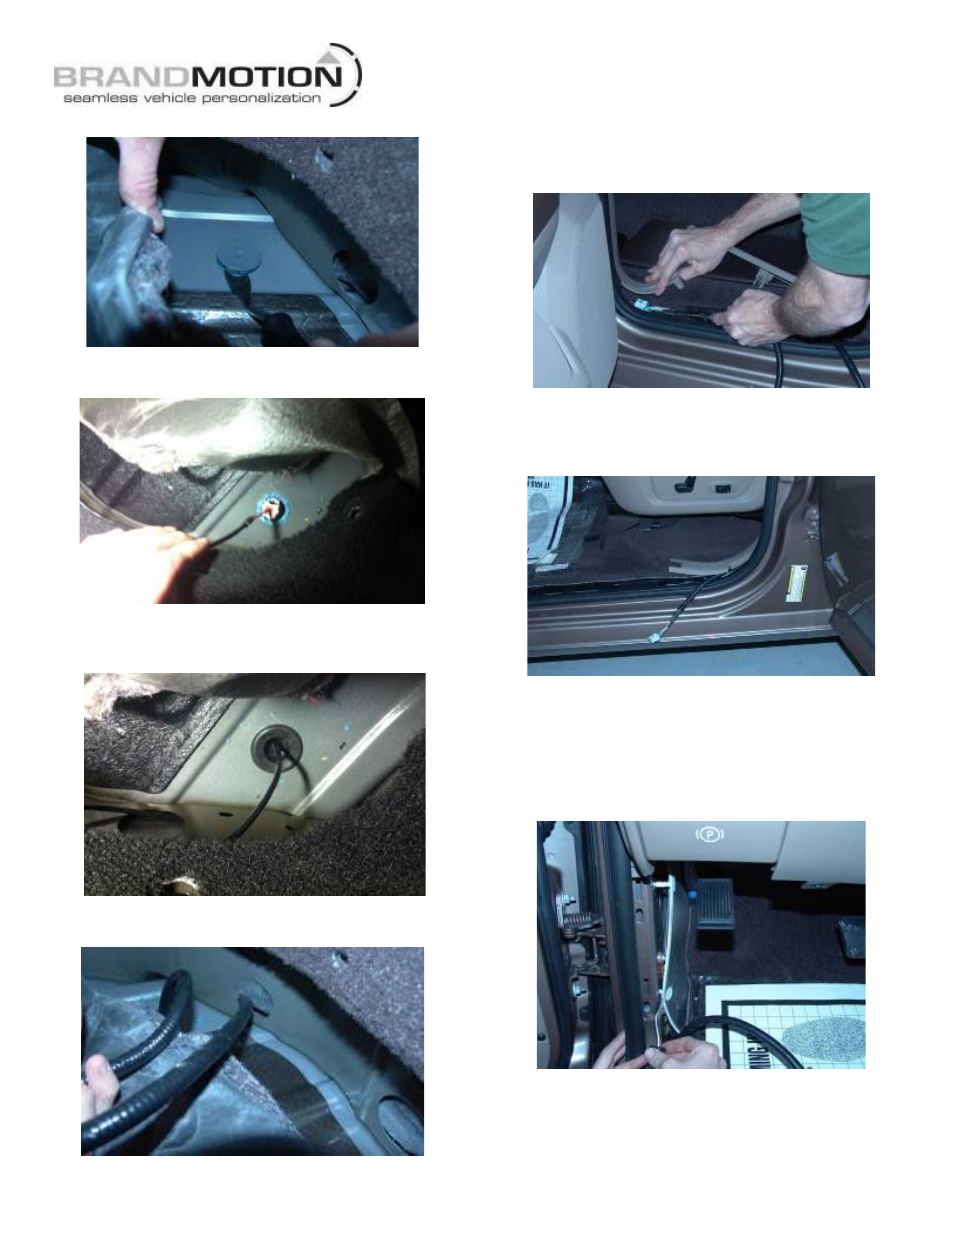
22. Pull back carpeting and remove the body floor plug.
23. Insert the large gray connector end of the supplied
Chassis Harness through the body floor plug hole.
24. Seat grommet affixed to the supplied Chassis
Harness in the body floor plug hole by firmly
pressing it with your fingers.
25. Route the Chassis Harness RCA connector through
the seat riser reinforcement hole.
26. Reinstall carpet and reinstall the three pushpins
removed earlier.
27. Route Chassis Harness around B-pillar trim by lifting
up on the trim and feeding harness through to front.
28. Continue to route Chassis Harness along the driver’s
side front door opening sill area. NOTE: This will be
a tight fit, as the supplied Chassis Harness will follow
the existing wiring harness.
29. Reinstall rear sill plate by pressing it back into place
with your hands.
30. Remove driver’s side kick panel insulation pad
retainers using a Pushpin Removal Tool. Route the
supplied Chassis Harness behind the insulation
(between insulation and metal frame) then reinstall
the insulation).
31. Reinstall front kick panel/sill plate by pressing it back
into place with your hands.
32. If needed, install aftermarket display/ Navigation
display per manufacturer’s instructions.