Adjustments – Ryobi BTS20R-1 User Manual
Page 29
Page 29
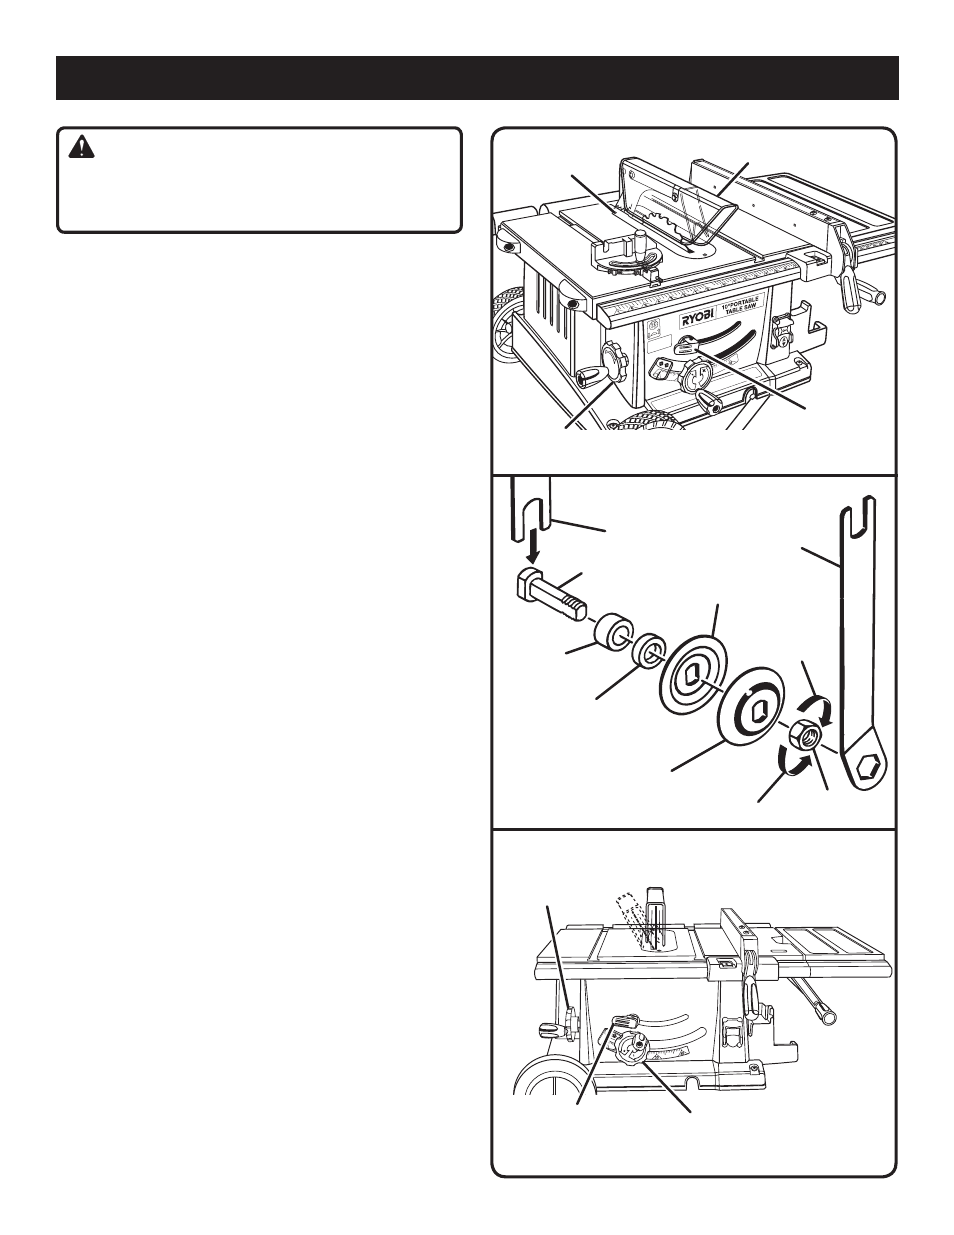
ADJUSTMENTS
BLADE
GUARD
THROAT
PLATE
BEVEL
LOCKING LEVER
BEVEL
HANDWHEEL
Fig. 35
TO ANGLE BLADE,
PUSH BEVEL LOCKING
LEVER RIGHT AND ROTATE
BEVEL HANDWHEEL
TO LOWER BLADE, PUSH BEVEL
LOCKING LEVER LEFT AND
ROTATE HEIGHT ADJUSTING
HANDWHEEL CLOCKWISE
TO RAISE BLADE, PUSH BEVEL
LOCKING LEVER LEFT AND
ROTATE HEIGHT ADJUSTING
HANDWHEEL COUNTERCLOCK-
WISE
TO LOCK BLADE ANGLE,
PUSH BEVEL LOCKING
LEVER LEFT
Fig. 37
WARNING:
Before performing any adjustment, make sure the tool
is unplugged from the power supply. Failure to heed this
warning could result in serious personal injury.
The table saw has been adjusted at the factory for making
very accurate cuts. However, some of the components might
have been jarred out of alignment during shipping. Also,
over a period of time, readjustment will probably become
necessary due to wear.
To avoid unnecessary set-ups and adjustments, a good prac-
tice is to check your setups carefully with a framing square
and make practice cuts in scrap wood before making finish
cuts in good workpieces. Do not start any adjustments until
you have checked with a square and made test cuts to be
sure adjustments are needed.
TO REPLACE THE BLADE
See Figures 35 - 37.
Unplug the saw.
Lower the saw blade, raise the blade guard, and remove
the throat plate.
Make sure the bevel locking lever is securely pushed to
the left. Raise the blade to its full height by turning the
height adjusting handwheel clockwise.
Using the smaller wrench, insert the flat open end into
the flats on the arbor shaft as shown. Insert the larger
wrench over the arbor nut, and, holding both wrenches
firmly, pull the larger wrench forward to the front of the
machine to loosen and push to tighten. Make sure the
arbor nut is securely tightened. Do not overtighten.
NOTE: The arbor shaft has right-hand threads.
Remove the outer blade washer from the arbor then
remove the blade. Make sure that the inner blade washer
and both spacers are tight against arbor shoulder.
Place the new blade on the arbor shaft (the teeth must
point down toward the front of the saw to work
properly).
Put the outer blade washer and arbor nut over the arbor.
Tighten securely.
Rotate the blade by hand to make sure it turns freely.
Check the spreader and adjust if needed.
Lower the saw blade and reinstall the throat plate.
NOTE: Securely tighten throat plate screws. Do not allow
the throat plate to bow up above the table surface.
Fig. 36
NOTE: PLACE BLADE BETWEEN
INNER AND OUTER BLADE WASHER
SMALL
WRENCH
LARGE
WRENCH
TO
LOOSEN
TO
TIGHTEN
OUTER
BLADE WASHER
INNER
BLADE WASHER
SMALL
SPACER
LARGE
SPACER
ARBOR
ARBOR NUT