Appendix, Installing the dust filter (optional accessory) – Optoma S313 User Manual
Page 47
EN-47
Appendix
Installing the Dust Filter (Optional
accessory)
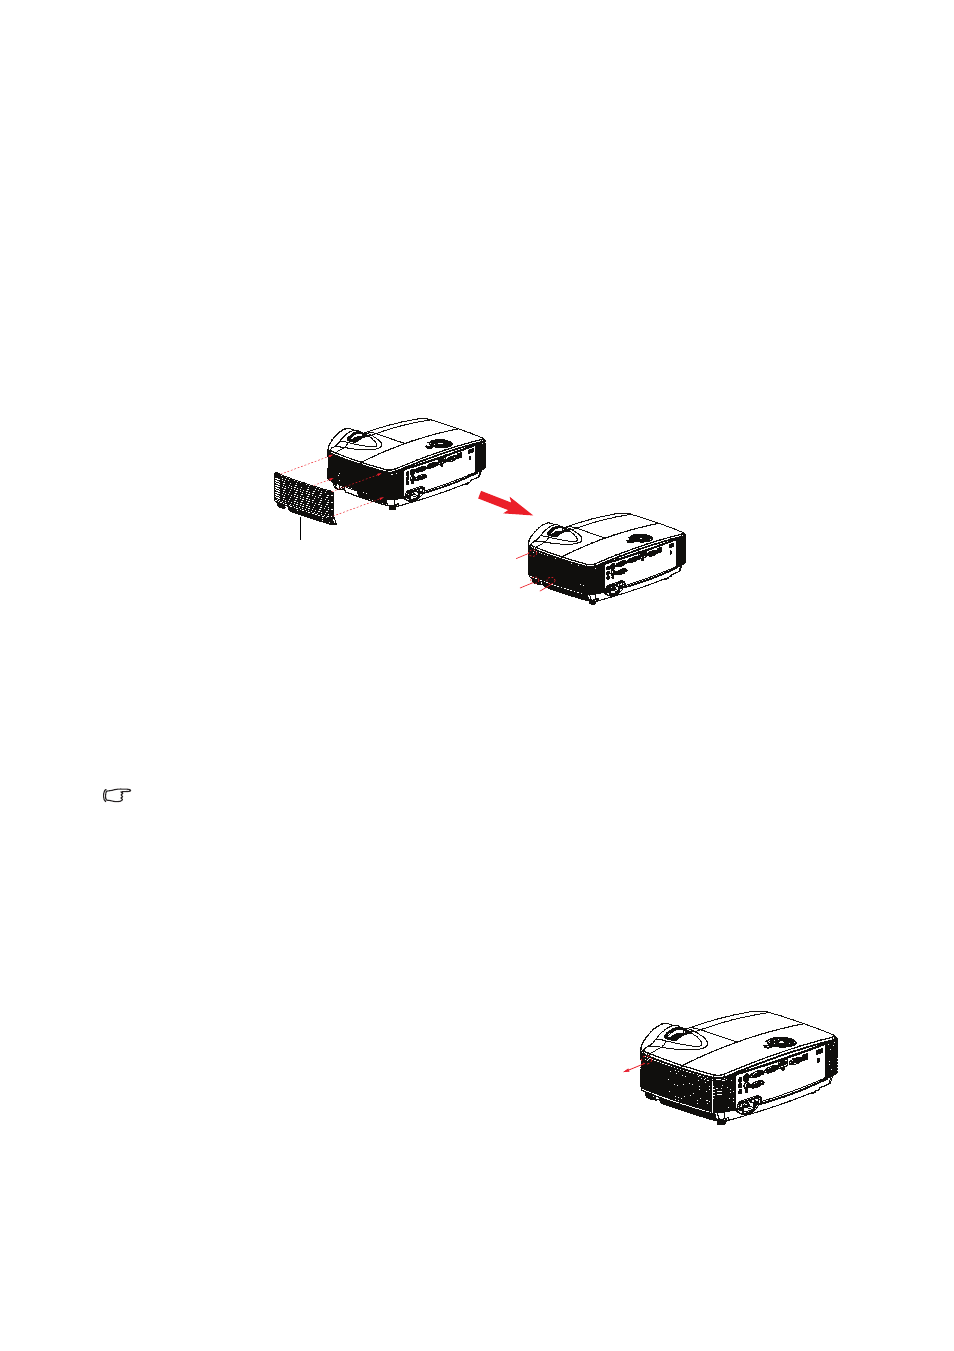
Be sure to follow the steps to install the dust filter.
1. Align the filter with these two hook positions (#1 & #2), then press it
close to the projector from the left side to the right one.
2. Press the last hook position (#3) until it clicks.
3. Turn on the projector, then press “Menu”, go to
OPTIONS > Optional Filter > Optional Filter Installed and
select “Yes”.
4. Clean the dust filter periodically.
The dust filter should be used in dusty environments only. Filters
must be cleaned/replaced periodically i.e after every 500 hrs or 3
months, or sooner depending upon the air environment. Clogged
filter can restrict air flow causing the projector to heat excessively
leading to pre-mature lamp and/or projector failure.
5. To remove the dust filter, take it apart from the upper-left side of the hook
position.
6. Turn on the projector, then press “Menu”, go
to OPTIONS > Optional Filter > Optional
Filter Installed and select “No” when you pull
out the dust filter and would not install it
again.
1
2
3
dust filter