CRU ToughTech Secure 128 mini-Q with WriteLock User Manual
Page 2
CRU
U s e r M a n u a l f o r T o u g h T e c h m i n i Q m o d e l s ( A 9 - 0 0 0 - 0 0 0 1 r e v 1 . 5 )
- 2 -
Table of Contents
1. Pre-Installation Steps
2
1.1 Accessories
2
1.2 Identifying parts of the unit
2
1.3 Warnings and notices
3
2. Installation steps
3
2.1 Hard Drive Installation
3
2.2 Connecting to a computer
6
3. Write-Protection information
7
4. Encryption Information
8
5. Usage with Mac and Windows Operating Systems
9
6. Encryption FAQs
11
7. General FAQs
12
8. Technical Specifications
13
1. Pre-Installation Steps
1.1 Check the accessories with your ToughTech mini-Q.
Please contact CRU if any items are missing or damaged. The box should contain:
1.2 Identify the parts of your ToughTech mini-Q.
ToughTech mini-Q
Quantity
ToughTech enclosure
1
eSATA cable
1
USB data/power cable
1
FireWire 800 cable
1
FireWire 800 to 400 cable
1
Packet of screws for hard drive
1
AC adapter
1
Quick Start Guide and Warranty info
1
ToughTech Secure mini-Q
Quantity
ToughTech enclosure
1
eSATA cable
1
USB data/power cable
1
FireWire 800 cable
1
FireWire 800 to 400 cable
1
Packet of screws for hard drive
1
AC adapter
1
Quick Start Guide and Warranty info
1
Encryption Keys
3
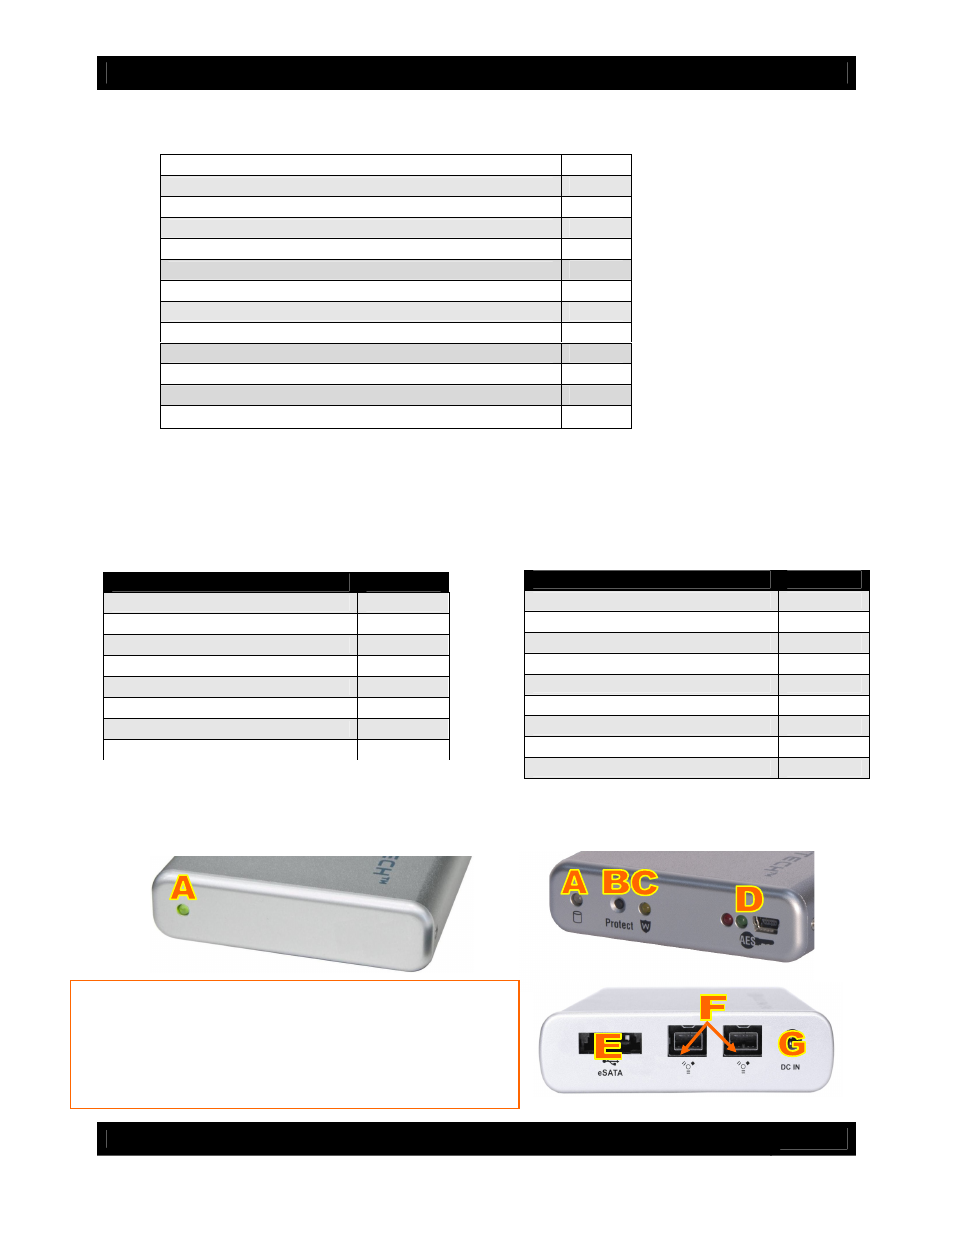
A
= Power/Access indicator LED
B
= Write-protection enable button for WriteLock and WriteProtect models
(also serves as write-protection disable button for WriteProtect model)
C
= Write-protection LED (for models with WriteLock and WriteProtect)
D
= Encryption key slot & LEDs
E
= eSATA & USB2 combo port
F
= FireWire 800 (1394b) ports
G
= Power input (from AC adapter)
Front of ToughTech mini-Q
Front of ToughTech Secure mini-Q with WriteLock
Rear connections