Clip controls – DT Videolabs InstaCue User Manual
Page 4
2
3
4
5
6
9
13
12
1
14
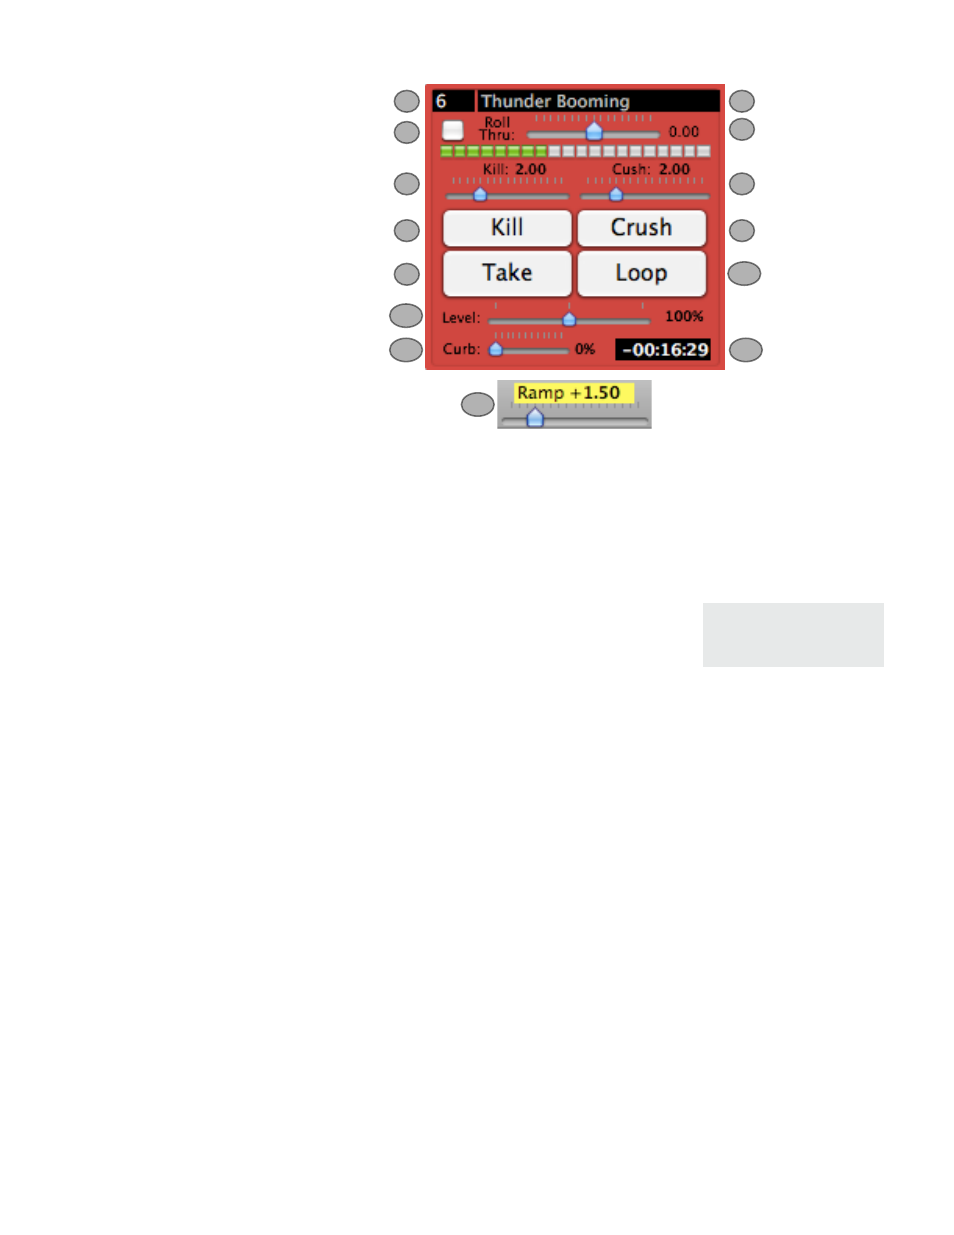
Clip Controls:
1. Index Number - The Index Number of the clip. Clips can be reordered via Drag and Drop.
2. Clip Name - Clip’s title, originally obtained by the filename. Can be changed via the Single Clip
Edit Sheet (or double click on the clip).
3. Roll-Through Checkbox - When enabled, plays the next clip when this one ends.
4. Roll-Through Duration - Controls how a clip will Roll-Through to
the next, when the Roll-Through Checkbox is enabled. A zero value
will cut to the next clip. A negative value will mix for that duration
with the Next clip. A positive value will delay playback of the Next
clip by that duration.
5. Kill - Fades out this clip for the Kill Duration and ends Playback.
6. Kill Duration - Determines how long the clip fades.
7. Crush - Kills any other Playing clip for the Crush Duration.
8. Crush Duration - Determines Fade Duration of other clips.
9. Take - Begins Playback.
10. Loop - Causes clip to repeat when it reaches the end.
11. Level - Controls overall volume of clip. There is also a Gain control in the Single Clip Edit
Sheet. Both controls have the same effect (gain structure is not relevant in InstaCue).
12. Curb - Lowers the volume of all other playing clips.
13. Ramp - On a clip with Curb, when Take is clicked, all playing clips will Fade for this duration,
and clip will begin Playback. When playback ends, other playing clips will return to their normal
levels.
14. Time Remaining - Shows duration of clip (when not Playing). Counts down to zero when
Playing.
-2.00 = 2 second Mix
+0.00 = Cut
+2.00 = 2 second Delay
InstaCue 1.1 Users Guide
Page 3
7
8
10
11