Chapter 3: system setup, Removing the chassis cover, Installing the cpu – NEXCOM NSA 3130 User Manual
Page 34
Copyright © 2012 NEXCOM International Co., Ltd. All Rights Reserved. 21
NSA 3130 User Manual
Chapter 3: System Setup
Removing the Chassis Cover
Prior to removing the chassis cover, make sure
the unit’s power is off and disconnected from
the power sources to prevent electric shock or
system damage.
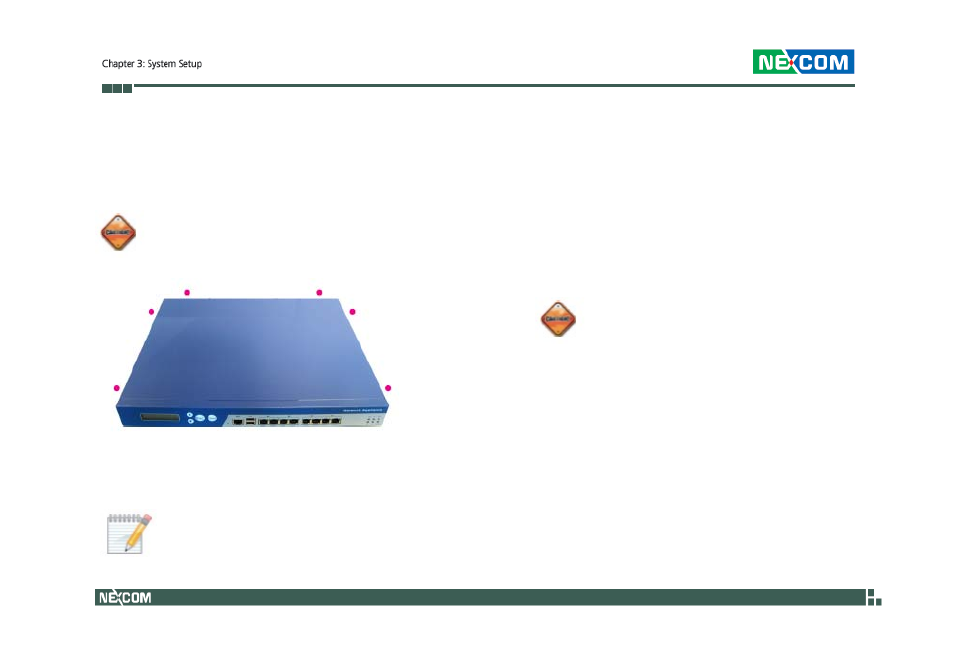
1.
The screws around the cover are used to secure the
cover to the chassis. Remove these screws and put
them in a safe place for later use.
The dots denote the locations of the screws.
2.
Lift up the cover then remove it from the chassis.
Installing the CPU
1.
If the system came with the heat sink already installed,
loosen the mounting screws that secure the heat sink to
the board.
•
Before you proceed, make sure
(1) the CPU socket comes with a
protective cap, (2) the cap is not
damaged and (3) the socket’s contact
pins are not bent.
•
Make sure all power cables are
unplugged before you install the CPU.
•
The CPU socket must not come in
contact with anything other than the
CPU. Avoid unnecessary exposure.
Remove the protective cap only when
you are about to install the CPU.
2.
Remove the heat sink to access the CPU socket.