ThunderMax PN#309-385 - GenII Sportster User Manual
Page 4
www.Thunder-Max.com
309-385 Installation / Setup Guide V2012.06.28
4
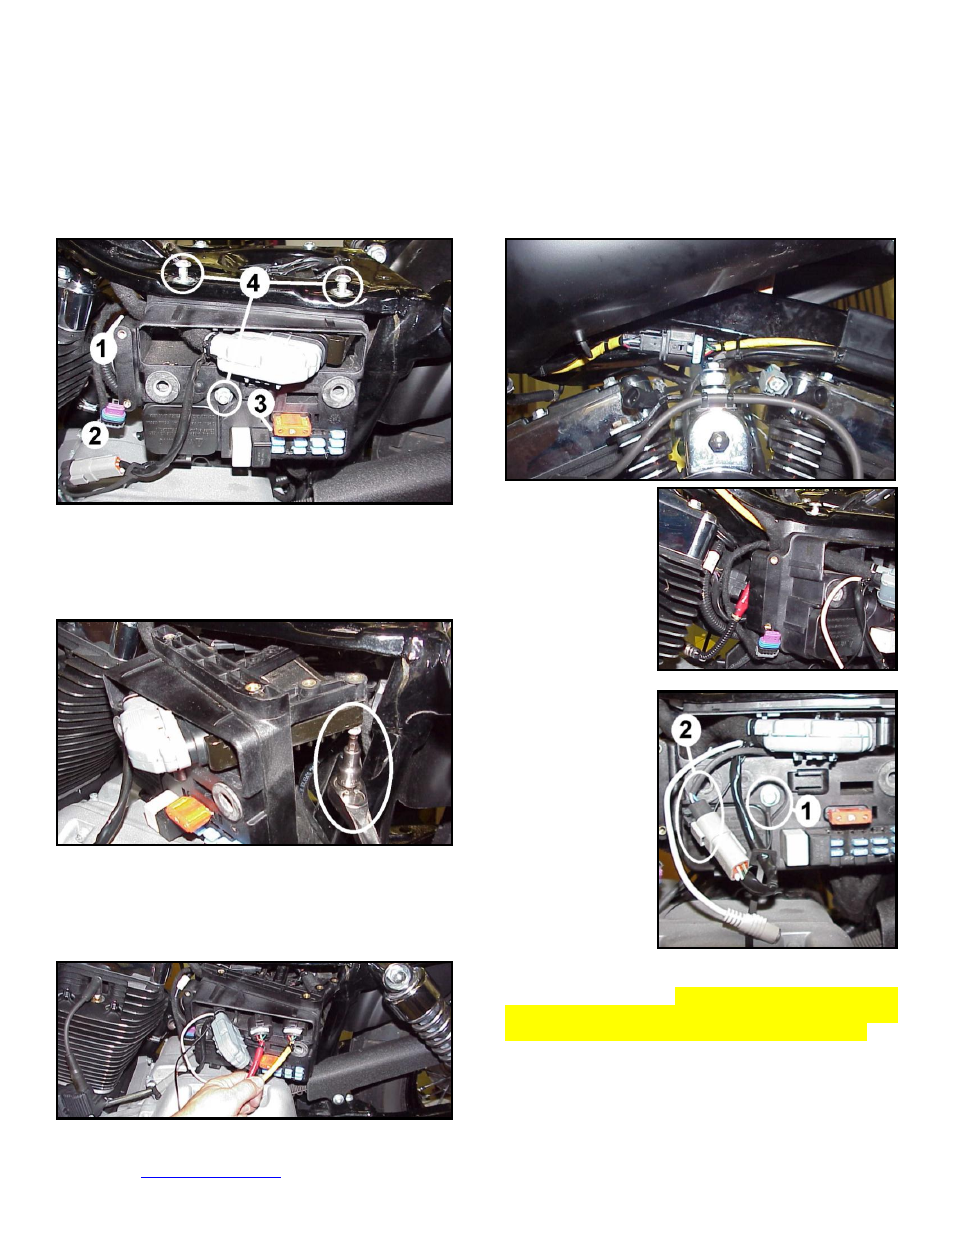
FXD-B: Remove left side cover to expose electrical
caddy. (1) Unplug and remove coil assembly from
caddy. (2) Slide diagnostic plug forward to remove from
caddy. (3) Remove ECM fuse (top left blue fuse; Note: if
equipped with optional security system, turn on ignition
switch before you remove the fuse to avoid tripping
alarm). (4) Remove 3 caddy mounting bolts.
FXD-C: Gently pull caddy from chassis far enough to
access the two stock ECM mounting bolts. Once ECM
is unbolted from caddy, depress tang on main 36-pin
ECM connector plug and remove ECM from plug. Install
pigtail harness to 36 pin connector as per included
instructions (do not install ground wire just yet).
FXD-D:
’06-’11 Models - unplug and remove factory
oxygen sensors from exhaust pipes. If you wish to cap
off the factory harnesses, inexpensive connector caps
can be purchased from any H-D® dealer (PN 72533-06).
Feed front & rear ThunderMax oxygen sensor harnesses
through ECM opening in caddy.
FXD-E: Route front sensor along left frame backbone
under gas tank; position sensor plug just forward of
engine mount top link. Install supplied oxygen sensor in
front pipe and route harness up left frame tube to
connector as shown. Check that connector position
does not interfere with gas tank when in position before
securing harnesses with plastic wire ties.
FXD-F: For the
rear cylinder, install
and connect the
oxygen sensor; coil
and tie the excess
harness and locate
it in the pocket
behind the ECM
caddy in front of the
frame backbone.
FXD-G:
Install
ThunderMax ECM
to the caddy and
attach the caddy to
the chassis with the
two top frame bolts,
taking care not to
pinch
any
harnesses in the
process.
After
applying dielectric
grease
(step
2),
connect the 36 pin
connector to the
ECM. Cut pigtail
ground wire to length, crimp on ring terminal and install
ground wire on center caddy mounting bolt between bolt
head and washer (1). Plug the closed loop module
into the 4-pin gray data link on the bike (2),
reconnect to caddy, then re-install the ECM fuse.
FXD-H: After checking that all harnesses are securely
tied down (away from any sharp edges that could chaff
or cut harnesses), re-install the ignition coil assembly,
gas tank, fuel line and seat. Advance to step 3.