ThunderMax PN#309-385 - GenII Sportster User Manual
Page 6
www.Thunder-Max.com
309-385 Installation / Setup Guide V2012.06.28
6
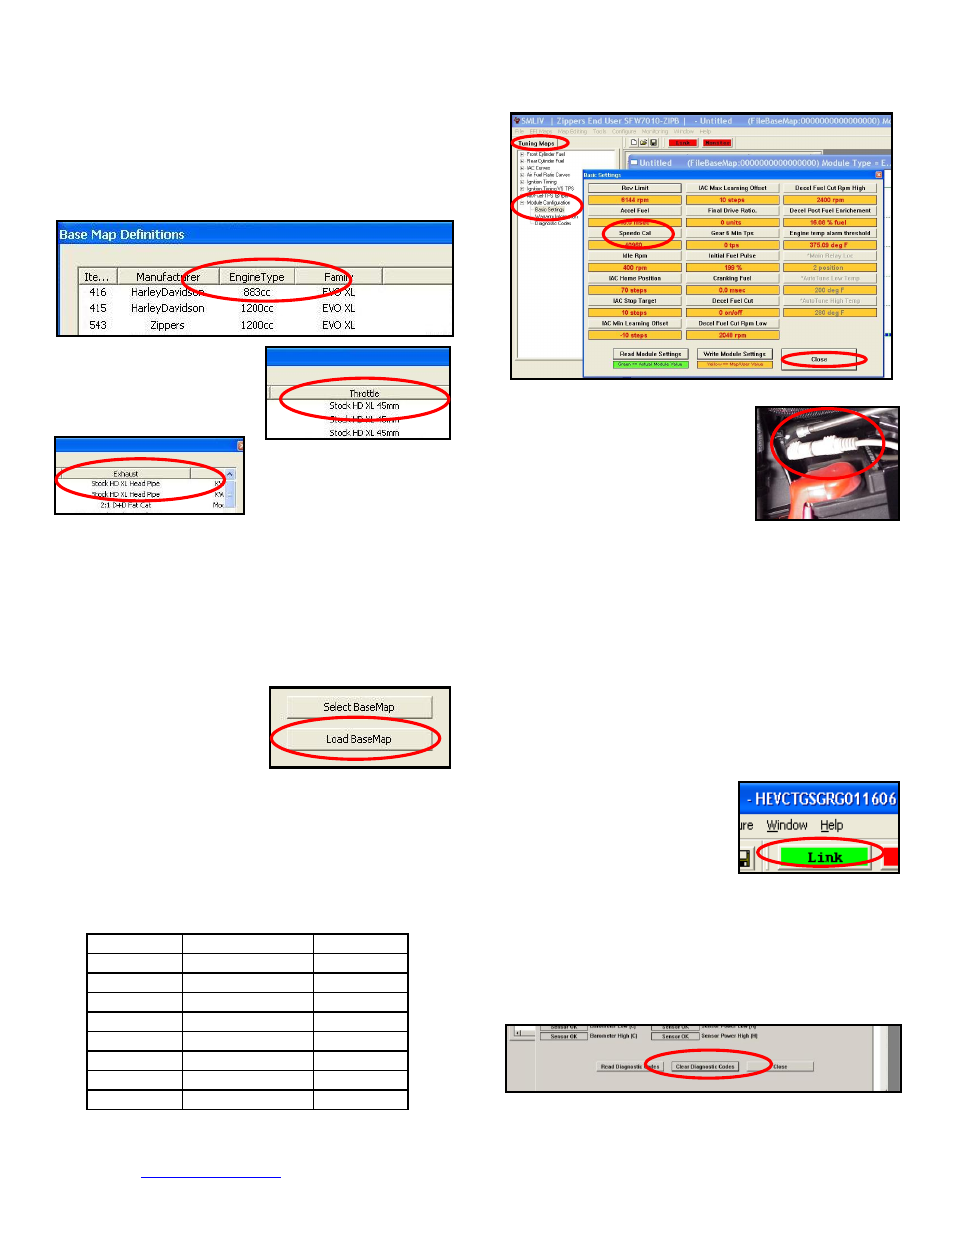
Filter the maps to locate a base map that best matches
your application by placing your curser first over any
‘Engine Type’ that matches your engine and right-click it.
All maps that do not match your selection will be filtered
from the screen.
Second, place your curser
over the ‘Throttle’ column
and right click your match.
Third,
right-click
the
‘Exhaust’ type that closest
matches your application.
Fourth
, right click the ‘Muffler’ column if further definition
of the exhaust system is required (depends on exhaust
application). Keep right-clicking the application columns
until you have located the best map match (in the case
of identical maps, choose the latest date). Highlight the
map you’ve chosen (left-click; blue bar indicates
selected map) and click [Close] button. This brings you
to the ‘Base Map Name Encoding’ page, from which you
can
review
the
map
parameters. Click the [Load
BaseMap] button to load the
map into the software. Click
[Close] this page to view
the open map page.
Step 4
From the ‘Tuning Maps’ Tree, click the + sign
next to [Module Configuration], then double-click
‘Basic Settings’. The basic settings page opens.
Check to see if the [Speedo Cal] calibration setting
matches your year and model; if not, click the button,
enter the correct value as shown, then click [Close].
Speedometer Calibration Settings
Step 5
Now you are ready to
‘Link’ and ‘Write’ the map to the
ECM. Attach the communication
cable from your computer to the
ThunderMax
pigtail
harness,
making certain that the cable is
routed away from any part of the
motorcycle that generates heat.
Special Note for International Model Bikes with
Active Exhaust Enabled: If your bike is equipped with
a working Active Exhaust Valve, you must unplug the
active exhaust harness before linking to the module, as
the AEV circuitry conflicts with the communication
stream. You can re-connect the harness after unlinking.
If the stock exhaust has been changed, disregard this
step. ThunderMax does not support active exhaust
Step 6
To link to the module, turn the key switch to the
“Ignition” position, making certain the “RUN / OFF”
rocker switch (Kill Switch) on the handlebar controls is in
the “RUN” position. Select the “Link” Button in the
SmartLink
software.
The
button turns green to indicate a
successful link. Answer [No] to
the “Do you wish to READ the
module map now” question at
this time.
From the toolbar, click [File] [Write Module Maps and
Settings], answer OK to the overwrite message; the
transfer bar appears during the map load.
Step 7
Clear any active Diagnostic Code readings.
While linked, from the Tuning Tree select [Module
Configuration] [Diagnostic Codes], click [Clear].
XL 883
2007-up
48400
XL 1200
2007-up
46000
DYNA®
2004-2005
40960
DYNA®
2006-2007
45900
DYNA®
2008-2009
42450
DYNA®
2010-2011
44750
ROCKER®
2008-2009
42450
ROCKER®
2010
44750
FXSTSSE
2
2009
42450