Xilica NeuPanel Series User Manual
Installation guide neupanel series - mini controls
Installation Guide NeuPanel Series - Mini Controls
(v3.2)
Xilica Audio Design www.xilica.com [email protected]
Page 1
Thank you for purchasing our Xilica - NeuPanel Series - Mini model wall control/s. Our NeuPanel Series programmable remote
controls are DHCP enabled network devices and provide user access to on/off functions, volume level adjustments, and preset
selection features in conjunction with our Neutrino and Uno Series digital processors. All NeuPanel controls are available in black or
white and offer a variety of mounting options that includes surface mount, flush mount, and rack mount.
All Mini control models feature the same physical footprint and are designed to fit into a N. America 2-gang electrical box for flush
mounting or surface mounted using the included surface box. Each Mini model includes a method to label the assigned functions giving
users a general understanding of the controller's function as well as a clean professional look.
Our NeuPanel Series Touch 7 surface or flush mount touch control model requires a larger installation area and comes with an included
custom back box and adapter plate to flush mount it. For installation of the Touch 7, refer to its own installation guide.
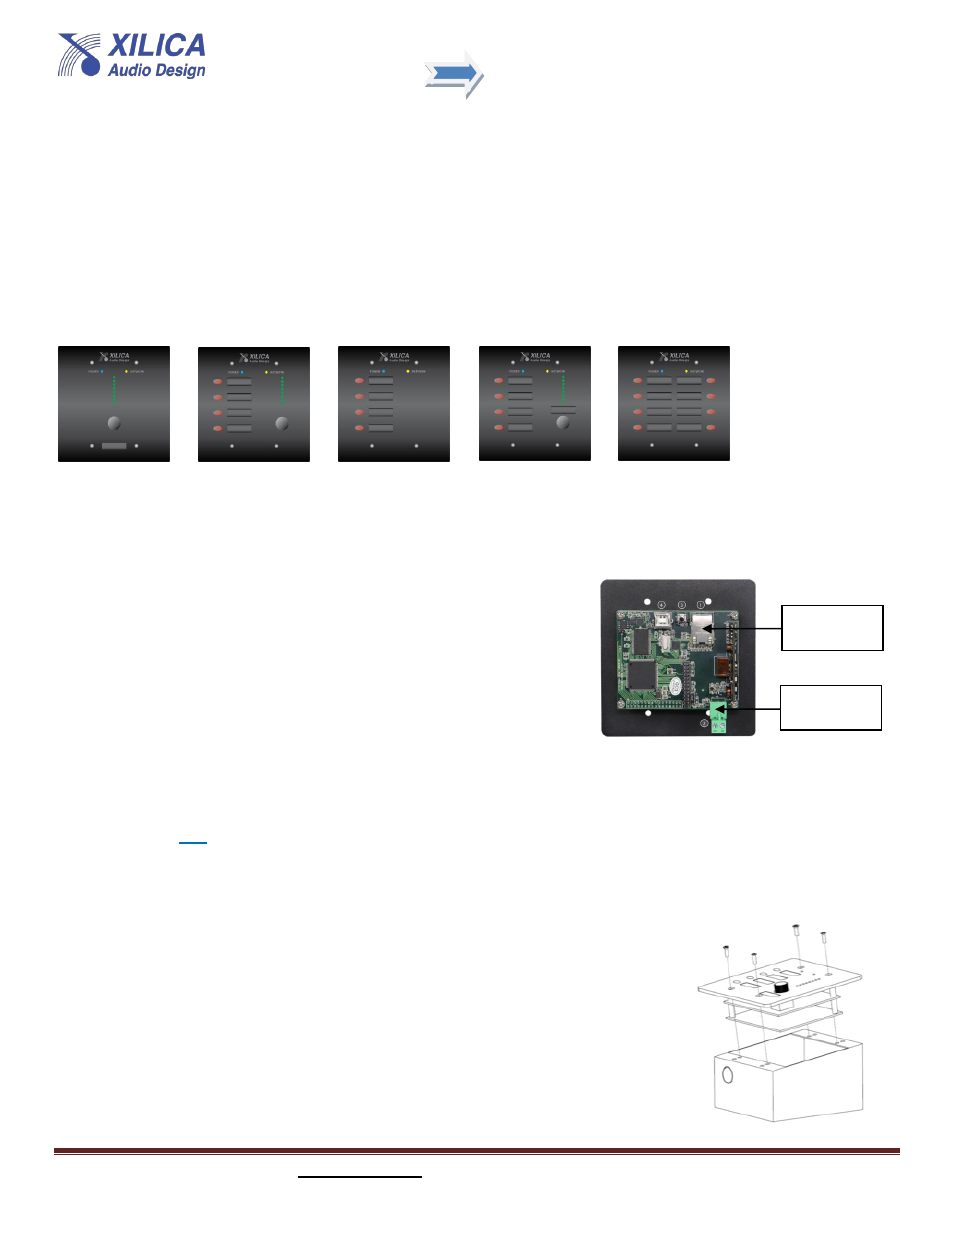
Mini-K1 Mini-K4 Mini-S4 Mini-S4K1 Mini-S8
All NeuPanel Series controls and Neutrino and Uno Series processors are based on Ethernet protocol and connect to the network via
standard Ethernet CAT5e/6 cable. They are powered either by a local 5V DC power supply that is included or by a PoE (Power over
Ethernet) network switch or a PoE injector (not included).
Refer to rear image of Mini control at right for connections.
If using the external power supply it is important to pay attention to the wiring polarity.
Next to the external power header the PCB has indicators identifying which terminal
is positive and which is negative - as shown at right.
This installation guide illustrates the different mounting options available and the steps to properly install and connect our
NeuPanel Series - Mini controls.
For Mini control - programming, operation, and network connection - refer to the Mini Quick Start Guide in the NeuConsole software
Help File or from our web site along with relevant instructional video tutorials available at www.xilica.com.
Surface Mount
Included with each Mini control is a surface mount back box that the Mini comes mounted into
inside the product carton. This back box is designed to be mounted externally on a wall or surface.
The surface back box has an angled mounting surface that allows the Mini control to be rotated to
meet the desired view angle and is secured to the back box with 4 x M8 metric screws.
Note: It is always recommended before installing the device to disconnect the power to prevent the
power from shorting to the chassis.
RJ45 Network
& PoE Connect
PoEConnection
Local DC
Power (-) (+)