Xilica NeuPanel Series User Manual
Page 3
Installation Guide NeuPanel Series - Mini Controls
(v3.2)
Xilica Audio Design www.xilica.com [email protected]
Page 3
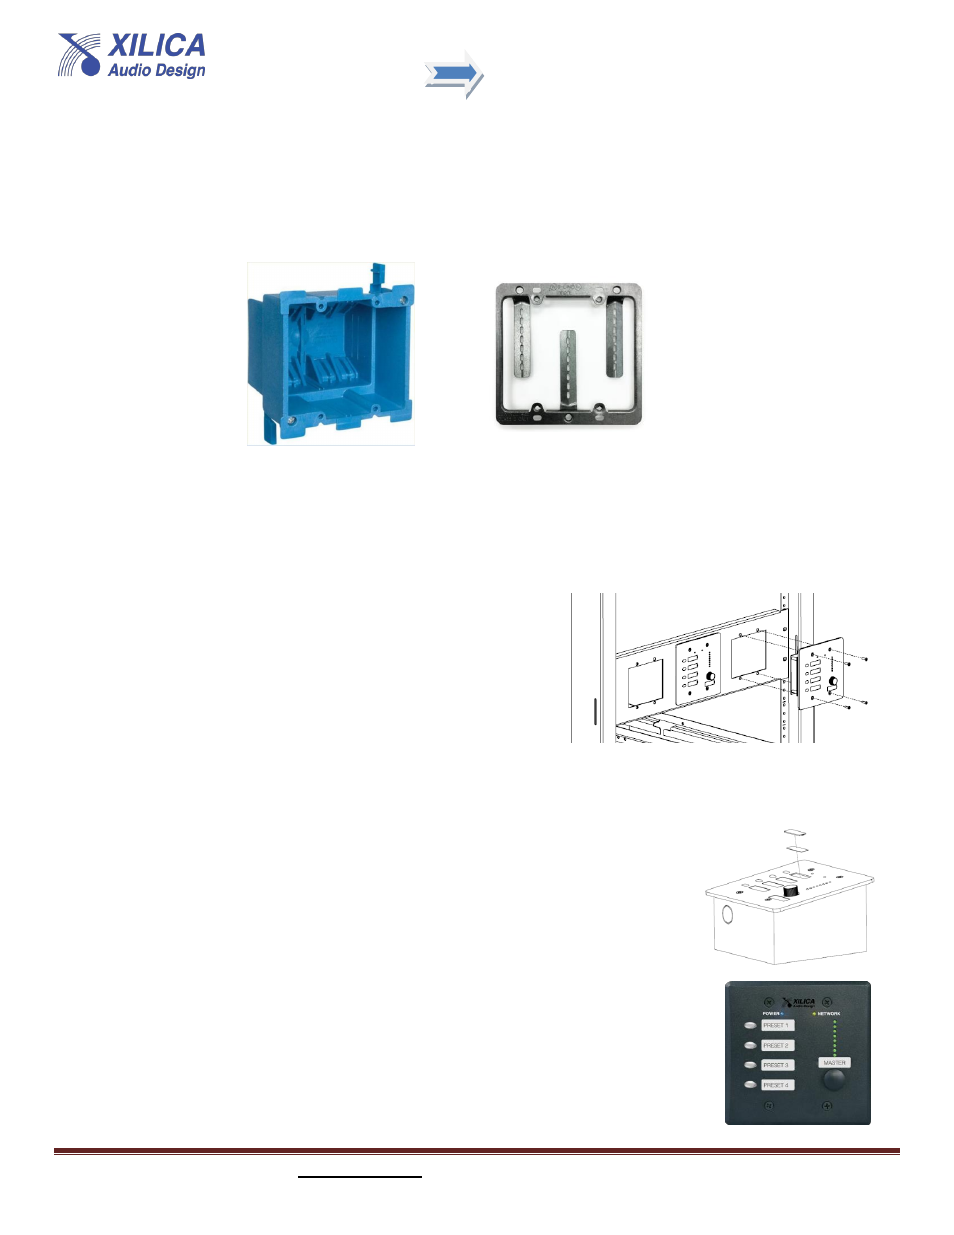
For Existing/Old Work Construction applications, we recommend using either an old work cut in/clamp in style full back box like the
Thomas & Betts BH234 shown below left or an old work cut-in/clamp In style mounting ring/bracket like the Cooper Industries B-Line
cut-in ring part # BB20L shown below right - or other brands - which will fit nicely as it lies thin and flat against the wall. Again, use the 4
x 6
⁄32 SAE screws that come in a bag with each Mini for this N. America brand of mounting ring. Use the included M8 metric screws for
cut-In rings from Europe or Asia.
Note: If the wall is insulated it is important that the wall insulation is moved away from the wall controller for proper convection cooling.
Rack Mount
Many installations require the system controllers to be mounted in an equipment rack. Xilica offers our optional Mini-RMKIT - a 19",
3RU rack mount panel with pre-cut 2-gang threaded cutouts that you can flush mount up to three (3) Mini controls into.
As shown at the right.
When rack mounting Mini control units, they can be powered locally using
the included external power supply. Note: The 5VDC power supply can be
daisy chained to more than one Mini control in the rack. A PoE switch or
Injector can also be used in lieu of the external power supply.
Use the 4 x M8 metric thread screws that are used to mount the Mini control
into its supplied surface mount box included in the product carton when
mounting the Mini controls into our Mini-RMKIT rack mount panel (or back
boxes and adapters manufactured In Europe and Asia).
Use the 6
⁄32 SAE screws that come in the bag with each Mini control to mount the
Mini controls into any rack mount panel, back box, or adapters manufactured in
N. America.
Labeling Mini Controls
Each Mini control model includes a method to label the assigned functions giving users a general
understanding of the controller's function as well as a clean professional look. For each function a
recessed label slot area with a clear plastic cover has been incorporated providing a flush look. The
clear plastic cover snaps into place after the label has been installed.
The maximum label size is .95" W (24mm) x .275" H (6.8mm). A professional labeling device or a
standard office-labeling machine such as a Brother P-Touch with 6mm width tape can be used to
create your Mini control labels.
Or, an Excel template is available that was designed to allow the integrator to create labels.
This template can be found on the Xilica web site at www.xilica.com.