Perform a rolling edit using the trim monitor, Perform a ripple edit using the ripple edit tool, Perform a ripple edit using the trim monitor – Adobe Premiere Pro CS4 User Manual
Page 177
171
USING ADOBE PREMIERE PRO CS4
Editing sequences and clips
Last updated 11/6/2011
Perform a rolling edit using the Trim Monitor
1
In the Trim Monitor, click the Select Video Or Audio Track button and select the track you want to edit.
2
Click in the Sync Lock box in the header of any track you want to shift when the rolling edit is made.
3
In a Timeline, place the current-time indicator at the edit point. This will display the edit point in the Trim Monitor.
4
Do any of the following:
•
Position the pointer between the video images so that it changes into the Rolling Edit tool
; then drag left or
right.
•
Drag the center timecode display left or right.
•
Drag the center jog disk left or right.
•
Click the timecode display between the views, type a valid timecode number to trim the edges of both clips to that
frame, and press Enter (Windows) or Return (Mac OS).
•
Select the boxed number above the center jog disk, type a negative number to trim both clips left or type a positive
number to trim both clips right, and press Enter (Windows) or Return (Mac OS).
•
Click the button that corresponds with the number of frames you want to edit. The –1 and –5 buttons trim both
clips left; +1 and +5 trim both clips right.
Note: The large trim offset number is 5 frames by default, but you can set it to any number by specifying a number in the
trim preferences. Choose Edit > Preferences > Trim (Windows) or Premiere Pro > Preferences > Trim (Mac OS).
Perform a ripple edit using the Ripple Edit tool
1
Select the Ripple Edit tool
.
2
In a Timeline panel, position the pointer over the In or Out point of the clip you want to change until the Ripple-
in icon
or the Ripple-out icon
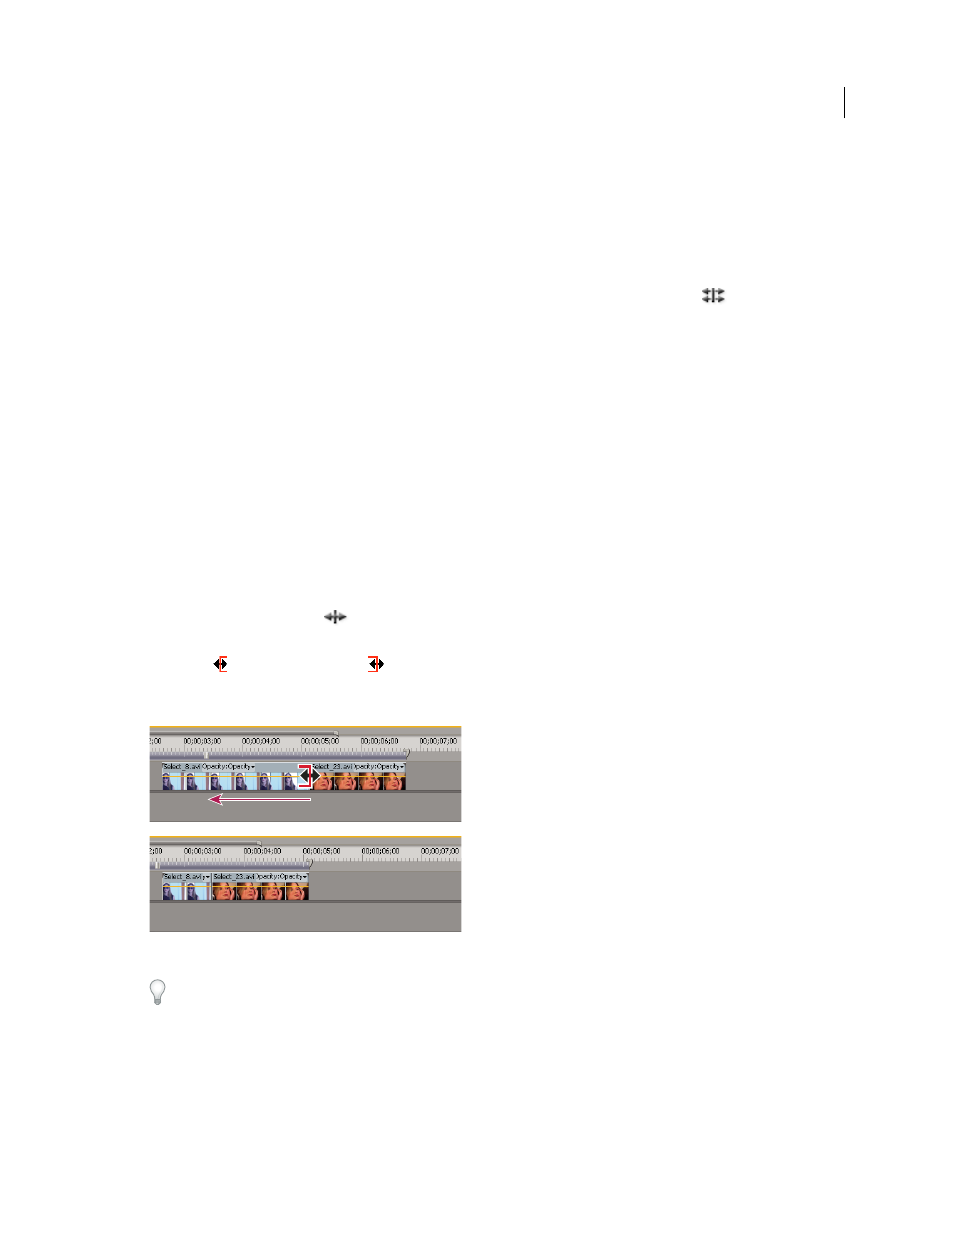
appears, and drag left or right. Subsequent clips in the track shift in time to
compensate for the edit, but their durations remain unchanged. Alt-drag (Windows) or Option-drag (Mac OS) to
affect only the video or audio portion of a linked clip.
Timeline panel during (above) and after (below) a ripple edit
When using the Selection tool, you can toggle from the Trim-in or Trim-out icon to a Ripple edit icon by pressing the Ctrl
(Windows) or Command (Mac OS) key. Release Ctrl (Windows) or Command (Mac OS) to revert to the Selection tool.
Perform a ripple edit using the Trim Monitor
1
In the Trim Monitor, click the Select Video Or Audio Track button and select the track you want to edit.
2
Click in the Sync Lock box in the header of any track you want to shift when the ripple edit is made.
3
In a Timeline, place the current-time indicator at the edit point. This will display the edit point in the Trim Monitor.