Adjust color using levels, Add contrast to a photo with levels – Adobe Photoshop CC 2014 v.14.xx User Manual
Page 406
Facebook posts are not covered under the terms of Creative Commons.
Note:
Moving the middle Input slider to the left makes the overall image lighter. This slider adjustment maps a lower (darker) level up to the
midpoint level between the Output sliders. If the Output sliders are in their default position (0 and 255), the midpoint is level 128. In this
example, the shadows expand to fill the tonal range from 0 to 128, and the highlights are compressed. Moving the middle Input slider to the
right has the opposite effect, making the image darker.
You can also enter a gamma adjustment value directly in the middle Input Levels box.
You can view the adjusted histogram in the Histogram panel.
Adjust color using Levels
1. In the Adjustments panel, click the Levels icon
or choose Levels from the panel menu.
2. In the Properties panel (CC, CS6) or the Adjustments panel (CS5), do one of the following to neutralize a color cast:
Click the eyedropper tool to set the gray point
. Then click in a part of the image that is neutral gray.
Click Auto to apply the default automatic levels adjustment. To experiment with other automatic adjustment options, choose Auto Options
from the Properties panel menu (CC, CS6) or the Adjustments panel menu (CS5), then change Algorithms in the Auto Color Corrections
Options dialog box.
In general, assign equal color component values to achieve a neutral gray. For example, assign equal red, green, and blue values to
produce a neutral gray in an RGB image.
Add contrast to a photo with Levels
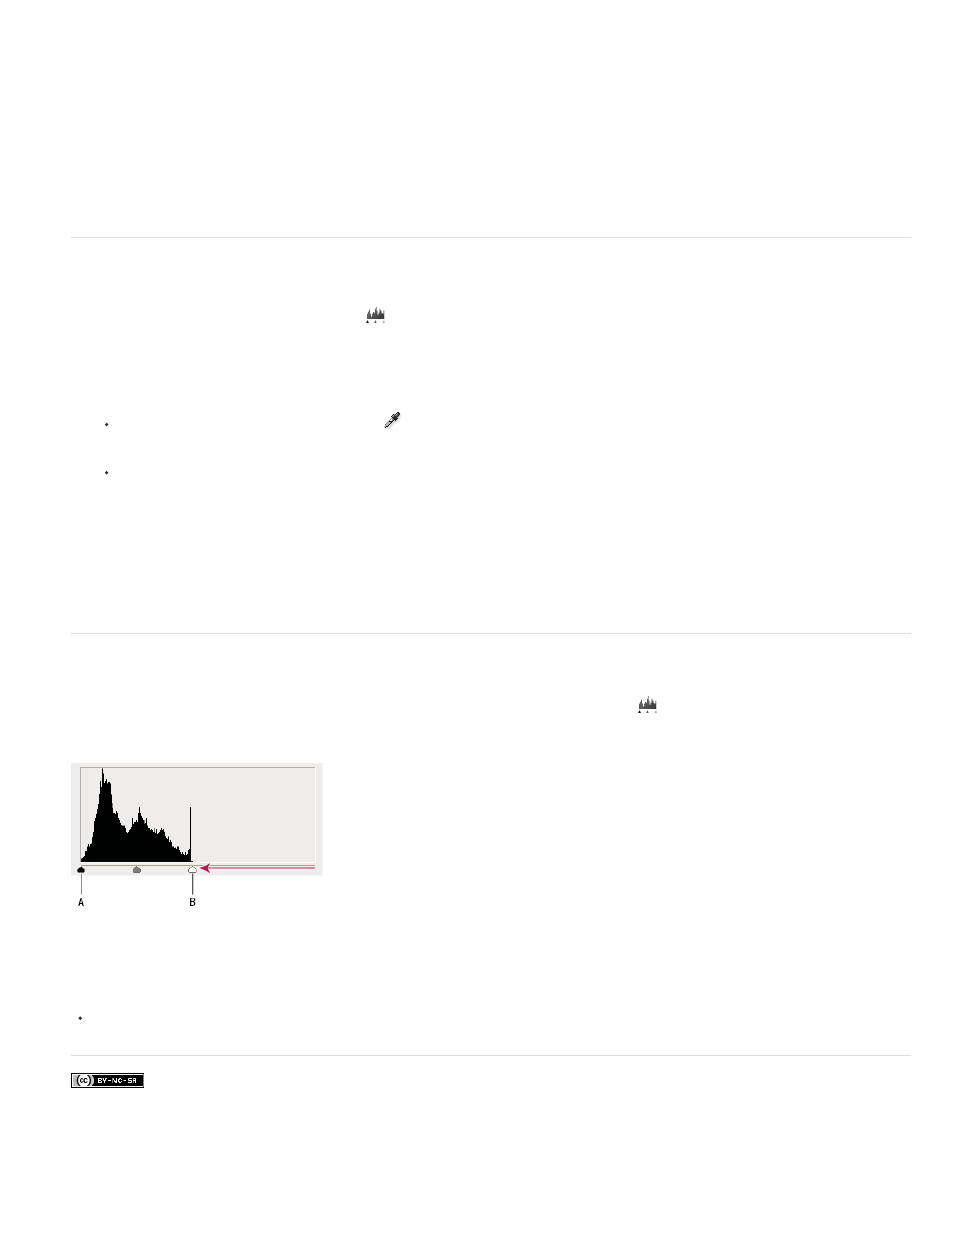
If the image needs overall contrast because it doesn’t use the full tonal range, click the Levels icon
in the Adjustments panel. Then drag the
Shadow and Highlight input sliders inward until they touch the ends of the histogram.
Image layer doesn’t extend to the ends of the graph, indicating that the image is not using the full tonal range.
A. Shadow Input slider B. Highlight Input slider
For more information
399