Column mount – Belshaw Adamatic Type B Donut Cutter User Manual
Page 18
Belshaw Bros., Inc.
• www.belshaw.com • Phone 206-322-5474 • Fax 206-322-5425
2
MN-1528EN
Type B Donut Cutter TS
Column Mount
If you have a Belshaw fryer, see the following
instructions “A” for electric fryers, or “B” for
gas fryers. For a list of adapter kits for non-
Belshaw fryers, check the information sheet in
the Appendix of this manual. If no adapter kit is
available for your fryer, see instructions “C”.
WARNING
When the cutter is column mounted, the
fryer must be securely fastened to the floor
to prevent tipping or overturning the fryer.
If the fryer is tipped, serious burns or other
injuries can occur.
A: Column Mounting on Belshaw Electric
Fryer
1. Fasten the fryer to the floor.
2. Slide the column mounting brackets onto
the column.
3. Remove six existing nuts and washers
from the mounting blocks on the back of
the fryer cabinet. NOTE: On older
Belshaw fryers with narrow kettle
flanges, there will be no mounting blocks,
but the mounting holes will have been
pre-punched in the sheet metal cabinet.
4. Mount the column and mounting brackets
onto the fryer by placing the mounting
brackets on respective bolts, and
reinstalling the nuts and washers from
Step 3. With the column resting on the
floor, tighten the 5/16-18 X 1” square
head set screws in the mounting brackets.
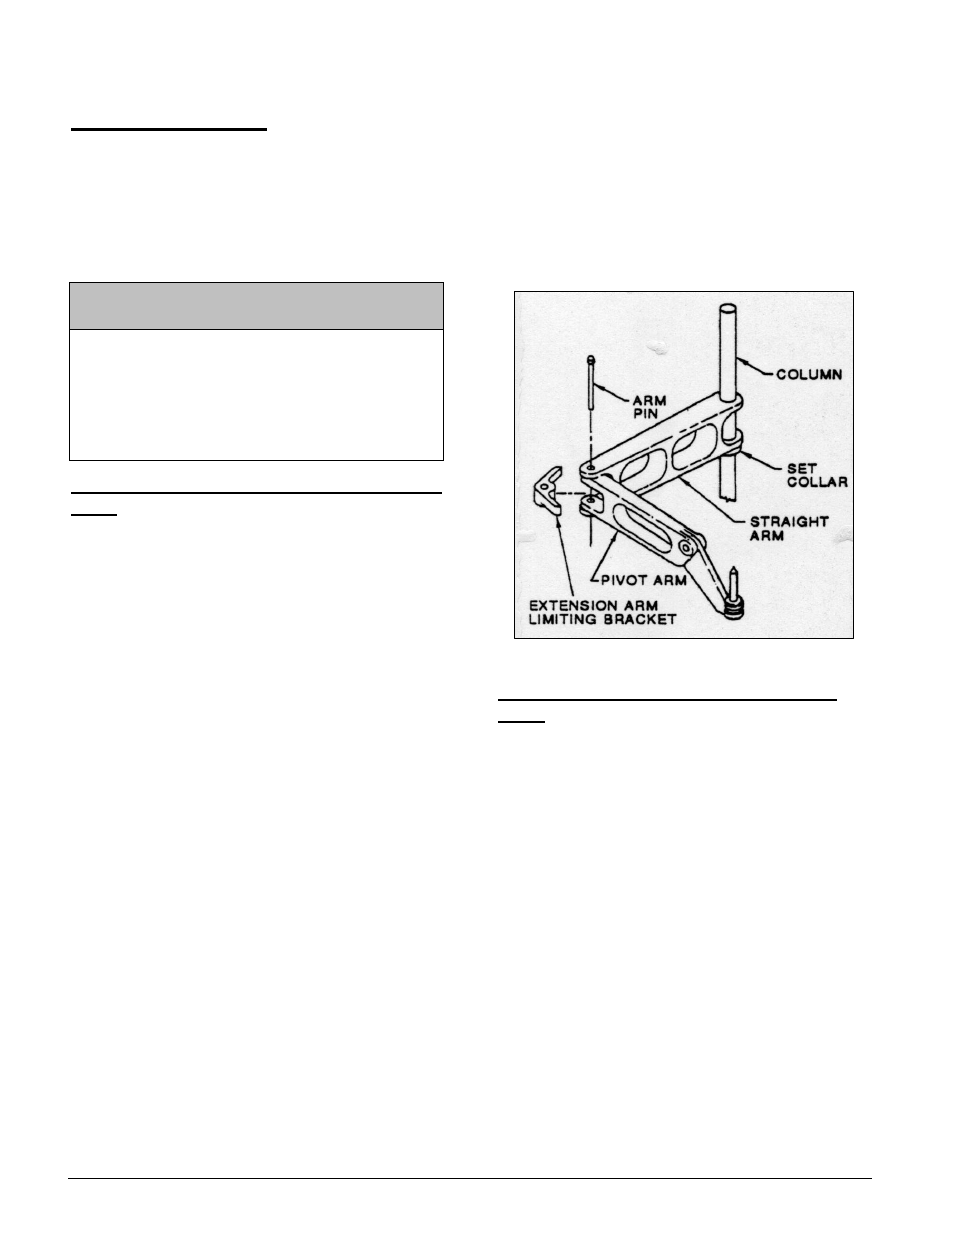
5. Slide the set collar onto the column.
6. Slide the straight arm section onto the
column. Connect the pivot arm to the
straight arm with the arm pin (See Figure
2).
7. The cutter frame can now be mounted on
the pin at the end of the pivot arm.
IMPORTANT: A 618L-0104 extension
limiting bracket is designed to help keep the
fryer from tipping if a column mounted cutter is
inadvertently swung out away from the fryer.
The extension limiting bracket is required for
models 618, 618L and 624 fryers. Refer to the
instruction sheet SB-91 in the Appendix.
Figure 2
B: Column Mounting on Belshaw Gas
Fryer
1. Fasten the fryer to the floor.
2. Slide the column mounting brackets onto
the column.
3. Mount the column and mounting brackets
onto the fryer and secure with 5/16-18 X
¾” hex head bolts and lock washers.
4. Slide the set collar onto the column.
5. Slide the straight arm section onto the
column. Connect the pivot arm to the
straight arm with the arm pin (See Figure
2).
6. The cutter frame can now be mounted on
the pin at the end of the pivot arm.
IMPORTANT: A 618L-0104 extension
limiting bracket is designed to help keep the