Installation for freestanding bathtubs, Installation using floor cleats – Blu Bathworks BT8001 User Manual
Page 3
2
1 866 907 0122 blubathworks.com
2015-02
Installation for Freestanding Bathtubs
IMPORTANT: Ensure to check the bathtub for proper drainage before any draining is done.
– The bathtub is shipped with the skirt attached as one piece.
– Blu recommends that the tub be water tested before installation is complete. Fill the tub to require the overflow and inspect for leaks.
NOTE: Blu recommends that acrylic tubs be anchored to the floor using either floor cleats or adhesive.
Installation Using Floor Cleats
(Included with all Blu acrylic bathtub models)
1. Mark the outline of the bathtub on the floor with nonpermanent marker.
2. Turn the bathtub upside down. This is a 2 person task and the floor must be protected by a clean, padded material to ensure that the
bathtub is not scratched or damaged through contact with the floor.
3. Measure the location of the feet and transfer measurement to the floor.
4. The floor finish will determine the type of screw to adhere the cleats to the finished floor.
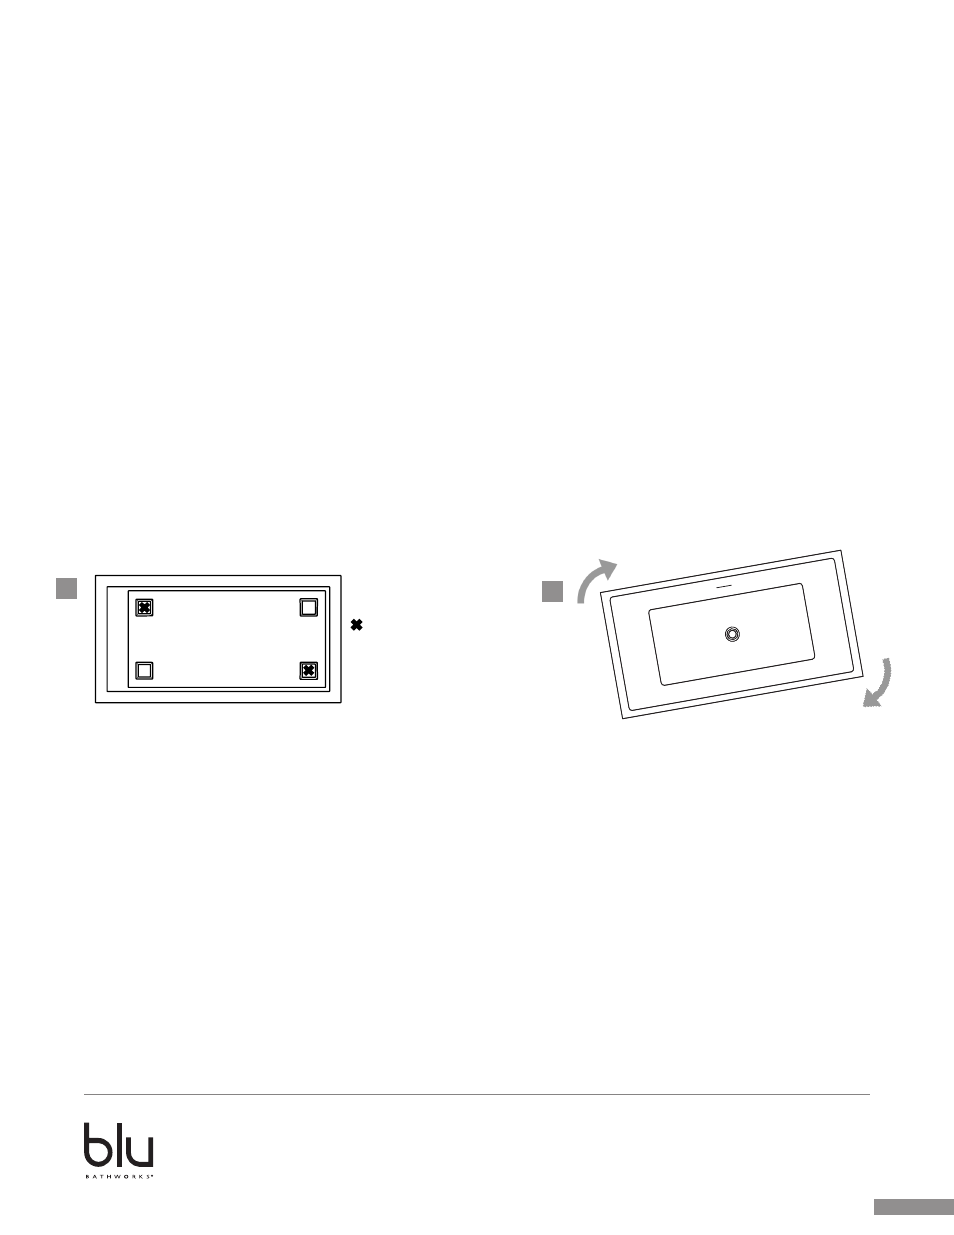
5. As per diagram 1, offset cleats, mount cleats open in the opposite direction.
6. Using 2 people, turn the bathtub the right way up, center the bathtub on the outline marked on the floor in the previous steps, and press
down firmly.
7. As per diagram A, offset the tub from center to allow the tub to enter the open cleat when slid into position. Then rotate clockwise into
position.
8. Connect the bathtub drain to the waste. Hook up the water to the faucet. Check that all connections are tested and not leaking water.
9. The waste and overflow can then be attached to the trap from below the floor.
1
Bottom view of tub
- recommended cleat locations
A