Drain plumbing installation, Prepare the tail piece – Blu Bathworks BT8001 User Manual
Page 6
5
1 866 907 0122 blubathworks.com
2015-02
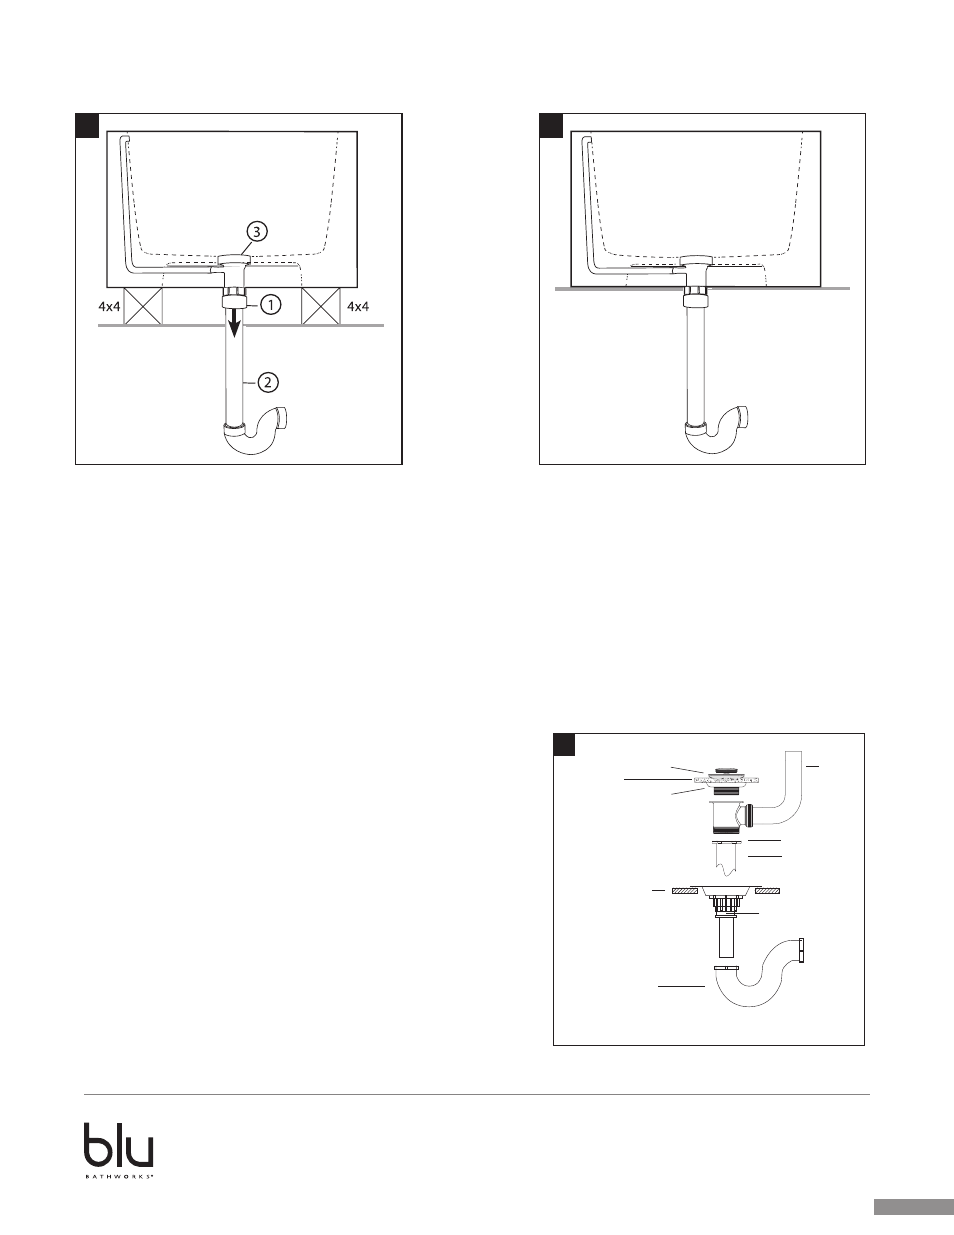
Drain Plumbing Installation
• Place the bathtub by raising it up 3½" with 4x4 pieces of lumber so you can have access from underneath the bottom of the tub.
(fig.1)
• From the bottom of the bathtub, tighten the rings of the drain (1) to the drain (3) (don’t forget to use the seal washer in between).
• Before placing the bathtub, thread on the Female threaded adapter (2).
(Not supplied with the bathtub and must be provided by your plumber).
• Ensure alignment of the drain (3) to the expansion joint (1).
• Move the bathtub down slowly by removing the pieces of lumber.
(fig.2)
• Fill the bathtub with water to test and let drain out.
• From underneath the tub, make sure that all the joints are tested and watertight.
• Fill the spaces with silicone.
• Let bathtub stand for at least 24 hours before use.
Finished floor level
2
Finished floor level
1
Prepare the Tail Piece
All parts involved in tail piece installation are provided by the installer (Fig. A)
Waste drain must always be installed according to local standard. Verify the
placement of the bathtub before drilling the hole for the waste drain.
•
Install 1½" rubber slip gasket over the waste drain.
•
Alternatively, Blu Bathworks recommends BTWaste.RN Island Tub Drain for
easy installation of freestanding bathtubs. (Provided by installer or customer)
•
Cut tail piece to desired length (will vary for each installation)
•
Slide tail piece nut over tail piece towards flanged end.
•
Place flange washer on top of tail piece.
•
Connect tail piece assembly to waste drain.
*** Island Tub Drain Installation
Refer to BTWaste.RN Installation Guide
A
trap
*
up washer
Island Tub Drain
***
floor
provided by installer
*
down
washer
thickness of bathtub
tailpiece
*
flexible
overflow
tube
tailpiece nut