Music limiter music priority, Front panel mp3 input – Cloud Electronics CX261 User Manual
Page 8
CX261 User Manual v1.3
88
Music Limiter
The music channel of the CX261 incorporates a limiter
circuit to help prevent inadvertent overloading of
subsequent power amplifier input stages and ultimately, the
installed loudspeakers. The limiter has no external controls.
If the music input gain and level controls are set correctly,
the limiter action should be inaudible on normal programme
material, with no compression artefacts.
The threshold of the music limiter is factory set at 0 dBu,
thus signal peaks above this level will be limited. A higher
threshold of +6 dBu can be set by moving internal jumper
J15 (see page 15 for jumper location); this will give improved
fidelity, and may be appropriate if the installer is confident
about the dynamic range of the programme material.
If there is dynamics control elsewhere in the system (e.g.
in the form of an external compressor/limiter or within a
DSP-based unit), or if limiting is considered undesirable, the
limiter may be by-passed by removing J15 from the PCB
header and leaving the links open.
Music Priority
Line input 6 can be set to have priority over other music
inputs. When set, the CX261will automatically switch the
music source to Line 6 when the signal level at Line 6 input
exceeds -30 dBu (approx.) The input set by the source
selection switch is temporarily deselected until the signal at
Line 6 input stops. Then it resumes, smoothly increasing in
level to its former volume. The restoration time is selectable,
options are 3, 6 or 12 seconds .
This facility is useful with sources such as spot
announcement players, jukeboxes, digital sound stores or
similar, as audio from these sources will always automatically
replace any previously selected programme for its duration.
Music Priority is set by moving internal jumpers J5A and
J5B from OFF to ON. See page 15 for location of internal
jumpers.
The factory default restoration time is 3 seconds. This may
be too short in some cases; for example, if a jukebox was
to take more than 3 seconds between the end of one track
and the start of the next. In such a case, longer restoration
times of 6 or 12 seconds may be set to ensure that the
CX261 does not revert back to the selected music source in
between tracks.
Restoration time is set by internal jumper J3. Moving the
jumper position on the 3-pin header changes the restoration
time from 3 s to 6 s; removing the jumper altogether sets a
time of 12 s.
As well as the main outputs, Music Priority also applies to
the auxiliary/MOH output when its source is set to follow
the front panel selection (see page 11, Auxiliary/MOH Output).
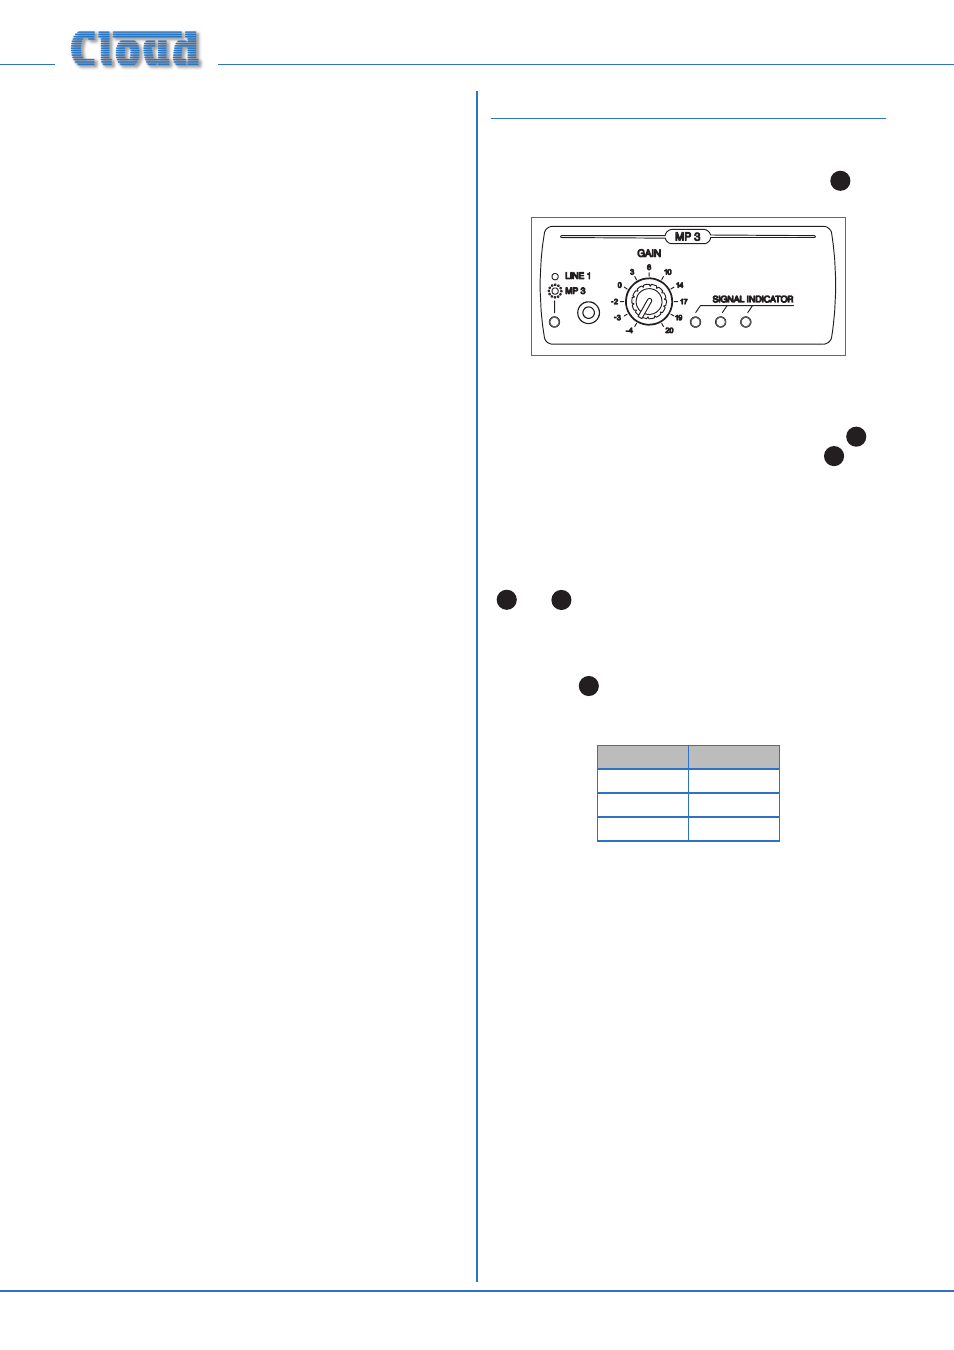
Front panel MP3 input
To facilitate easy connection of digital audio devices such as
portable MP3 players or laptop computers, a 3.5 mm stereo
jack socket is provided on the CX261’s front panel (
4
on
fig. 2)
This input replaces Line input 1, and will only operate if the
MUSIC SOURCE switch is set to L1/MP3. The front
panel jack socket is selected instead of the L1 phono sockets
by setting the
LINE 1/MP3 switch on the rear panel (
4
on fig. 3) to
MP3. A green LED on the front panel (
6
on
fig. 2) illuminates to confirm the selection. When the MP3
input is selected, the music source connected to L1 will no
longer be available.
To allow for the wide range of signal levels which may be
encountered from portable audio devices, the MP3 input
is provided with its own level control and signal level LEDs
(
5
and
7
respectively on fig. 2). The range of sensitivity
adjustment is from -20 dBu (with the control fully clockwise,
at “20”) to +4 dBu (with the control fully anticlockwise, at
“-4”).
Three LEDs (
7
on fig. 2) are fitted to the front panel to aid
level adjustment. The LEDs illuminate at the levels shown in
the table:
LED
LEVEL
Green
-21 dBu
Yellow
-6 dBu
Red
+1 dBu
With an MP3 player (or other source) connected to the
MP3 input and playing, and the MP3 input selected, the level
control should be adjusted so that the green and yellow
LEDs are on more or less continuously and the red LED
only on during the louder passages.