Cybex 425A Arc Trainer User Manual
Page 53
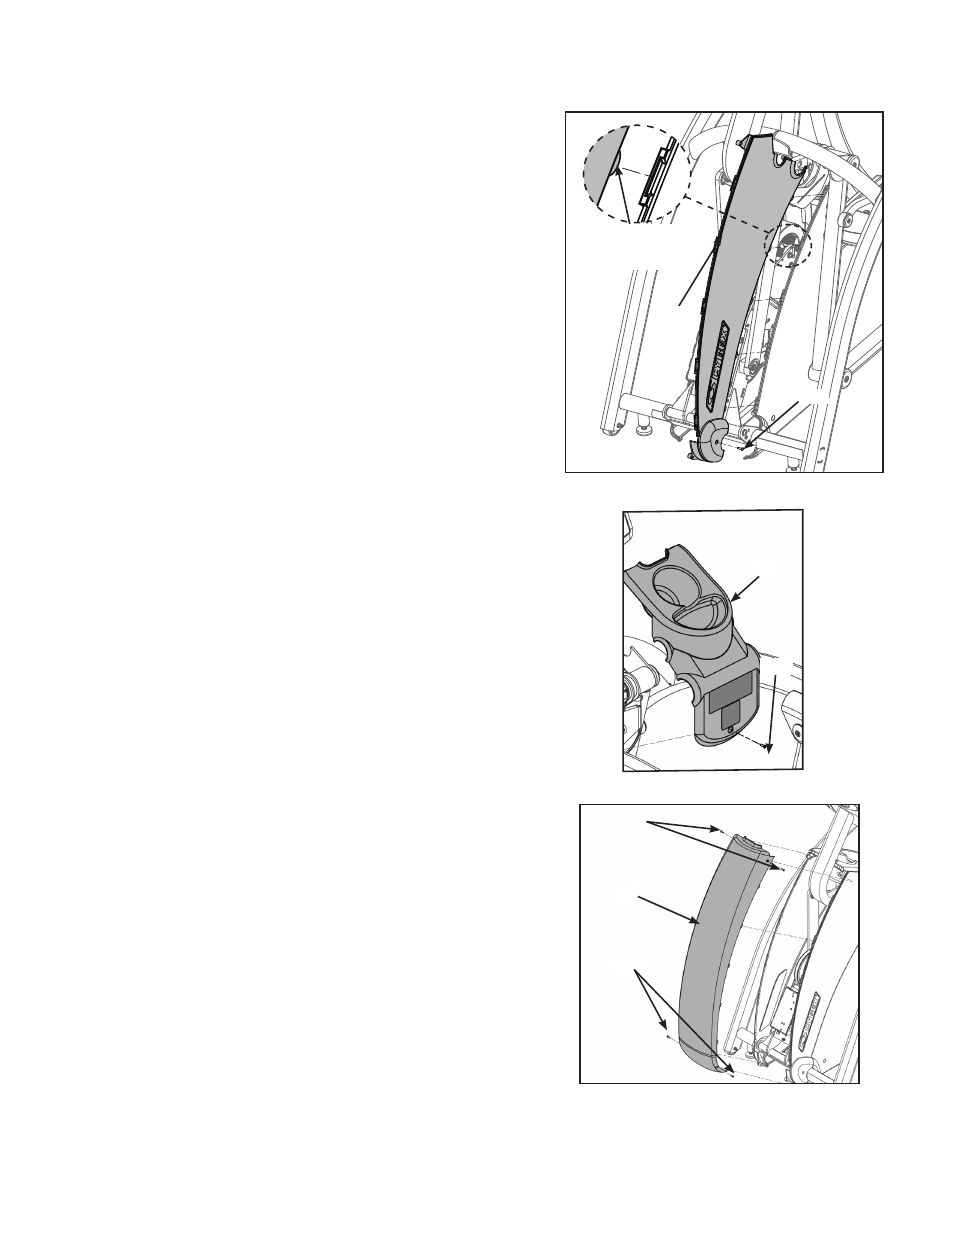
8. Attach the left upper cover.
A. Locate the upper left side cover (#9) and one Phillips
screw #8 X .625 BLK (#17).
B. Place the upper left side cover (#9) in position on
mainframe and hand thread the Phillips screw #8 X .625
BLK (#17). See Figure 5.
NOTE: Ensure the locking connectors are securely in place. See
Figure 5.
C. Using a Phillips head screwdriver, securely fasten the
Phillips screw #8 X .625 BLK (#17).
D. Repeat steps 8A through 8C for right upper cover.
9. Attach top cover.
A. Locate top cover (#11) and one Phillips screw
#8 X .625 BLK (#17).
B. Place the top cover (#11) in the correct position on the
main frame assembly and hand thread the Phillips
screw #8 X .625 BLK.(#17)
See Figure 6.
C. Using a Phillips head screwdriver, securely fasten the
Phillips screw #8 X .625 BLK (#17).
Setup
and Assembly
Page 5-7
Figure 6
#11
#17
Figure 5
Locking
Connectors
#9
#17
10. Attach front cover.
A. Locate front cover (#8) and four Philips screws
#8 X .625 (#17).
B. Place the front cover (#8) in the correct position on the
main frame assembly and hand thread the four Phillips
screws #8 X .625 BLK (#17). See Figure 7.
C. Using a Phillips head screwdriver, securely fasten the
four Philips screws #8 X .625 BLK (#17).
Figure 7
#8
#17
Cybex Arc Trainer 425A Owner’s Manual
#17