To replace the drive belt – DR Power Walk-behind Pro User Manual
Page 18
18
DR
®
FIELD and BRUSH MOWER
Figure 20
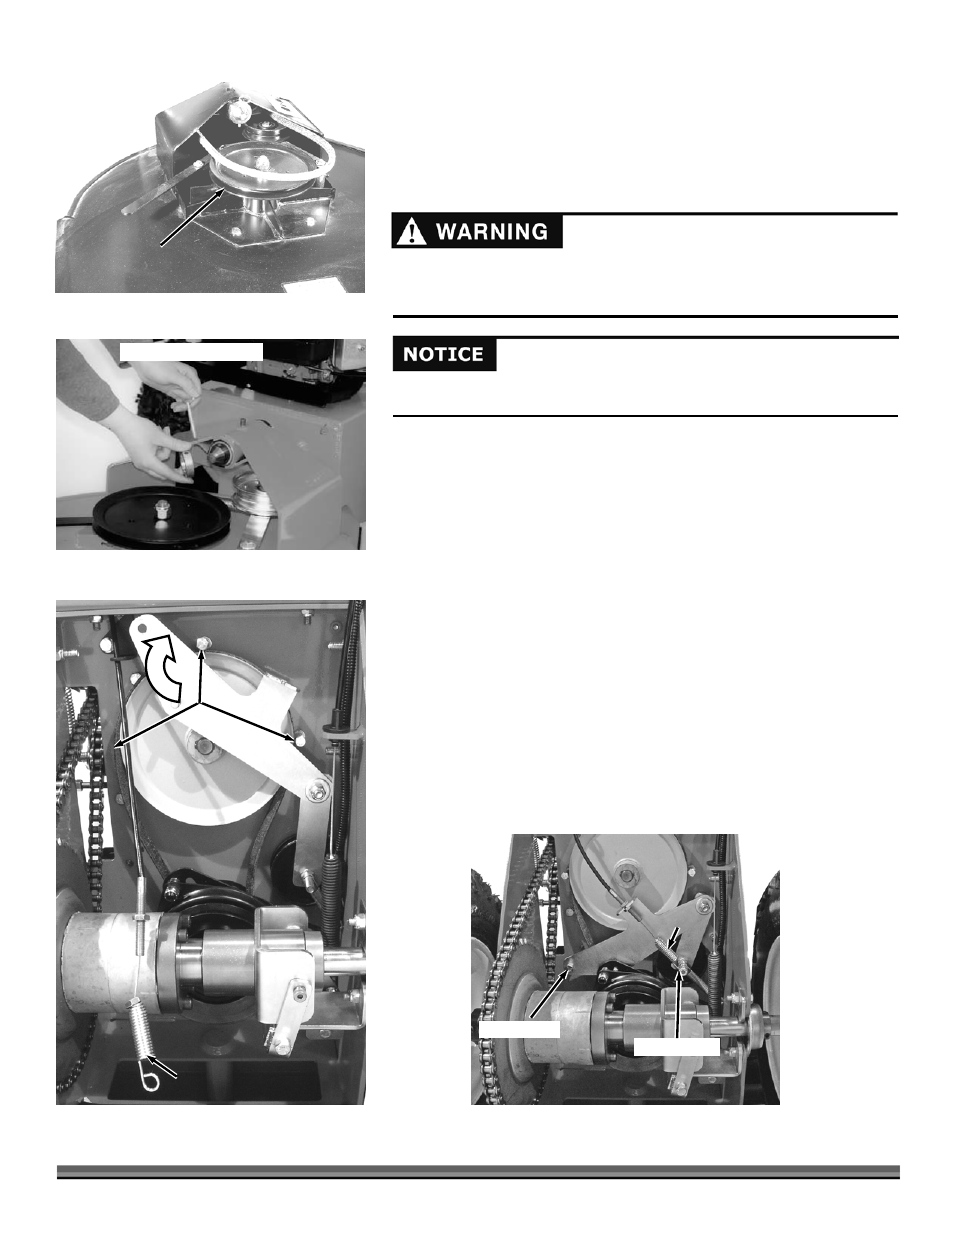
3 Belt Guides
Clutch Drive Spring Removed
Clutch
Bracket
3. Remove the Belt from the Pulley (Figure 18), and then drop it from the
Engine Pulley below the machine.
4. To mount the Belt, follow the above procedure in reverse.
To Replace the Drive Belt
Tools and Supplies Needed:
•
7/16" socket
•
1/2" wrench
•
9/16" wrench
•
Gloves
1. Drain the gas and oil.
2. Remove the Blade Belt following the instructions as outlined in the previous
page.
3. Remove the Pin and Collar (Figure 19), and then pull the Power Unit away
from the Deck.
4. Tilt the Power Unit forward onto the Attachment Pin (Figure 20).
5. Remove the Bolt on the Clutch Bracket and the Nut on the Clutch Drive
Spring (Figure 21).
6. Remove the Clutch Drive Spring.
7. Lift and swing the Clutch Bracket out of the way.
8. Remove the three (3) Belt Guides (Figure 20).
Use only DR belts on your machine. They have been thoroughly tested and
proven for many hours of use.
Before performing any maintenance procedure or inspection, stop the
engine, wait five (5) minutes to allow all parts to cool. Disconnect the spark
plug wire(s), keeping it away from the spark plug(s).
Figure 18
Belt Removed
Figure 19
Remove Pin and Collar
Spring
Remove Nut
Remove Bolt
Figure 21