DR Power Walk-behind Pro User Manual
Page 24
24
DR
®
FIELD and BRUSH MOWER
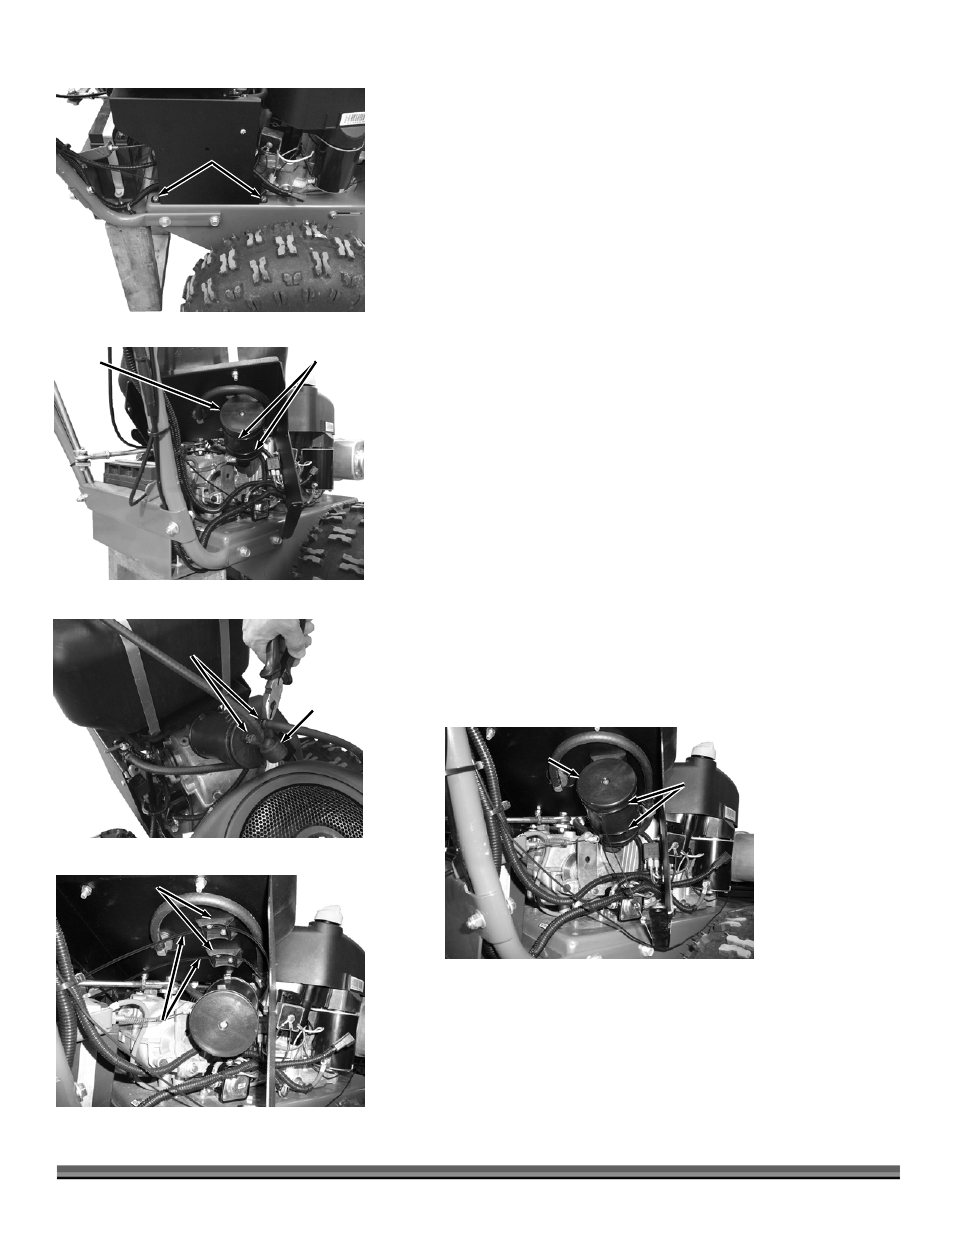
3. Remove the Bolts from the Right side of the Fuel Tank Mount with a 7/16"
Wrench (Figure 39).
4. Reposition the Fuel Tank and Mount to gain access to the Carbon Canister
(Figure 40)
5. Cut the Cable Ties that hold the Canister in place with Wire Cutters.
6. Position the Carbon Canister so that you can remove the Hose Clamps with
Pliers (Figure 41).
7. Pull the Hoses from the Ports of the old Carbon Canister.
NOTE: The Hoses MUST be installed onto the new Canister in the same location as
they were on the old Canister. The Canister is labeled “Purge” (this hose is from the
engine) and “Tank” (this hose is from the top of the fuel tank).
8. Install the Hoses onto the new Canister and secure with the Clamps.
9. The Air Filter portion of the Canister swivels. Make sure the filter is pointed
down so rain can not enter.
10. Slide the Cable Ties through the slots in the Canister Brackets under the Fuel
Tank Mount (Figure 42).
11. Position the Carbon Canister with the two Tabs of the Canister fitting into the
Canister Brackets and tighten the Cable Ties around it (Figure 43).
12. Move the Fuel Tank back into position and secure with the two Bolts (right
hand side) and two Locknuts (left hand side)(Figure 38 on previous page and
39).
13. Replace Fuel as needed.
Fuel Tank
Mount
Figure 39
Bolts
Carbon
Canister
Figure 40
Cable
Ties
Cable
Ties
Figure 42
Canister
Brackets
Carbon
Canister
Figure 43
Cable
Ties
Hose
Clamps
Figure 41
Canister
Air
Filter