DR Power Walk-behind 8 - 15 HP (1998 - 2001) User Manual
Page 19
DR
®
FIELD and BRUSH MOWER Safety & Operating Instructions
15
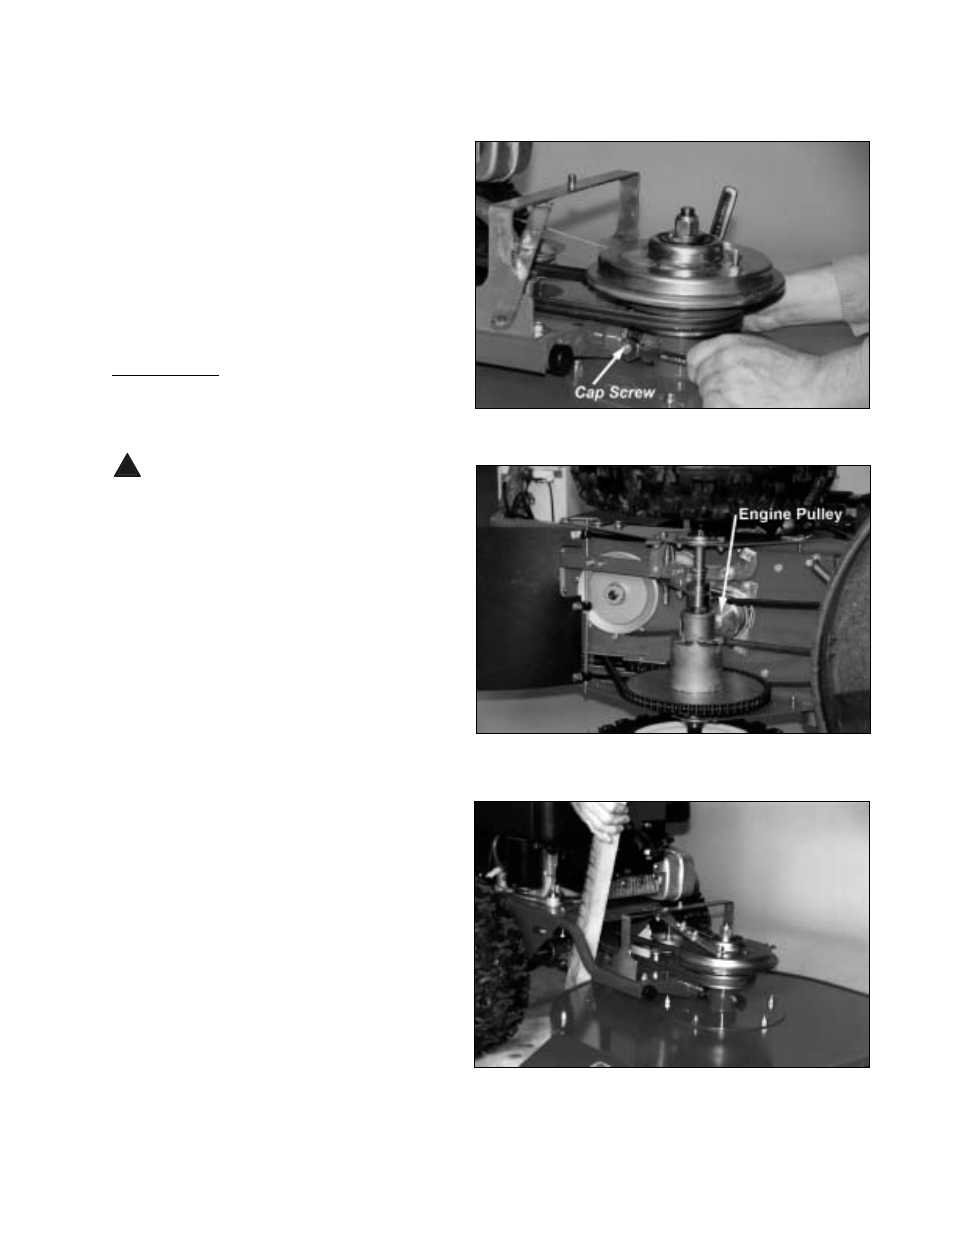
5. Remove the 5/16" x 2" cap screw from the
pivot tube (Figure 17).
6. Push the deck back to create slack on the
belt. Then pull the belt forward and drop
it down off the blade clutch pulley.
7. Twist the other end of the belt and drop it
off the 3" engine pulley (Figure 18).
8. Remove the belt.
To Replace the Blade Belt
Tools Needed:
· 1/2" socket with extension
· 1/2" wrench
· vise grip pliers
!
WARNING: Always remove the spark
plug wire before servicing your machine.
1. Keep the mower deck back and mount
the new belt over the two pulleys
(Figures 17 & 18).
2. Pull the mower deck forward.
3. Push the pivot washer back toward the
engine (it should be between the cap
screw and the frame).
4. Replace the 5/16" x 2" cap screw on the
pivot tube (Figure 17). Tighten until you
see 3-4 threads outside of the nut—do not
over tighten.
Note: If you can't get the cap screw
through the pivot tube, you can use a
piece of wood to push the deck forward
so the holes line up (Figure 19).
5. Replace the extension spring (Figure 16).
6. Replace the blade clutch spring
(Figure 14).
7. Replace the anti-rotation strap
(Figure 13).
Note: Only turn the nut on the anti-
rotation strap until one or two threads
show—it is not meant to be tightened
down.
8. Replace the black belt guard and screw
the black knob into place.
Figure 17
Figure 18
Figure 19