DR Power Walk-behind 8 - 15 HP (1998 - 2001) User Manual
Page 20
16
DR
®
FIELD and BRUSH MOWER Safety & Operating Instructions
To Remove the Drive Belt
Tools Needed:
· 7/16" socket
· 1/2" socket
· 5/8" wrench
!
WARNING: Always remove the spark
plug wire before servicing your machine.
1. Drain the oil and gas and remove the air
filters.
2. Remove the black belt guard. Unscrew
the black knob, lift the cover and pull
back and up to remove it.
3. Remove the blade belt. (Follow the
instructions on page 14.)
4. Turn the machine onto its left side, with
the discharge chute facing up.
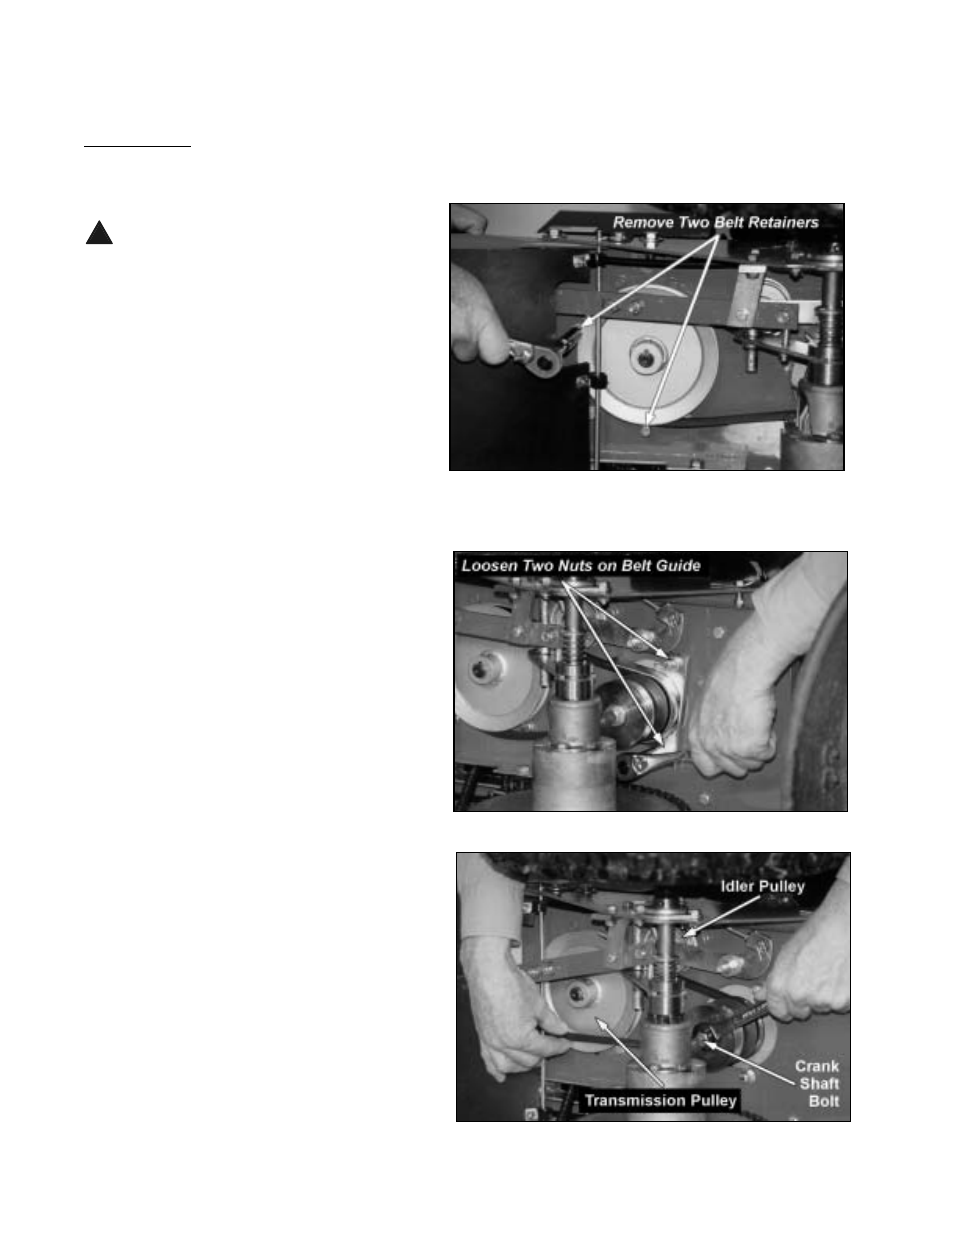
5. With a 7/16" socket, remove the two belt
retainers from the 6" transmission pulley.
There is one on the rear of the pulley and
one on the side (Figure 20). Be careful not
to lose the retainers or washers.
6. With a 1/2" socket, loosen the two lock
nuts that hold the belt guide (2-3 turns,
don't remove them) and pull the belt guide
back (Figure 21).
7. Push the 2-1/4" clutch idler pulley to the
outside of the frame and start guiding the
belt off the 6" transmission pulley. Using a
5/8" wrench (on the Kawasaki use a 14mm
wrench), rotate the crankshaft bolt on the
engine clockwise (counterclockwise on the
Briggs & Stratton manual-starting engine)
while continuing to guide the belt off
(Figure 22).
Figure 20
Figure 21
Figure 22