Drive chain, Rive, Hain – DR Power Walk-behind 8 - 15 HP (1998 - 2001) User Manual
Page 23
DR
®
FIELD and BRUSH MOWER Safety & Operating Instructions
19
Drive Chain
To Adjust the Drive Chain
This adjustment should be done after the 1
st
, 3
rd
, 5
th
and 10
th
hours of use, then every
subsequent ten hours of use, to remove any slack or looseness from the chain.
Tools Needed:
• (2) 1/2" wrenches
!
WARNING: Always remove the
spark plug wire before servicing your
machine.
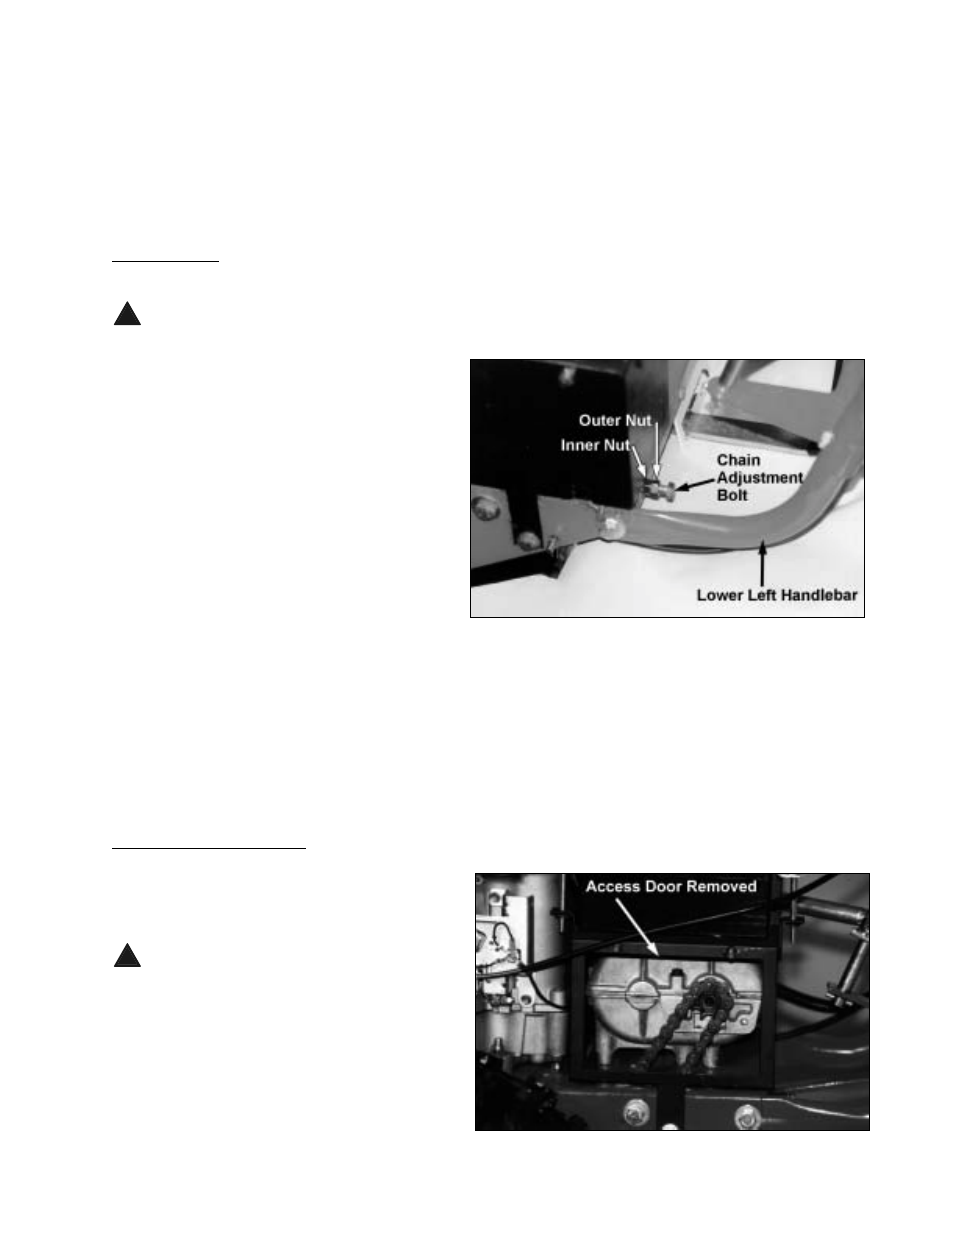
1. Loosen the outer nut on the chain
adjustment bolt so you can access the
inner nut (Figure 27).
2. Tighten the inner nut by hand or with a
1/2" wrench until it is snug against the
frame (Figure 27).
3. With the machine in Neutral, roll it back
and forth several times to remove any
play in the chain, then recheck the
adjustment. When you push in the center
of the chain it should not move more than
1/2".
4. When the adjustment is correct, with two 1/2" wrenches, hold the inner nut in place and tighten
the outer nut firmly against it.
5. Check and tighten the innermost nut on the adjustment bolt (look under the machine, it's the nut
that sits against the chain adjuster bracket). This nut must be tight against the bracket.
IMPORTANT!: DO NOT try to adjust the chain adjustment bolt—only the three nuts.
To Replace the Drive Chain
Tools & Supplies Needed:
· Chain: Part #131081
· 7/16" wrench
· flat-head screwdriver
· pliers
!
WARNING: Always remove the spark
plug wire before servicing your machine.
1. Remove the lock nuts from the access
door and remove it (Figure 28).
Note: On the Kawasaki and Tecumseh
engines you'll need to move the fuel line and
clamps off the studs before removing the
access door.
Figure 27
Figure 28