DR Power Dual Action 15-Ton Gas (Aug 2011 - Present) User Manual
Page 12
12
DR
®
DUAL-ACTION GAS LOG SPLITTER
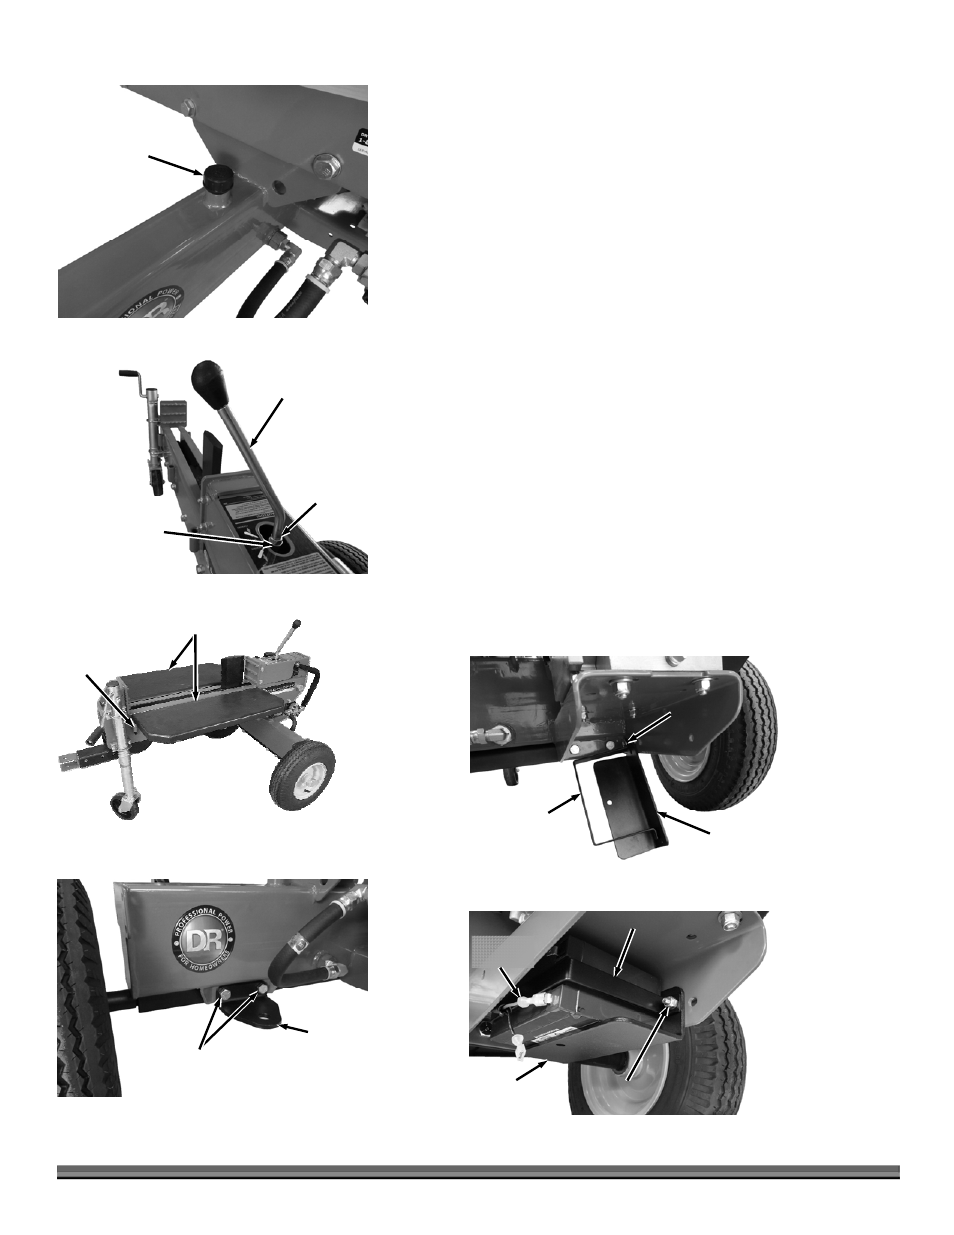
26. Install Hydraulic Cap/Dipstick into the hole on top of the Tank (Figure 16).
27. Remove the Nut and Flat Washer from the Control Lever threads and
reinstall the Nut all the way onto the threads (Figure 17).
28. Place the Washer onto the threads and screw the Control Lever into the top
of the Control Valve as far as it will go. Turn it back to the desired position
depending of your preference to split on the right or left side of the splitter.
Tighten the Jam Nut against the Valve to secure the Lever using a 17mm
Wrench.
29. Install the Trays onto the sides of the Beam assembly by aligning the legs
with the receiving tubes and secure with the Hitch Clips (Figure 18).
30. Remove the two left side Bolts, Flat Washers and Locknuts from the Tank
and Axle using two 3/4" Wrenches. Position the Tow Bracket and secure
with the hardware you just removed (Figure 19).
31. Raise the Jack so the Wood Splitter is parallel with the ground.
32. The following steps are for Electric Start only: Position the Battery Mount
and Hold down under the Engine and install a Bolt, Washer (each side) and
Locknut closest to the axle by hand (Figure 20).
33. Place the battery into the Hold Down with the Terminals facing to the rear of
the Splitter.
34. Rotate the Mount and Battery into position and install the second mounting
Bolt, Washer (each side) and Locknut. Tighten both sets of Hardware using
two 7/16" Wrenches (Figure 21).
35. Install the red positive Terminal to the Battery. Do not install the Negative
Terminal at this time.
Hydraulic
Cap/Dipstick
Figure 16
Battery Hold
Down
Figure 20
Battery
Mount
Hardware
Trays
Figure 18
Receiving
Tubes
Figure 19
Tow
Bracket
Bolts, Washers
and Locknuts
Figure 17
Control
Lever
Jam Nut
Flat Washer
Figure 21
Hold Down
Bolts and
Locknuts
Battery
Mount
Positive
Terminal