Changing the hydraulic fluid – DR Power Hydraulic 5-Ton (Oct 2010 - July 2013) User Manual
Page 14
14
DR
®
5-TON WOOD SPLITTER
Changing the Hydraulic Fluid
Tools and Supplies Needed
6mm Allen Wrench
10mm Wrench
Clean Rags
Small Funnel
Hydraulic Fluid
Approved Container (1 gallon or more capacity)
Replace the Hydraulic Fluid in the Wood Splitter after every 150 hours of use. Take the following steps to replace the Fluid.
1. Make sure the Air Bleed Screw is screwed down tight.
2. Tip the machine up vertical on the Wheels (you may need to have someone
support the splitter to prevent tipping over). Clean the area around the
Hydraulic Fluid Fill/Drain Port (Figure 14) and then, using a 6mm Allen
Wrench, unscrew and remove the Dipstick located in the Hydraulic Fluid
Fill/Drain Port.
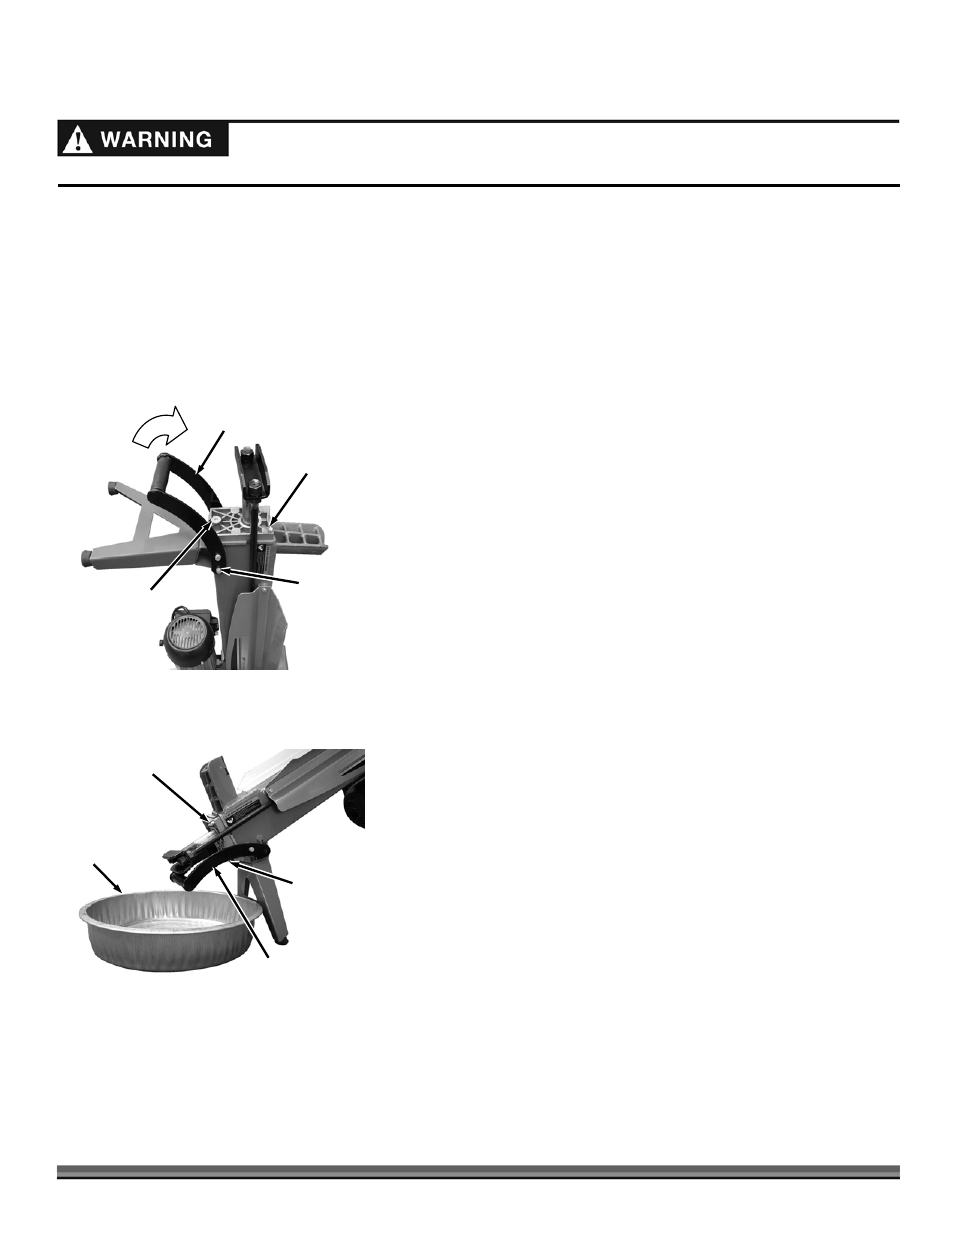
3. Remove the rear two Bolts from the Handle and rotate the Handle out of the
way
4. Tip the Splitter down onto the Legs as you drain the Fluid into an approved
Container (1 gallon or more capacity) and continue tipping the machine
until the Tank is empty (Figure 15).
5. Tip the Splitter up vertical onto the Wheels again and insert a Small Funnel
into the Dipstick opening.
6. Refill the Tank with 3.75 quarts of fresh Hydraulic Fluid.
7. Clean the Dipstick with a Rag, insert the Dipstick (do not screw the Dipstick
down when checking), remove and check the level; it should be between the
two marks on the Dipstick. If the fluid is too high, simply pour out a little at
a time into a suitable container by tilting the Wood Splitter. If the fluid is too
low, insert a small Funnel and add Hydraulic Fluid (See “Specifications” in
Chapter 2 for Fluid type) a little at a time, until the level falls between the two
marks on the Dipstick.
8. Clean the Dipstick and the O-ring seal thoroughly and reinstall the Dipstick,
being careful not to damage the threads of the aluminum Hydraulic Fluid
Cylinder End Cover.
9. Lower the machine to the ground, loosen the Air Bleed Screw three or four
turns counterclockwise and cycle the Ram back and forth 3 or 4 times to
purge any air from the hydraulic system (See Operating The DR 5-TON
WOOD SPLITTER in Chapter 3).
10. Periodically check fluid level to ensure it is between the 2 grooves around the
dipstick. If the level is below the lower limit, fill until level is correct.
Hydraulic Fluid
Drain/Dipstick
Figure 14
Air Bleed
Screw
Handle
Handle
Hardware
Hydraulic
Fluid Drain
Port
Figure 15
Air Bleed
Screw
Handle
Hydraulic
Fluid
Before performing any repairs or maintenance procedure, unplug the wood splitter power cord from the power source.