Grease fittings, Tensioning, replacing, and aligning the drive belt – DR Power 11.5 FPT User Manual
Page 15
CONTACT US AT www.DRpower.com 15
Grease Fittings
Your DR CHIPPER/SHREDDER was greased at the Factory. The operator needs to lubricate the Chipper Side and Drive Side
Bearings periodically.
Tools and Supplies Needed:
Flexible hose grease gun
Lithium grease
Clean cloth
5/32" Allen Wrench
Loctite
®
243 (if set screws are loose)
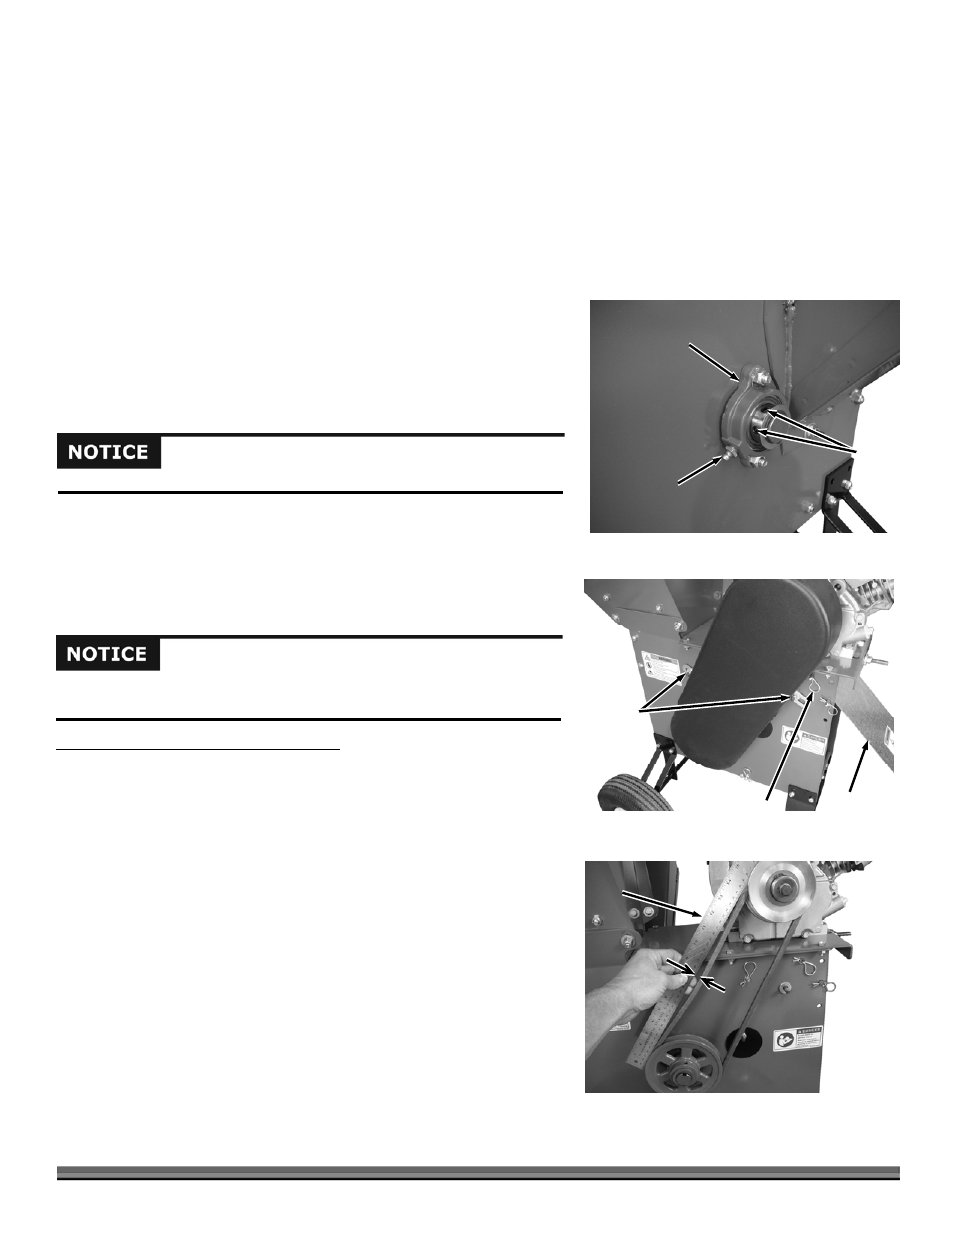
1. Wipe all dirt, etc., from the Grease Fittings on both Bearings with a clean
cloth (Figure 13).
2. Apply no more than three pumps of quality general-purpose lithium grease
with a hand-pumped grease gun to each Grease Fitting, one on the Chipper
Side Bearing, and one on the Drive Side Bearing (not shown). To access the
Drive Side Bearing, you will have to remove the Belt Guard (see below).
3. After greasing, check the Side Bearing Collar Set Screws (Figure 15) for
tightness with a 5/32" Allen Wrench. There are two Set Screws per Bearing.
If they are loose, reset them with Loctite
®
243, obtainable at most hardware
stores.
Tensioning, Replacing, and Aligning the Drive Belt
CHECKING AND SETTING BELT TENSION
Tools and Supplies Needed:
Two 1/2" Wrenches
Straight Edge
1. Remove the Belt Guard by removing the two Locknuts and four Washers
with a 1/2" Wrench (Figure 14).
NOTE: One Washer is located under the Belt Guard Bracket and one on top of the
Bracket. Make sure you install the Washers in these same positions.
2. Place a straight edge onto the full length of the Belt (Figure 15).
3. Push on the Belt with about three pounds of pressure. The Belt should
move approximately 3/8". If the distance is close to 3/8" no tension
adjustment is needed. If it is not close to 3/8" adjust per the following
directions.
4. Remove the Cotter Pin and Baffle Rod and set the Baffle Plate aside for
better access under the Engine (Figure 14).
Belt
Guard
Figure 14
Locknuts
and
Washers
Baffle Rod
and Cotter Pin
Baffle Plate
Over lubrication can damage Bearings.
Set
Screws
Figure 13
Chipper Side
Bearing
Grease
Fitting
Use only a DR Belt on your machine. The Belt has been thoroughly tested and
proven for many hours of use.
Figure 15
3/8"
Straight
Edge