Knife sharpening – DR Power 11.5 FPT User Manual
Page 17
CONTACT US AT www.DRpower.com 17
Note: Make sure the Shaft Key stays in the slot of the Shaft when the Pulley is removed. If it does come out of the slot, slide it back in for
assembly.
f)
Place enough Shims on the Shaft to equal the measurement you wrote down.
g)
Reinstall the Pulley (line up with the key on the shaft) and any remaining Shims on the outside of the Pulley. Secure with the
Retaining Ring (ensure it is locked into the groove).
h)
Apply Loctite
®
243 to the threads of the Set Screws and reinstall them into the Pulley Hub tightly against the Shaft.
i)
Install the Belt and recheck the alignment.
j)
Set Belt tension as described in the “Checking and Setting Belt Tension” section.
4. Reinstall the Belt Guard.
NOTE: Check and re-tighten (if necessary) the Drive Belt after an initial break-in period of one hour.
Knife Sharpening
You should never attempt to sharpen the Chipper Knife freehand; take the Knife to a machine shop for proper sharpening.
It is extremely important to consistently maintain the 45-degree angle for proper performance.
Excessive heat generated during the sharpening process will damage Knives and weaken the metal.
How many times a Knife can be sharpened is determined by how much material needs to be taken off to sharpen or to
compensate for dents or gouges.
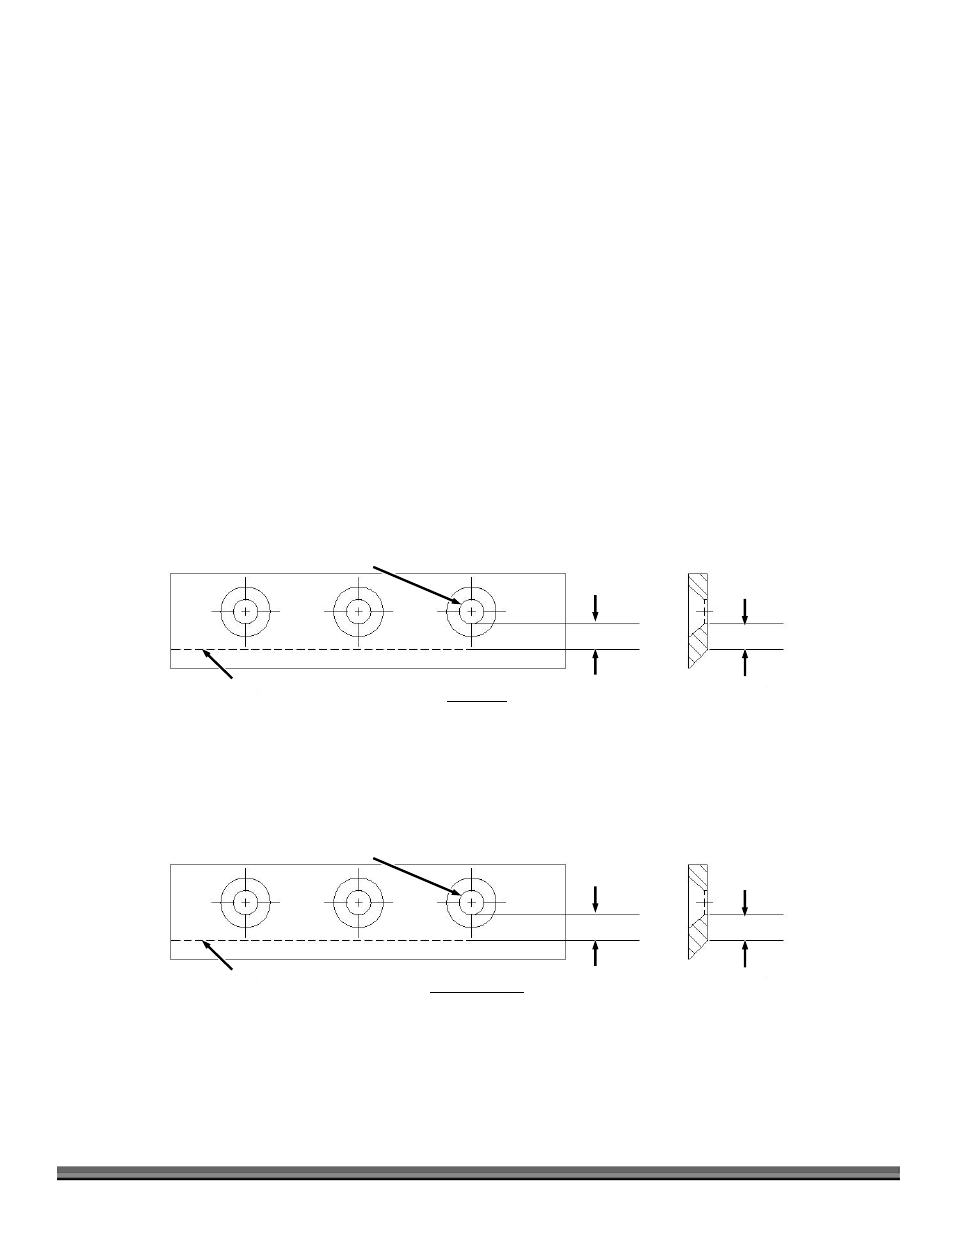
A new Chipper Knife has a 5/16" measurement between the short side bevel edge and the Knife mounting holes (Figure 19).
The knife should never be sharpened to the extent that more than 3/32" is taken off this measurement.
Once this measurement is below 7/32" (Figure 20), or if you are unable to remove dents or gouges with these guidelines,
replace the Knife.
Figure 19
New Knife
Short Side Beveled Edge
Knife Mounting Hole
5/16"
5/16"
Figure 20
Sharpened Knife
Short Side Beveled Edge
Knife Mounting Hole
7/32"
7/32"