Knife installation, Wear plate, Sharpened knife – DR Power TPH-184CHP User Manual
Page 21
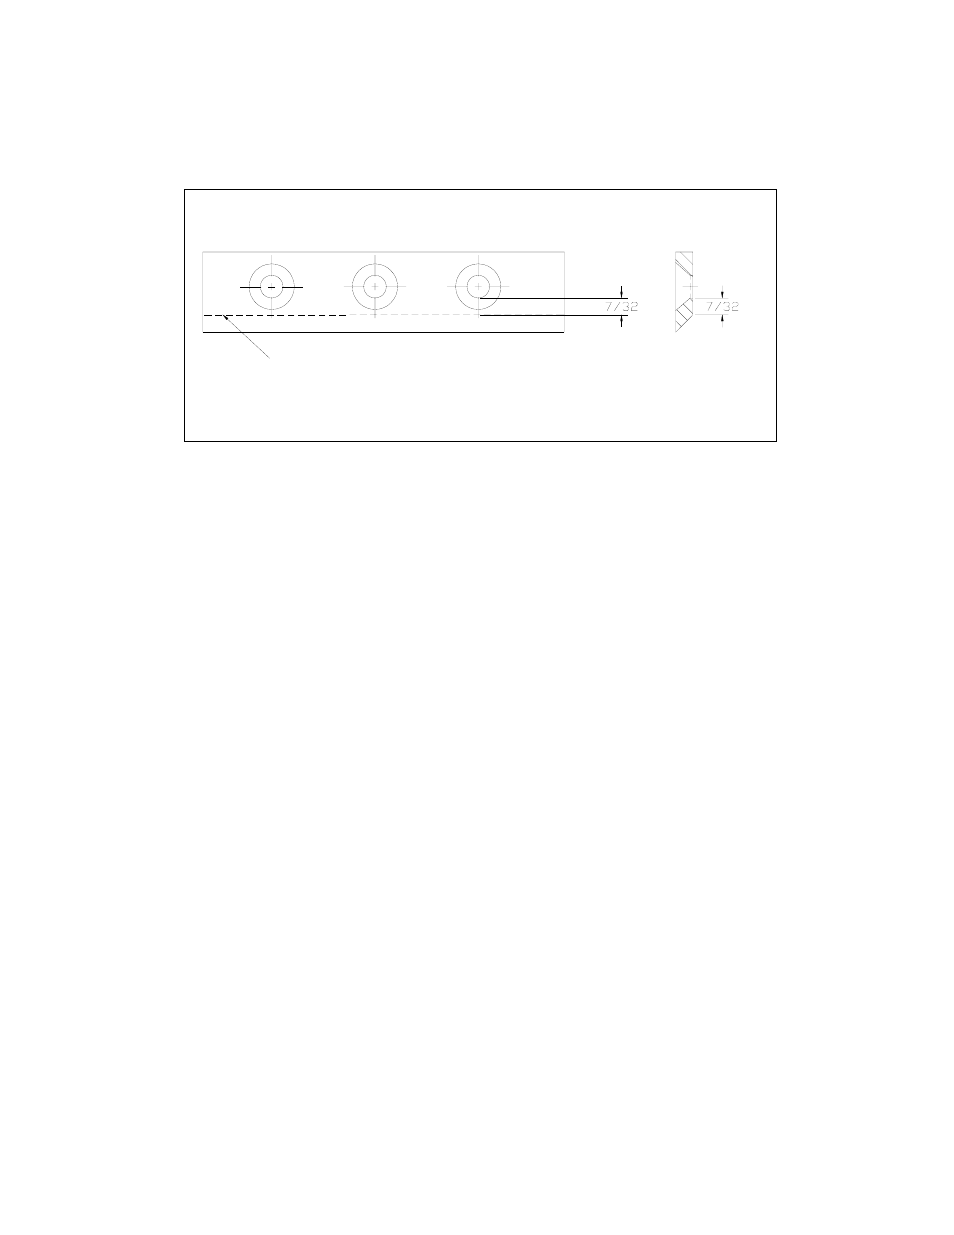
• The knife should never be sharpened to the extent that more than 3/32” is taken off this measurement.
• Once this measurement is below 7/32” (see figure 3) the knife should be replaced.
• If you are unable to remove dents or gouges with these guidelines, replace the knife.
SHORT SIDE BEVEL EDGE
SHARPENED KNIFE
Figure 3
KNIFE INSTALLATION
• Clean chipper disk where knife is going to be attached.
• Visually inspect the chipper disk slot and knife mounting area and be sure they are clean and that the knife will
be able to mount flush against the chipper disk.
• Visually inspect and clean the knife.
• Apply Loctite 243 to the screws that hold the knife in place.
• Hand tighten the knife to the chipper disk. If you are installing a new knife, use the new hardware that comes
with the knife when attaching it to the chipper disk.
• Tighten the center bolt.
• Tighten the outer bolt.
• Tighten the inner bolt.
• Double-check all three for tightness one more time.
WEAR PLATE
• The wear plate should have a square edge and be free of dents or gouges.
• The wear plate can be sharpened by hand, but as with the knife, do not overheat during the sharpening
process. This will change the characteristics of the steel and it should be replaced.
• Check the gap between the knife and wear plate every time any adjustments are done to either piece, or every
8-10 hours of operation.
22