Setting up your dr power grader, Chapter 3, Dr power grader controls and features – DR Power 48 Power Grader without Remote User Manual
Page 13: 48" model, 60" model
CALL TOLL-FREE 1-800-DR-OWNER 9
Figure 1
CHAPTER 3
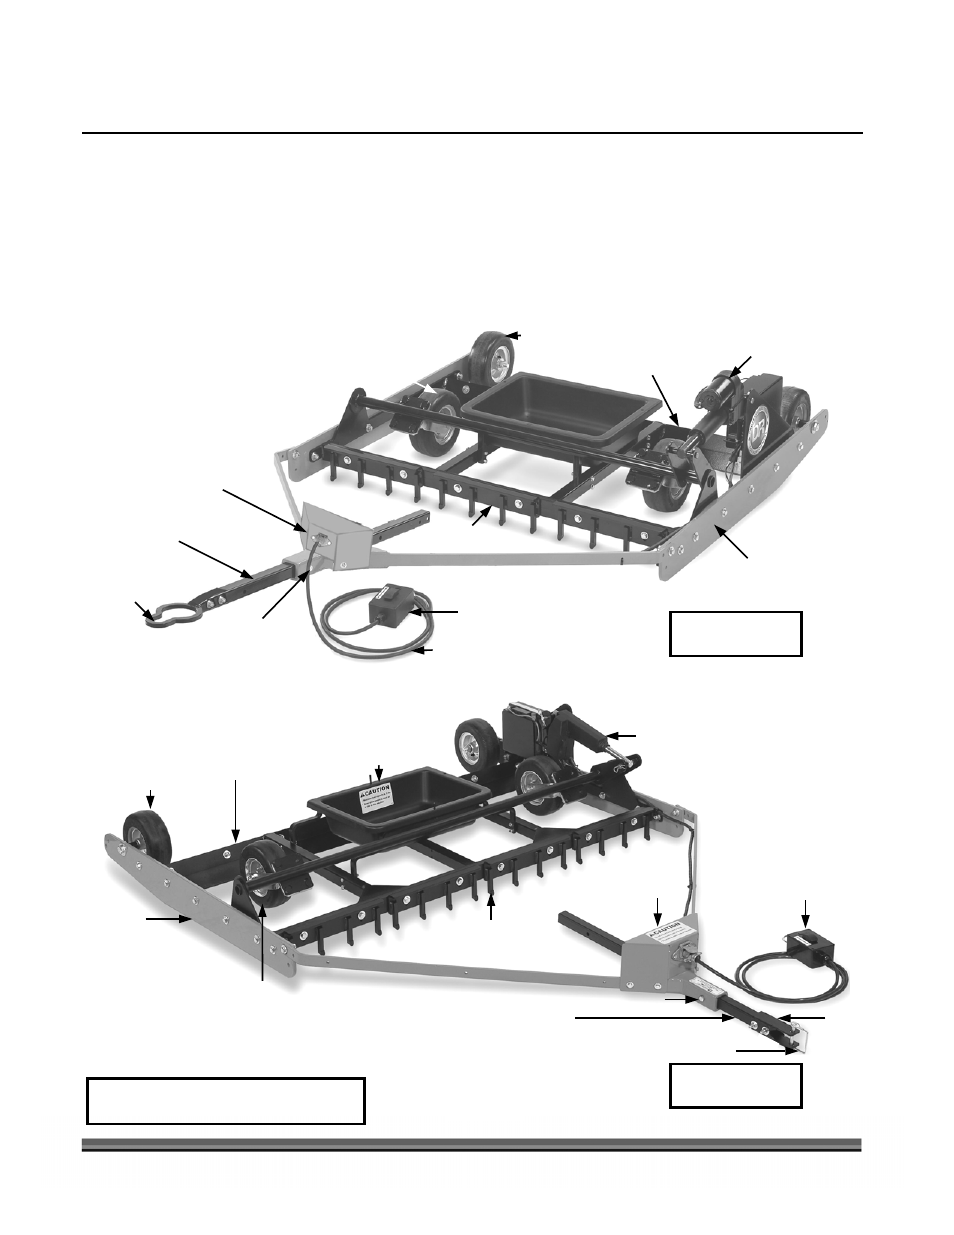
SETTING UP YOUR DR POWER GRADER
This chapter outlines a few simple steps you will need to follow to set up your new machine before you use
it. It may be helpful to familiarize yourself with the controls and features on your new DR POWER GRADER
by reviewing Figure 1 before beginning the steps outlined in this chapter. If you have any questions at all,
please feel free to contact our Customer Service Representatives at our Toll-Free number:
1-800-DR-OWNER (376-9637).
DR POWER GRADER Controls and Features
Battery
Control Box Power Cord
w/Quick Connect
Height Adjustment
Control Box w/Rocker Switch
Scarifying,
Carbide Teeth Plates (3)
Breakaway Adjustable
Tow Bar
Height Adjusting
Linear Actuator
Front Caster Wheels
Fixed Rear Wheels
Rear Scraper Blade
Side Rails (Patented)
Keyhole (Ball)
Hitch
Quick Disconnect
Receptacle Box
Shear-Bolt*
*There are two (2) extra Shear-Bolts
provided. Keep one with you while grading.
48" Model
Weight Tray
60" Model
Side Rails
(Patented)
Height Adjusting
Linear Actuator
Rear Scraper Blade
Weight Tray
Fixed Rear Wheels
Scarifying,
Carbide Teeth Plates (4)
Front Caster Wheels
Height Adjustment
Control Box w/Rocker Switch and
Power Cord w/Quick Connect
Shear-Bolt*
Tow Bar
Hitch
Safety Snap Pin
Quick Disconnect
Receptacle Box
Breakaway Adjustable Tow Bar