Attaching the yoke – DR Power 48 Power Grader without Remote User Manual
Page 18
14 DR
®
POWER GRADER™
Attaching the Yoke
Tool Needed:
•
(2) 9/16" Wrench
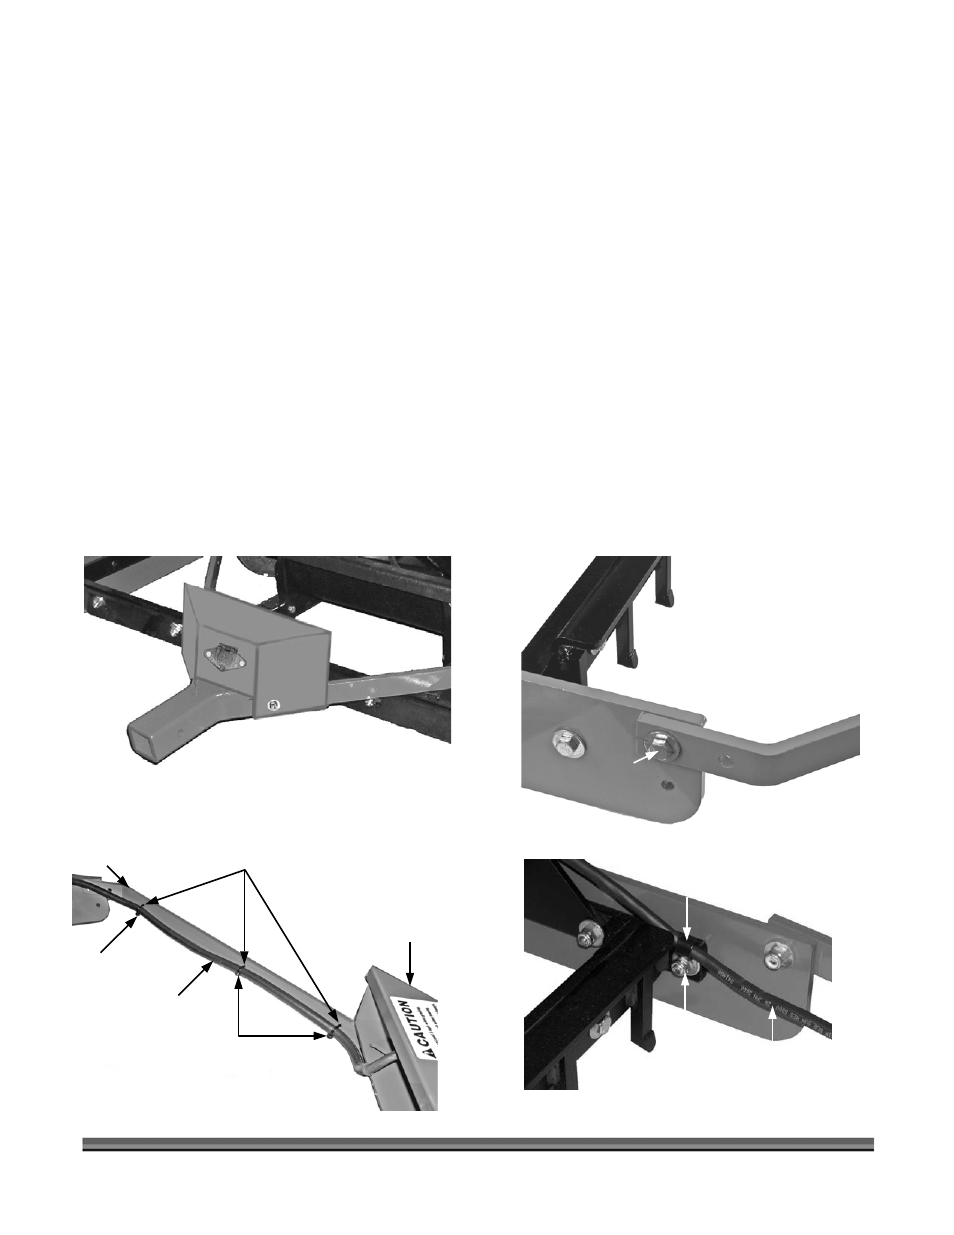
1. Position the Yoke in front of the DR POWER GRADER with the Receptacle Box facing up (Figure 4).
2. Attach each side of the Yoke in the upper hole on the outside of the Side Rail using a 3/8"-16 x 1-
1/2" Bolt, 3/8" Flat Washer and 3/8" Lock Nut (Figure 5). Do not tighten at this time
3. Run the Control Cable, from the Receptacle Box, along the left side arm of the Yoke and secure the
Control Cable to the Yoke arm using three (3) Cable Ties through the pre-drilled holes in the Yoke
(Figure 6).
NOTE: Tie the Control Cable below the pre-drilled holes and do not over tighten the Cable Ties as the Control Cable is
subject to movement during use.
4. Remove the Nut (Figure 7) previously installed on the right side of the Yoke and install the Cable Clamp
around the Control Cable and then onto the Bolt as shown.
5. Position the Clamp in the vertical position (Figure 7), replace the Nut, and tighten both sides.
NOTE: To allow the Yoke to pivot up and down, DO NOT fully tighten the Lock Nut against the hardware. Back the
Lock Nut off 1/4 to 1/2 turn after contact with the hardware.
6. Slowly fold the Yoke back onto the frame to ensure that the Control Cable will not pinch.
Figure 4
Figure 5
Yoke
Receptacle Box
3/8" Bolt, Washer,
and Lock Nut
Yoke
Side Rail
Figure 6
Cable Ties
Control Cable
Cable Tie
Yoke Arm
Pre-Drilled Holes
Receptacle Box
Figure 7
Nut
Cable Clamp
Control Cable