Installing the linear actuator – DR Power 48 Power Grader without Remote User Manual
Page 19
CALL
TOLL-FREE
1-800-DR-OWNER 15
Installing the Linear Actuator
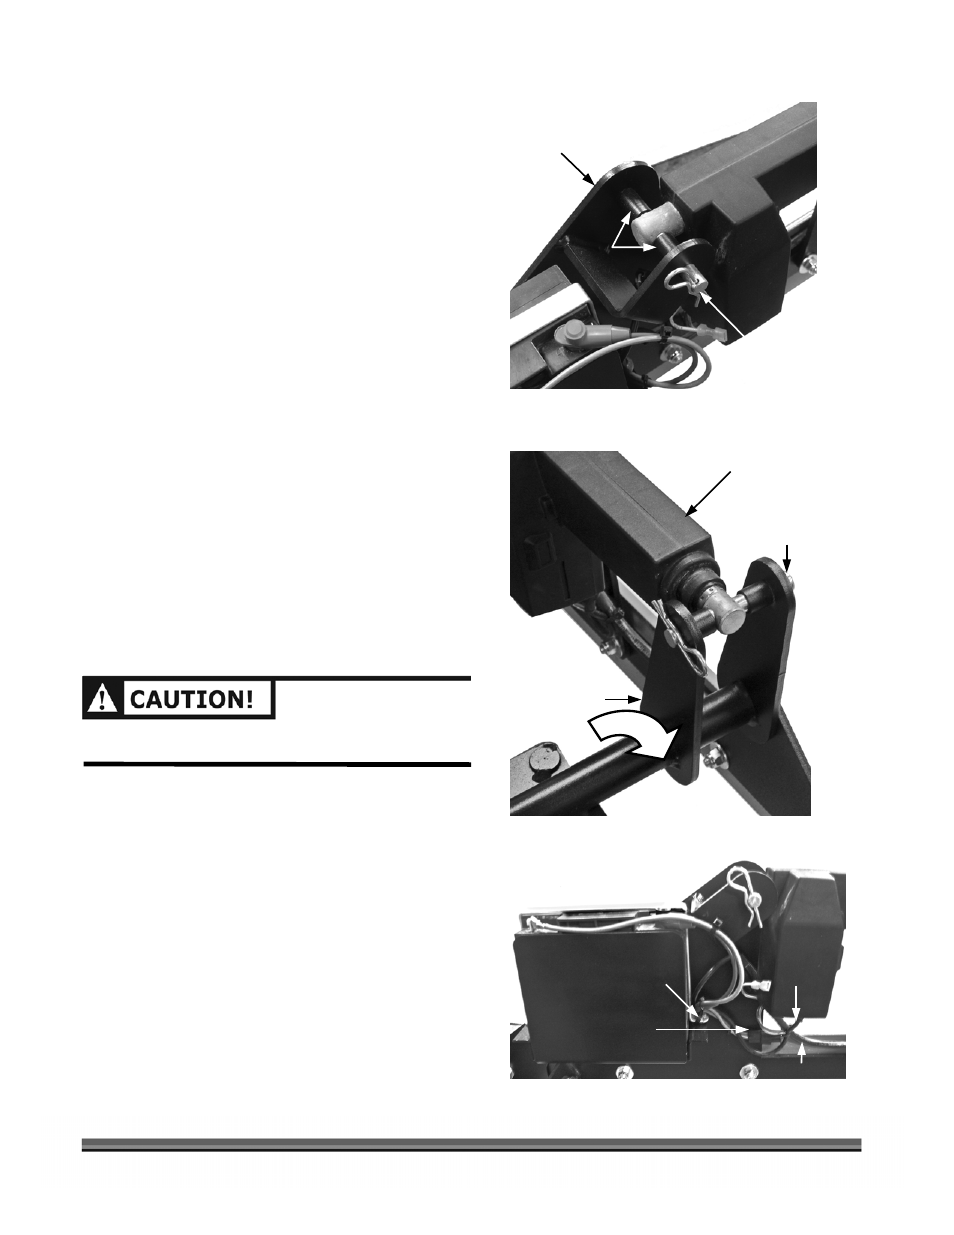
1. Remove the Hitch Clip, Clevis Pin, and two (2)
Spacers assembled on the Clevis Base w/Battery
Assembly (Figure 8).
2. Locate the Linear Actuator and place it between
the Clevis Base w/Battery Assembly and the Axle
Clevis with the Actuator Arm facing the forward
and Motor facing down (Figure 9).
3. Reinsert the Spacers, Clevis Pin, and Hitch Pin in
the Clevis Base w/Battery Assembly (Figure 8).
NOTE: The Spacers go on either side of the Actuator (Figure 8).
4. Route the Control Cable between the Caster
Bracket and the Side Rail pushing it down on top
of the Frame (Figure 3 on page 13).
5. Connect the Control Cable to the Linear Actuator
and Battery Cables (Figure 10).
6. Using a Wire Tie around the exposed portion of
the Battery Clamp Bolt between the Clamp and
Frame, secure the Wire Harness as shown in
Figure 10. Clip off access Wire Tie material.
7. Connect the Control Box w/Quick Disconnect to
the Receptacle Box (Figure 1 on page 9) and
push the Rocker Switch to the Lower position to
extend the Linear Actuator Arm out to the
maximum length.
AT THIS TIME, DISCONNECT THE CONTROL BOX TO
PREVENT ACCIDENTAL MOTOR ACTUATION.
8. Remove the Hitch Clip, Clevis Pin, and two (2)
Spacers assembled on the Axle Clevis (Figure 9).
9. Pick up the Caster Wheel Axle Assembly to rotate
the Clevis Arm Fork forward (Figure 9), so that
the hole in the Linear Actuator Arm aligns with
the holes in the Clevis Arm Fork and reinsert the
Spacers, Clevis Pin, and Hitch Clip (Figure 11 on
the next page).
NOTE: The Spacers go on either side of the Actuator Arm
(Figure 11 on the next page).
Tip: Insert the Spacers from the top down as you
insert the Clevis Pin. You may have to slightly
spread the Fork with your fingers to ease the
last Spacer into place.
Figure 9
Axle Clevis
Linear Actuator Arm
Clevis Pin and
Hitch Clip
Clevis Base w/Battery Assembly
Figure 8
Wire Tie around
Bolt and Harness
Actuator
Motor
Fork
Figure 10
Linear Actuator
Spacers
Control Cable
Actuator
Cable
Battery Cables
Clevis Pin
Rotate Forward