Replacing the blade, Replacing the drive belt – DR Power Lawn Mower Subaru Engine (January 2013 - March 2014) User Manual
Page 16
16
DR
®
SP22 MOWER
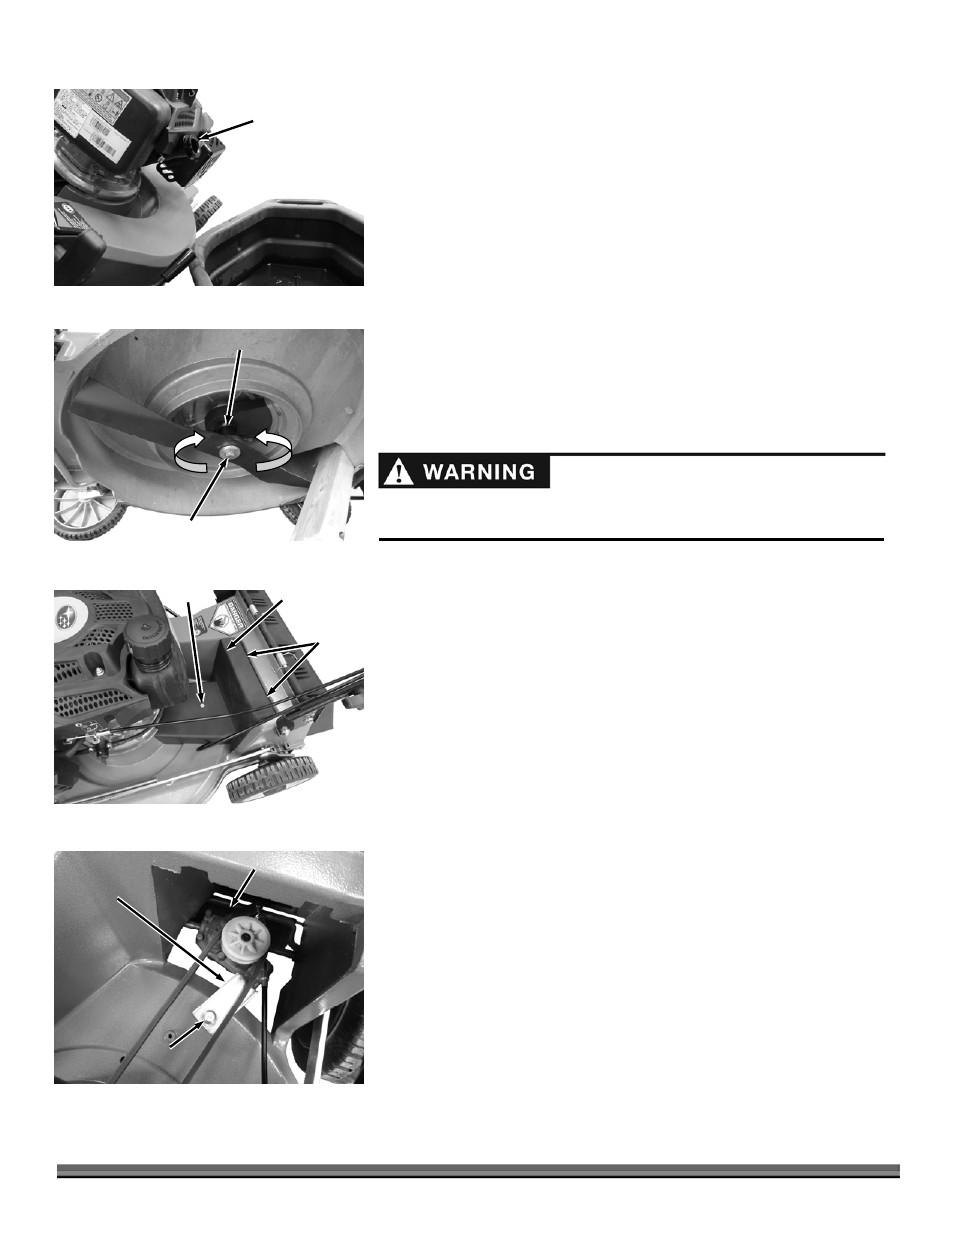
1. Ensure the Fuel Cap is tight and remove the Dipstick (Figure 14).
2. Tip the mower onto its side (with the air filter up) to drain the used oil out
through the oil fill tube (Figure 16). Lower the machine when done.
3. Slowly pour fresh oil into the oil fill tube until the oil level reaches the Full
line on the dipstick. See procedures in “Checking the Engine Oil Level” for
reference. Do not overfill.
4. Insert and fully screw in the dipstick when the Oil level is correct.
5. Dispose of the used oil properly at a local recycling center.
Replacing the Blade
Tools and Supplies Needed:
5/8" Socket and Torque Wrench
Block of Wood
IMPORTANT: You will need a torque wrench to install the blade properly. If you
do not have a torque wrench or are uncomfortable performing this procedure,
contact us at www.DRpower.com.
Examine the blade whenever you run out of gasoline. If the blade is damaged or
cracked, replace it immediately. If the blade edge is dull or nicked, have it
sharpened or replace it.
1. Block up the Mower to gain access under the Deck.
2. Use a block of wood to hold the blade steady (Figure 17).
3. Remove Bolt, Large Washer and the blade, saving all mounting hardware.
Note: The Blade Adapter might come off the Engine Shaft. Ensure that the Blade
Adapter and Shaft Key are in place when reinstalling the Blade.
IMPORTANT: Make sure in the following step that you position the curved ends
of the blade pointing up toward the mower housing.
4. Position the new Blade with its holes aligned with the pins of the Blade
Adapter and secure with the large Washer and Bolt.
5. Use a torque wrench to tighten the blade bolt to 30 ft-lb (40 Nm).
Replacing the Drive Belt
Tools and Supplies Needed:
Philips Head Screwdriver
12mm Wrench
8mm Wrench
1. Remove the Screw from the upper Belt Cover and remove the Belt Cover
(Figure 18).
Note: There are two Tabs at the back of the Belt Cover that snap into the Frame of
the Mower. You will need to push down and forward at the area of the Tabs to
release the Cover from the Frame.
2. Remove the Transmission Bracket Bolt using a 12mm Wrench (Figure 19).
Transmission
Bracket
Figure 19
Bolt
Transmission
Oil Tube
Figure 16
The blade is sharp; contacting the blade can result in serious personal injury.
Wear gloves when servicing the blade.
Blade
Figure 17
Blade Adapter
Bolt and Large
Washer
Wood
Block
Loosen
Tighten
Screw
Figure 18
Tabs
Upper Belt
Cover