Adjusting the engine brake and drive cables, Cleaning the mower – DR Power Lawn Mower Subaru Engine (January 2013 - March 2014) User Manual
Page 17
CONTACT US AT www.DRpower.com 17
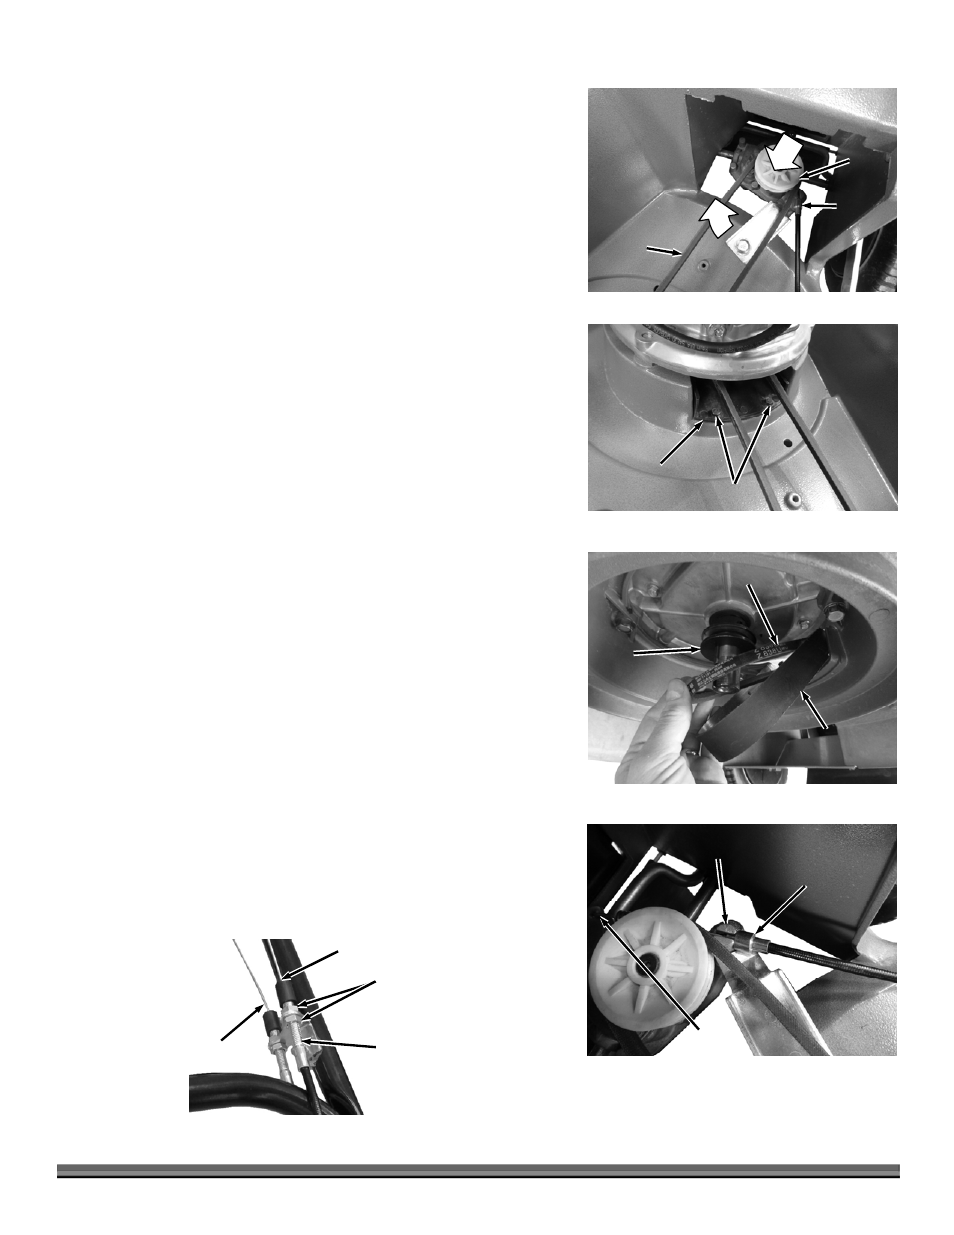
3. Slide the Transmission Bracket over (step 1) so the Transmission can be
tilted forward (step 2) to allow the Belt to be removed from the pulley
(Figure 20).
4. Remove the two Screws from the top side of the lower Belt Guard with an
8mm Wrench (Figure 21).
5. Remove the Blade as described on the previous page.
6. Pull the Lower Belt Guard down enough so you can remove the Belt from the
Engine Pulley (Figure 22).
7. Remove the Belt from the machine.
8. Install the new Belt using the reverse order of the previous steps.
9. When the Transmission is rotated back into position, make sure the metal
portion of the Transmission Cable is inserted fully into hole in the
Transmission Post (Figure 23). There is a flat area on the metal portion of
the Cable that must rest against the Transmission Bracket. Also check that
the Cable Spring is attached to the Transmission.
Adjusting the Engine Brake and Drive Cables
The Cables are adjusted at the factory and should not need any initial
adjustment. A worn Belt and machine use however can cause the Cables to
need some adjustment. Perform the following procedures if the Engine is not
stopping properly when the upper Bar is released or if the Wheels are not
engaging properly when the lower Bar is pulled to the Handlebar.
1. Loosen the top Jam Nut and tighten the bottom Jam Nut to tighten the
Cable (Figure 24).
2. Loosen the bottom Jam Nut and tighten the top Jam Nut to loosen the
Cable.
3. Tighten both Nuts towards each other against the Bracket to hold the
adjustment location.
Cleaning the Mower
1. For best results, clean the mower soon after you have completed mowing.
2. With the engine running on a flat paved surface, spray a stream of water in
front of the right rear wheel.
3. The water will splash into the path of the blade, cleaning out the clipping.
4. When no more clippings come out, stop the water and move the mower to a
dry area.
5. Run the engine for a few minutes to dry the housing.
Figure 20
Pulley
Drive
Belt
Drive
Cable
1
2
Lower Belt
Guard
Figure 21
Screws
Engine
Pulley
Figure 22
Lower Belt
Guard
Belt
Drive
Cable
Spring
Figure 23
Transmission
Post
Drive Cable
Stop (flat on
bottom)
Jam Nuts
Figure 24
Cable Threads
Engine Brake Cable
Drive Cable