DR Power Redi-Plow Plus (Sept. 2013 - Present) User Manual
Page 10
10
DR
®
REDI-PLOW™ PLUS
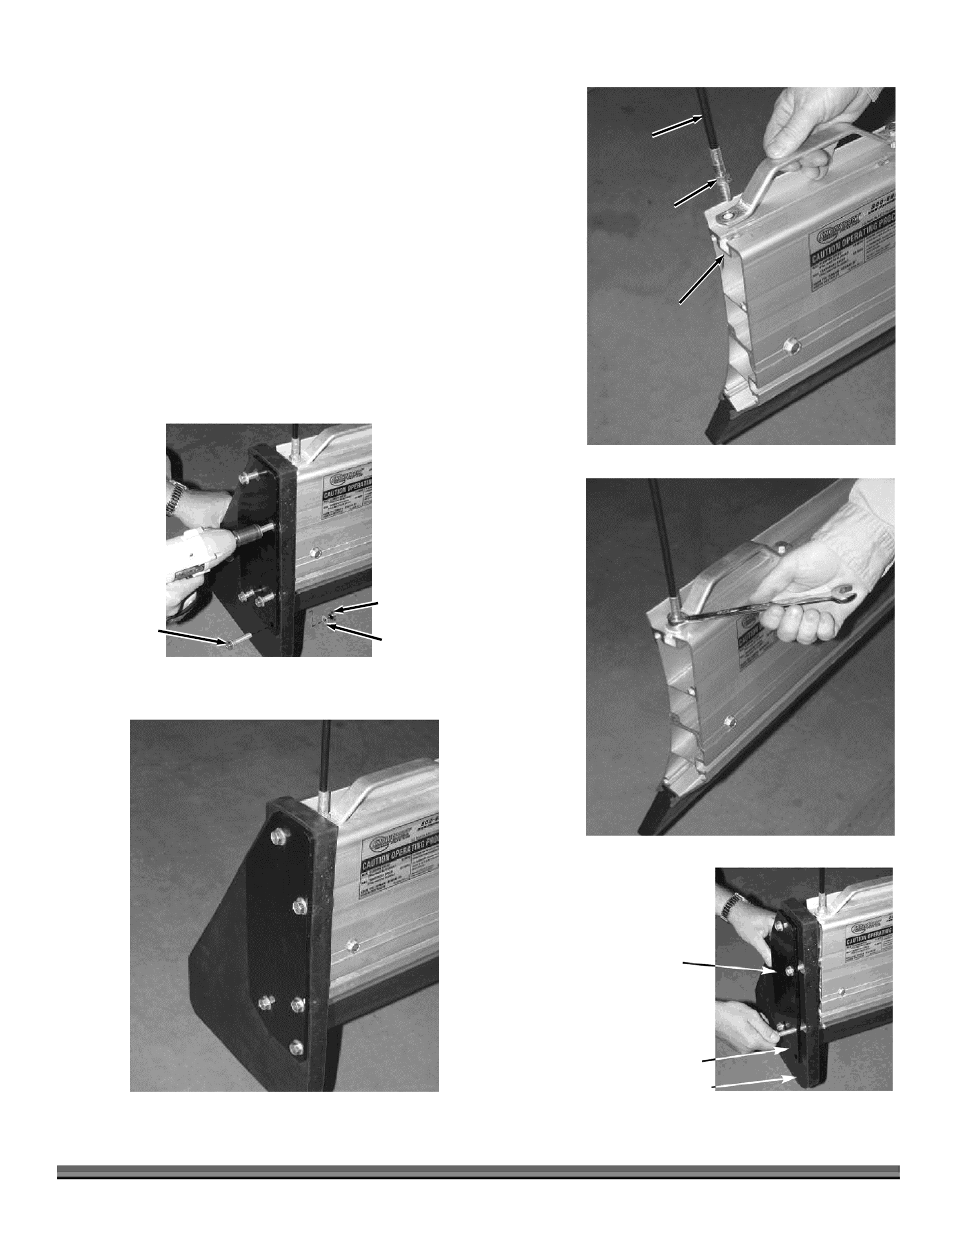
23. Insert two square nuts into top channel (Figure 23). Turn a hex head jam
nut onto the stud of blade marker and align marker with hole on lift handle
and bolt marker and handle to blade using square nut in channel.
24. Turn 3/8" x 3/4" bolt into other hole on handle and thread to nut in channel
(Figure 24). Position the handle flush with blade edge. Then tighten both
bolts on lift handle. Repeat at other end.
25. Attach rubber end and metal cap plate to end of blade with four long self
threading bolts (Figure 25).
26. Tighten all bolts until rubber begins to compress to blade. Insert a 5th bolt
to tighten bottom of rubber to bottom of end plate. Use flat washer and lock
nut (Figure 26).
27. Tighten all bolts equally. Repeat box end assembly at opposite end (Figure
27).
Blade
Marker
Figure 23
Hex Head
Jam Nut
2 Square Nuts
in Channel
flat side up
Figure 24
Four Long Self
Threading Bolts
Figure 25
Metal End Cap
Rubber Box End
Bolt
Figure 26
Flat
Washer
Lock Nut
Figure 27