DR Power Redi-Plow Plus (Sept. 2013 - Present) User Manual
Page 8
8
DR
®
REDI-PLOW™ PLUS
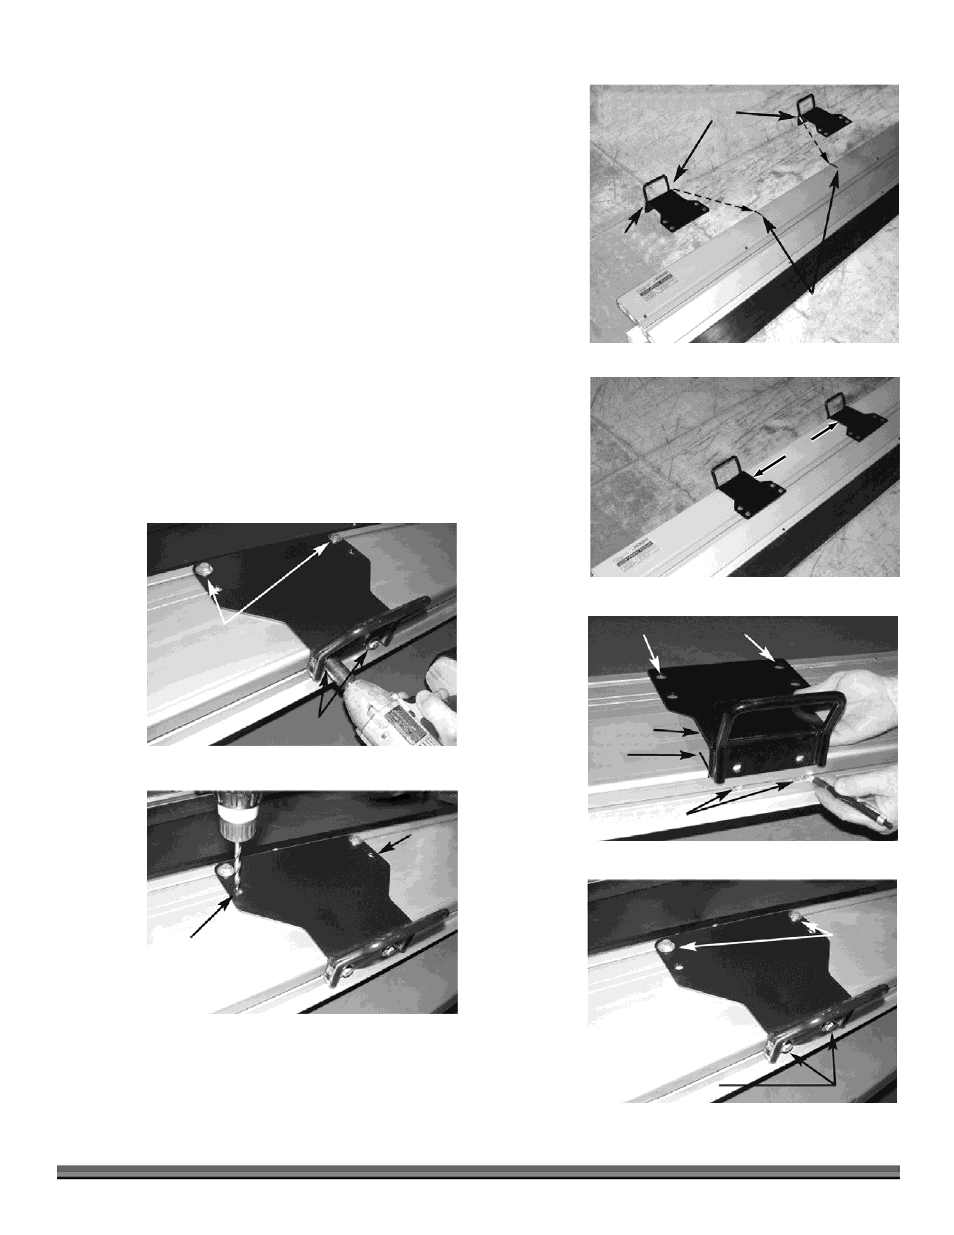
10. Place each side hinge on blade and align edge of hinge with factory mark on
blade (Figure 10).
11. When both hinges are properly aligned – they should measure 22 1/2" apart
(Figure 11).
12. At end of blade, insert two square nuts in each channel – flat side facing out.
Slide nuts over to hinge and align them with holes at top and bottom (Figure
12).
13. Turn 3/8" x 3/4" hex bolts with flat washer into nuts on top section of blade
and leave loose (Figure 13). Turn 3/8" x 3/4" hex bolts into nuts on bottom
section of blade and leave loose.
14. Make sure slide hinge is lined up with mark (Figure 10). Using 9/16"
wrench, tighten hex bolts in top section first (Figure 14). Then tighten hex
bolts on bottom section.
15. Using 5/16" bit, drill a hole through blade in each factory punched hole on
slide hinge (Figure 15). Turn a (short) 3/8" self threading bolt into each
drilled out hole and tighten. Repeat steps to attach opposite slide hinge.
22-1/2"
Figure 11
Align this edge of each Slide
Hinge with Factory mark
Slide Hinge
Factory Marks
on Blade
22-1/2" apart
Figure 10
Align edge
with Factory
Mark
Figure 12
Align Square Nut here at bottom
Align Square
Nut here at top
Bottom
Hex Head
Bolt
w/Flat
Washer
Figure 13
Top Hex Head Bolt w/Flat
Washer (loose for now)
Tighten these
bolts second
Figure 14
Tighten these
bolts first
Factory
Hole in
Slide
Hinge
Figure 15
Drill 5/16" Hole
in Blade