DR Power TreeChopper User Manual
Page 13
CONTACT US AT www.DRpower.com 13
Universal
Mount
Figure 13
Universal
Cross Bar
U-Bolts, Flat
Washers and
Locknuts
Bolt, Flat Washers
and Locknut
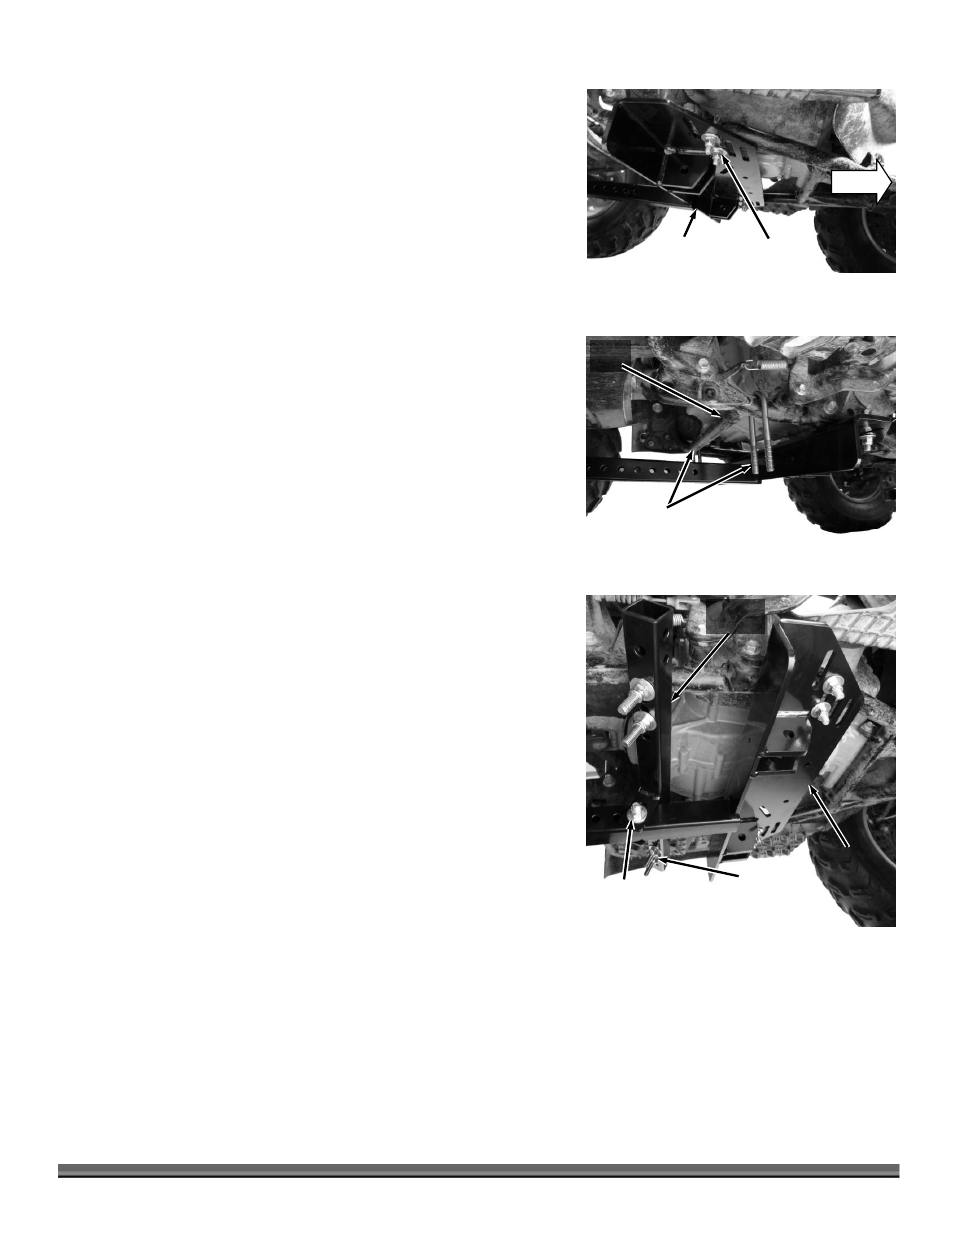
7.
Secure the Universal Mount to each U-bolt or Bolt with a Flat Washer, Lock
Washer and two Jam Nuts using a 9/16" Wrench for each Threaded portion
of the U-Bolts, or Bolts (Figure 11).
8.
Position the Universal Cross Bar further back on the Frame than the
Universal Mount and place the tabs over the square tube of the Universal
Mount. Determine the best place to attach the Cross Bar to the Frame.
9.
Round Tube Frame (also some Polaris Frames): When you have determined
the best place to attach the Cross Bar to the Frame, remove the Cross Bar
and place a 4" Long U-Bolt around the Frame on both sides to determine
where it can rest against a stopping point on the Frame (Figure 12).
Square Tube Frame (also some Polaris Frames): When you have determined
the best place to attach the Cross Bar to the Frame, remove the Cross Bar
and place a Square Frame Bracket over the top of the Frame on both sides
to determine where it (or the Bolts that will support it) can rest against a
stopping point on the Frame.
Beam Frame: When you have determined the best place to attach the Cross
Bar to the Frame, remove the Cross Bar and place a Beam Frame Bracket
over the top the Frame to determine where it (or the Bolts that will support
it) can rest against a stopping point on the Frame.
10.
Reposition the Cross Bar against the Frame with the center Tabs over the
Universal Mount Tube (Figure 13). Insert the U-Bolts, or Bolts into the
holes in the Cross Bar. Install a Flat Washer, Lock Washer and two Jam
Nuts on each U-Bolt or Bolt using a 9/16" Wrench but leave the hardware
fairly loose for now.
11.
Align the holes in the Tabs of the Cross Bar to the nearest holes in the
Universal Mount Tube that will allow the Cross Bar to rest tight against the
Frame. Install the 3/8-16 X 2-3/4" Bolt with a Flat Washer through the Tab
holes and Mount Tube. Install a Flat Washer and Locknut on the end of the
Bolt but only screw on by Hand.
Universal
Mount
Figure 11
FWD
Flat Washers
and Locknuts
4" U-Bolts
Figure 12
U-Bolt
Stop