Adjusting the cutter assembly angle, Removal and installation of the cutter assembly – DR Power TreeChopper User Manual
Page 15
CONTACT US AT www.DRpower.com 15
Adjusting the Cutter Assembly Angle
Important!
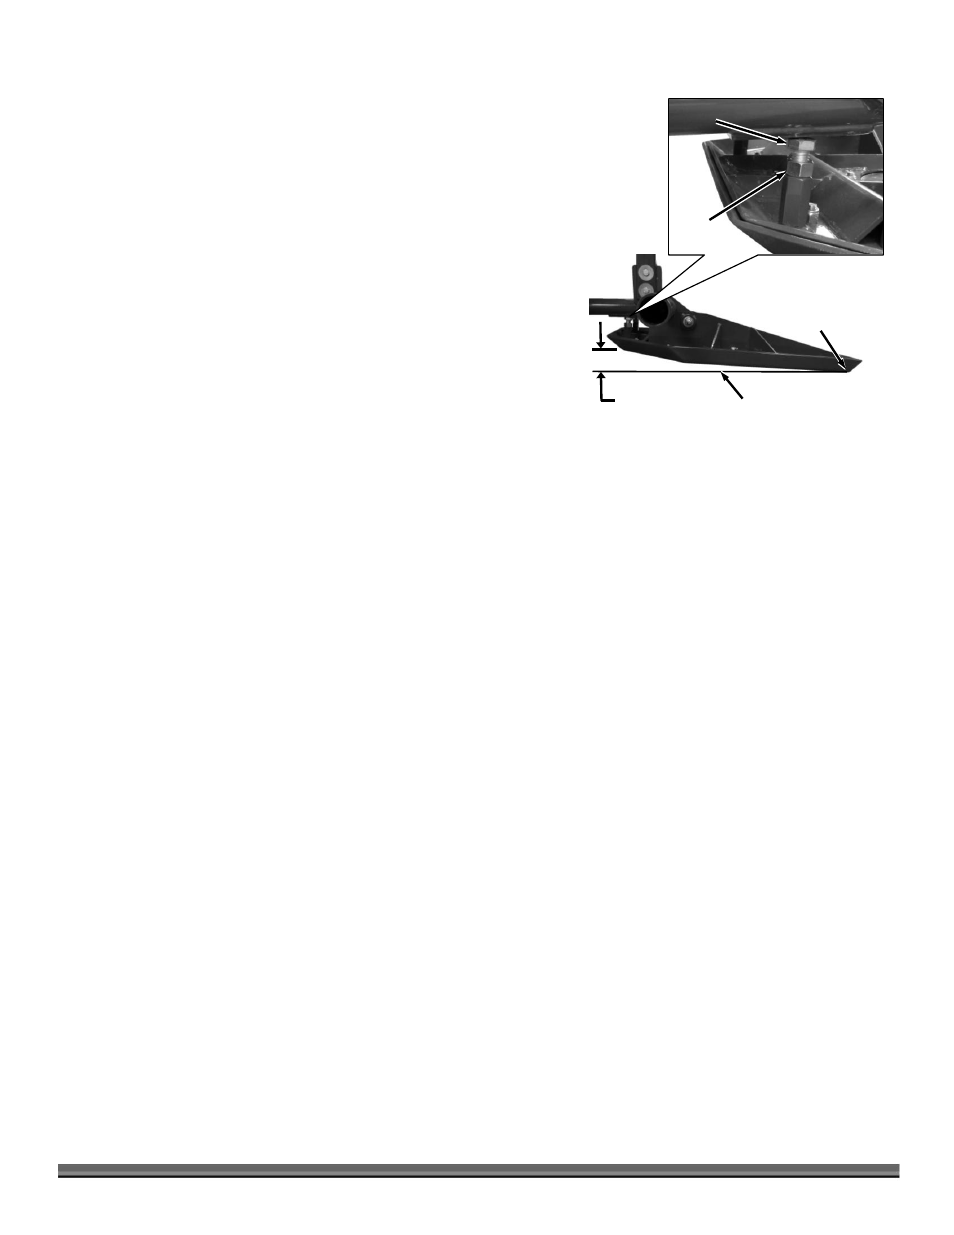
Make sure the cutting assembly is properly adjusted using the two Adjuster
Bolts on the back of the Cutting Head Assembly as described below. This
adjustment should be made on a flat, hard surface such as concrete. The wheels
of the ATV must be on the same flat surface that you are adjusting the Cutter
Assembly angle to. These Bolts should be adjusted so that the front forks of the
Cutting Head Assembly are slightly pitched down. This enables the Cutting
Head Assembly to stay parallel to the ground when accelerating the ATV
through the tree.
1.
Lower the Cutting Head Assembly with your lifting device until the forward
end of the Head just touches the concrete (Figure 17).
2.
Measure from the back end of the Cutting Head Assembly to the concrete.
It should be 1" off the concrete.
3.
If the back end of the Cutting Head Assembly is not 1" from the concrete,
loosen the adjuster Nut and turn the adjuster Bolts in or out equally until the
back end of the Cutting Head Assembly is 1" from the concrete when the
front end is just touching.
4.
Tighten the Jam Nut when adjustment is complete.
Removal and Installation of the Cutter Assembly
The TreeChopper can be quickly and easily installed or removed from the Universal Mount. To remove the TreeChopper simply
remove the Hairpin Cotter Pins and Pivot Pins to drop the Chassis down onto the ground (Figure 14 on page 14). The Head
Assembly and Chassis can now be pulled away from the ATV. Install in the reverse order.
Figure 17
Front
Touching
Flat Surface
1"
Jam Nut
Adjusting Bolt