2 power section, 3 clock & control – ESI EX8000 User Manual
Page 4
MaXiO XD
EX8000
2.2 Power Section
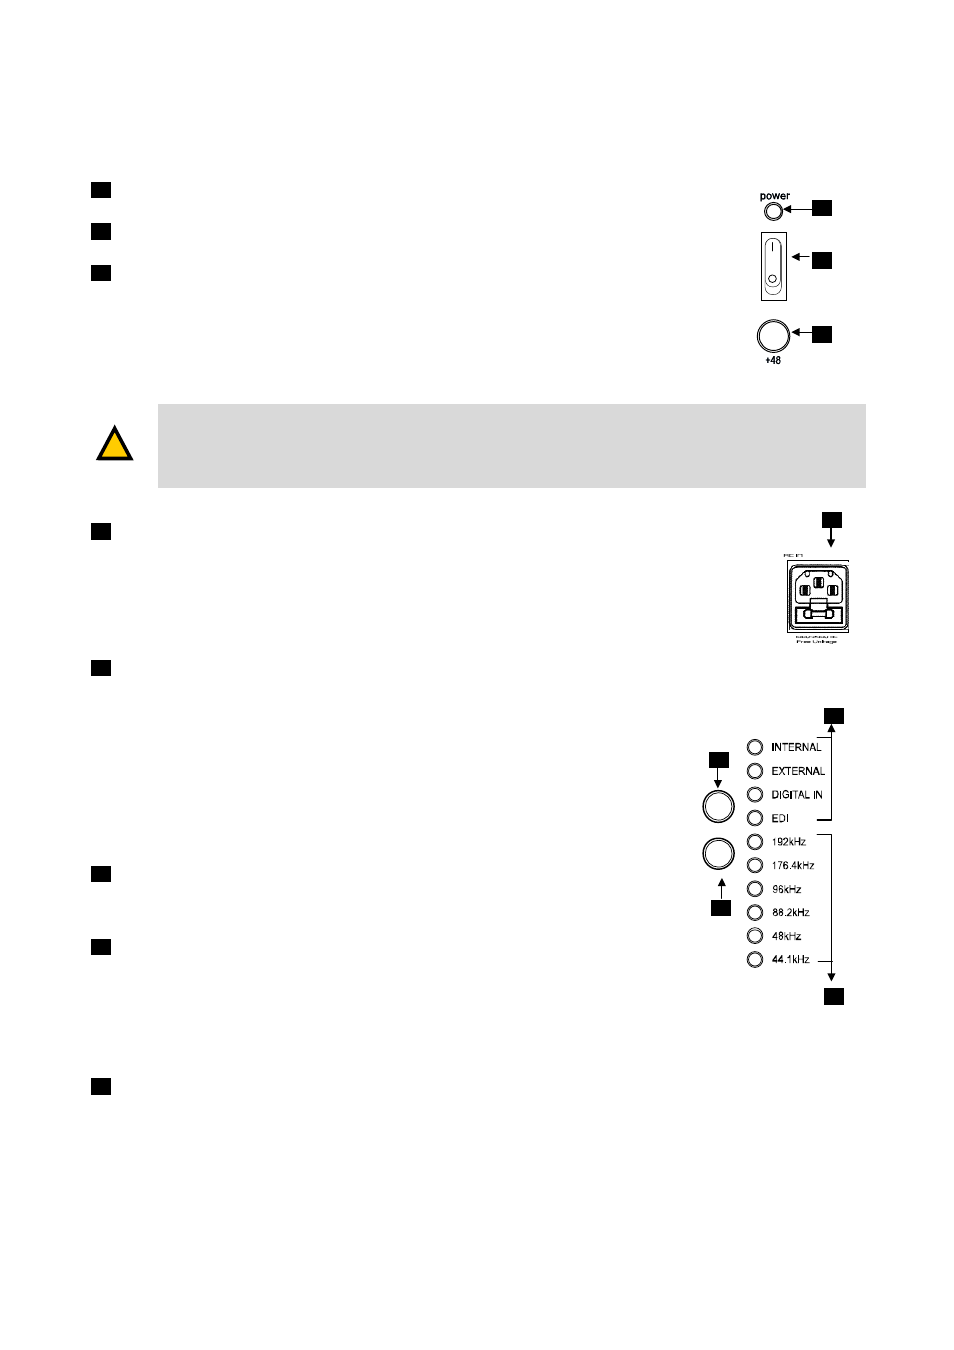
Power Indicator LED
5
5
4
Power Switch
Phantom Power Switch
+48V DC phantom power (for balanced condenser microphones) will be
supplied via every XLR input connector when this button is enabled.
Note that this affects only those input channels that are set to receive
microphone signals (check no. 2).
·
Before you turn on the phantom power switch, you must make sure to connect your microphones
to the XLR inputs (with balanced cables).
·
After you have turned on the phantom power switch, you should not connect or disconnect a
microphone to any of the input connectors.
AC IN
EX8000 needs external AC power. It supports 100~240V AC (free voltage). There
is a spare fuse (5X20mm Glass Fuse) below the connector.
2.3 Clock & Control
Clock Source Indicator
Displays the current clock source of EX8000:
- Internal:
EX8000 uses its internal clock.
- External: EX8000 works with the clock from the Word Clock input.
- Digital In: EX8000 works with the clock supplied from the AES/EBU,
S/PDIF or ADAT input.
- E.D.I:
EX8000 works with the clock from the MaXiO PCI host
card.
Clock Frequency Indicator
Displays the current sample rate of EX8000.
Clock Select Button 1
When EX8000 is working in stand alone mode, you can choose the
clock source with this button (Internal, External, Digital In). This
function is not available when EX8000 is connected to the MaXiO PCI
host card.
Clock Select Button 2
When EX8000 is working in stand alone mode, you can choose the sample rate with this button
(44.1 ~ 192 kHz). This function is not available when EX8000 is connected to the MaXiO PCI
host card.
6
6
7
7
!
CAUTION
22
22
9
11
12
9
10
11
10
12