Ip camera recording – Exacq exacqVision Pro User Manual User Manual
Page 27
27
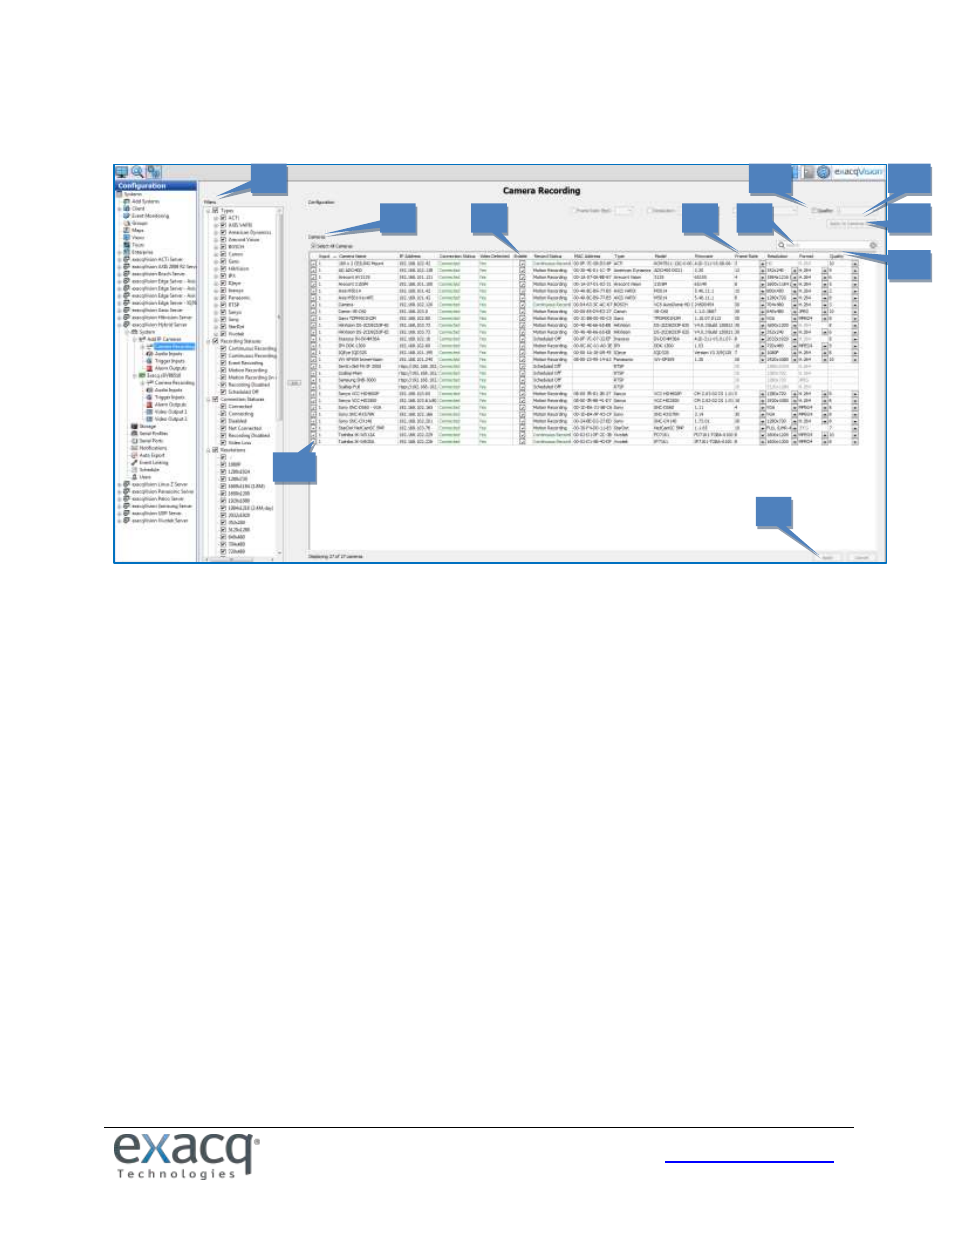
IP Camera Recording
The IP Camera Recording page allows you to enable IP cameras to record video and configure recording settings. The
following features are available on the IP Cameras page:
1. The Filters list allows you to select which cameras are displayed in the Cameras list, based on categories such as
camera type, recording status, resolution, and more.
2. The Cameras list displays all cameras on the selected server that match the criteria selected in the Filters list.
Cameras can be sorted by clicking the title of any column. Several of the columns can also be hidden or displayed
by right-clicking any column title, although the checkboxes, camera names, and recording settings (frame rate,
resolution, format, and quality) cannot be hidden.
3. To search for a camera in the list, enter text in the Search field. If any of the information about a camera entry
matches the Search text in any displayed or hidden column, the camera entry is shown; all other camera entries
are hidden. To display the rest of the cameras that match the Filter criteria, delete the text in the Search field.
4. The Enable column contains check boxes that allow you to enable or disable recording from that camera. By
default, the check box is selected if a signal is detected; however, you can manually disable recording on a
camera that is connected and sending a signal to the system.
5. Recording settings can be changed individually for a camera by selecting any of the drop-down lists in the Frame
Rate, Resolution, Format, and Quality columns. The options available in each drop-down list can vary by
manufacturer and model. If a drop-down list is not displayed for a camera in any of the fields, the camera does
not support any other settings for that parameter.
6. Alternatively, to apply a quality setting to multiple cameras simultaneously, select the checkbox (a) in the first
column for each applicable camera (or select the Select All Cameras checkbox), select Quality checkbox (b),
choose a video quality from the drop-down list (c), and click Apply to Cameras in Grid (d). The quality should
now be modified for all selected cameras, as shown in the Quality column in the Cameras list (e).
7. Click Apply to activate any changes.
1
2
4
5
6a
7
6b
6c
6d
6e
3