Maps – Exacq exacqVision Pro User Manual User Manual
Page 85
85
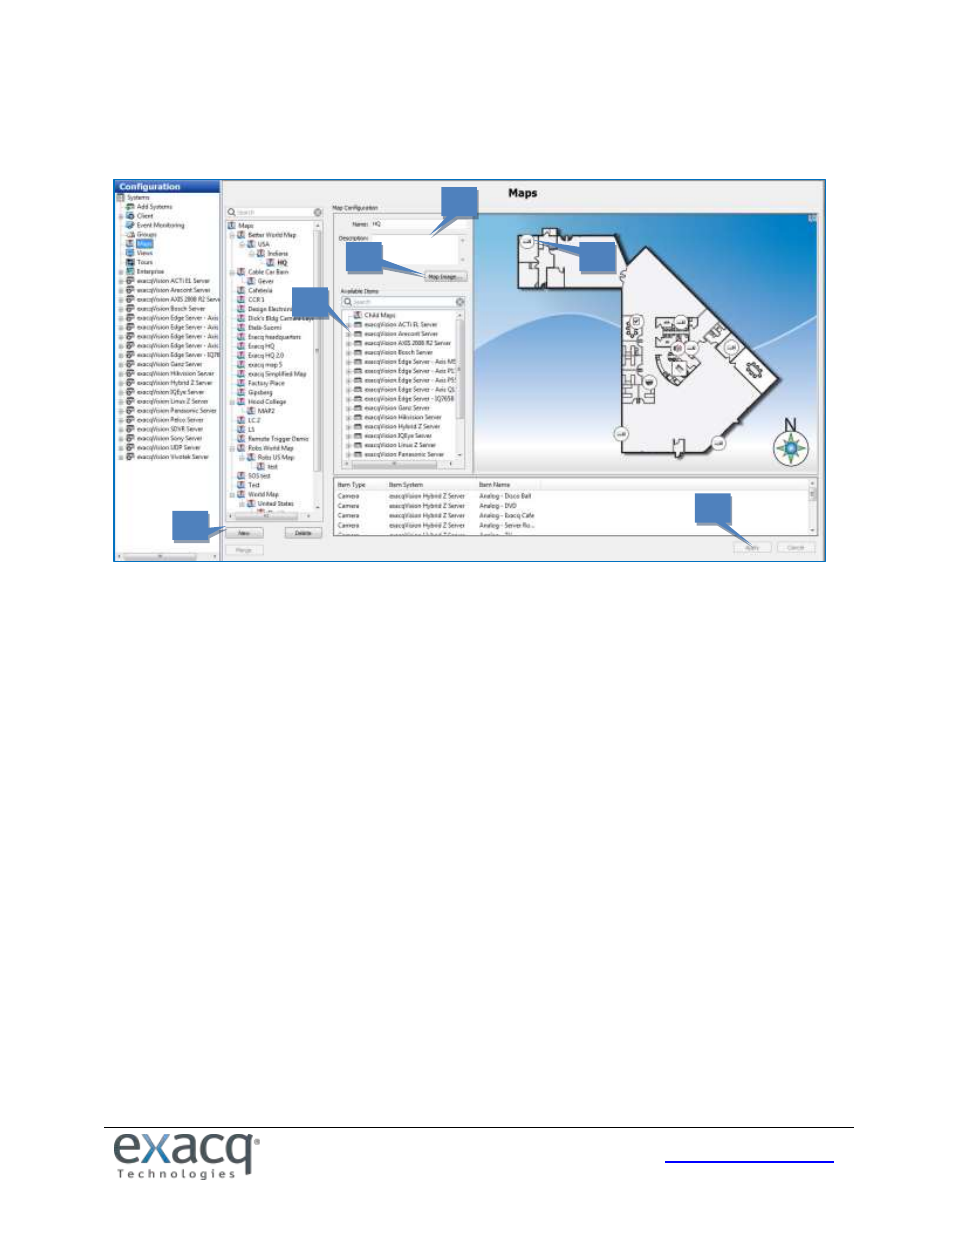
Maps
NOTE: The Maps page is not available in exacqVision Start.
The Maps page allows you to organize your cameras, soft triggers, and other devices visually using a graphics file.
1. Click New.
2. Enter a Name and Description for the map.
3. Click Map Image to open the Map File window, which allows you to browse for the graphic file that you want to
use for the map (it is recommended that you use a compressed graphic file, such as a PNG or JPEG, to improve
responsiveness). Select the file and click Open to display the map.
NOTE: To create a child map for an existing map, select the existing map before you click New. This allows you to
place an icon representing the child map on the existing (or parent) map. Notice that the child map is listed
under the parent map when you click New.
4. The systems that you are currently connected to are listed in the Available Items section. Expand the systems to
display the devices associated with it. Any child maps that you create for this map are also displayed in Available
Items.
5. To add an icon representing a device, soft trigger, or child map, drag the name of the device or map from the
Available Items section onto the new map. When you view the map in Live Maps, double-clicking an icon
displays video or data from the device (or opens the child map), and alarm and trigger icons display their current
status. To remove an icon from a map, right-click it and select Remove Selected Item. To flip the icon to point
the other way, right-click it and select Mirror Icon. To rotate the icon, right-click it, select Icon Rotation, and
select any of the available options. To change the appearance of the icon, right-click it, select Icon Balloon, and
select any of the available options. Repeat this step until all icons are placed on the map (and listed below it).
NOTE: If the map has a parent map, a small map icon representing the parent map is displayed in the upper-
right corner. You can drag this parent map icon anywhere on the map.
6. To complete a map, click Apply. See the “Live Maps” section for information about using a completed map.
1
2
3
4
5
6