Exacq exacqVision Virtual User Manual User Manual
Page 13
www.e
x
acq.com
+1.317.845.5710
+44.1438.310163
USA (Corporate Headquarters)
Europe/Middle East/Asia
Page 13 of 44
4/12/2013
Expanding Virtual Disk Storage
Virtual hard disk 3 is configured for video storage and is formatted with the ext4 file system. This virtual disk can grow to a VMware
maximum of 2TB by editing the settings using the VMware client, and this does not require a reboot of the EVA. The EVA system will
scan the drive every five minutes and automatically register the new space after the scan. Adding a new drive to the EVA requires
the exacqVision server service to be restarted temporary, which suspends video recording and viewing.
VMware allows the simple expansion of a virtual disk. After the disk size is increased on the hypervisor server, the operating system
must be adjusted to see the new storage. These instructions are intended for expanding the default 100 GB store, but they can be
used to expand any virtual disk that is added to the EVA.
To expand the virtual disk, complete the following steps:
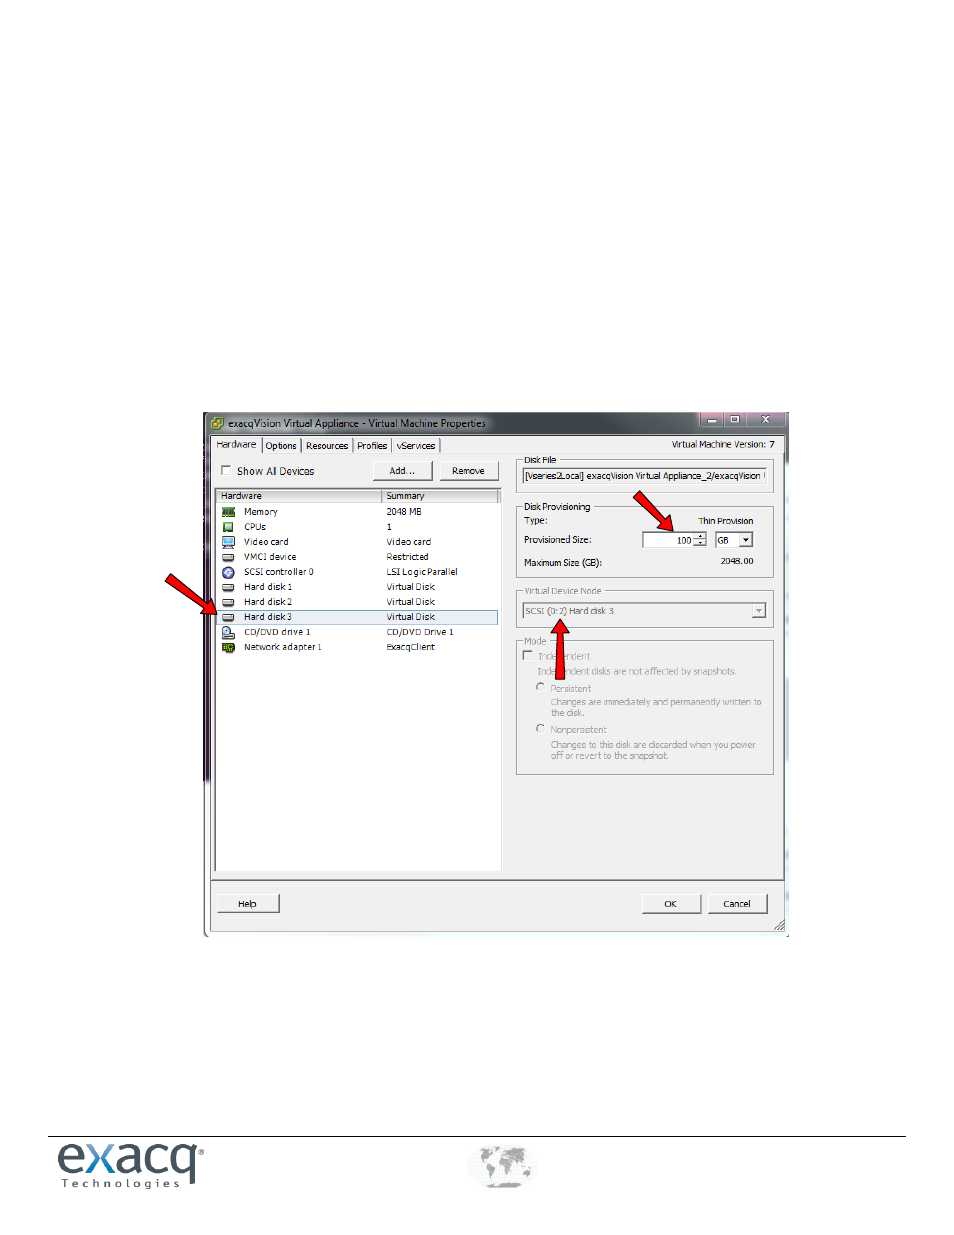
1. Right-click the exacqVision Virtual Appliance and choose Edit Settings. Click on Hard Disk 3 and change the provisioned size
to 2048 GB in the right pane. Note the SCSI host device node number; you will need this when you rescan the SCSI host. In
this example, this important number is 0:2.
2. After saving the new value, open the console screen of the EVA and press Enter to log in to the command line interface (CLI)
with the admin account. You can grow your disk incrementally to a maximum of 2TB.