Flowserve MSS Series User Manual
Page 7
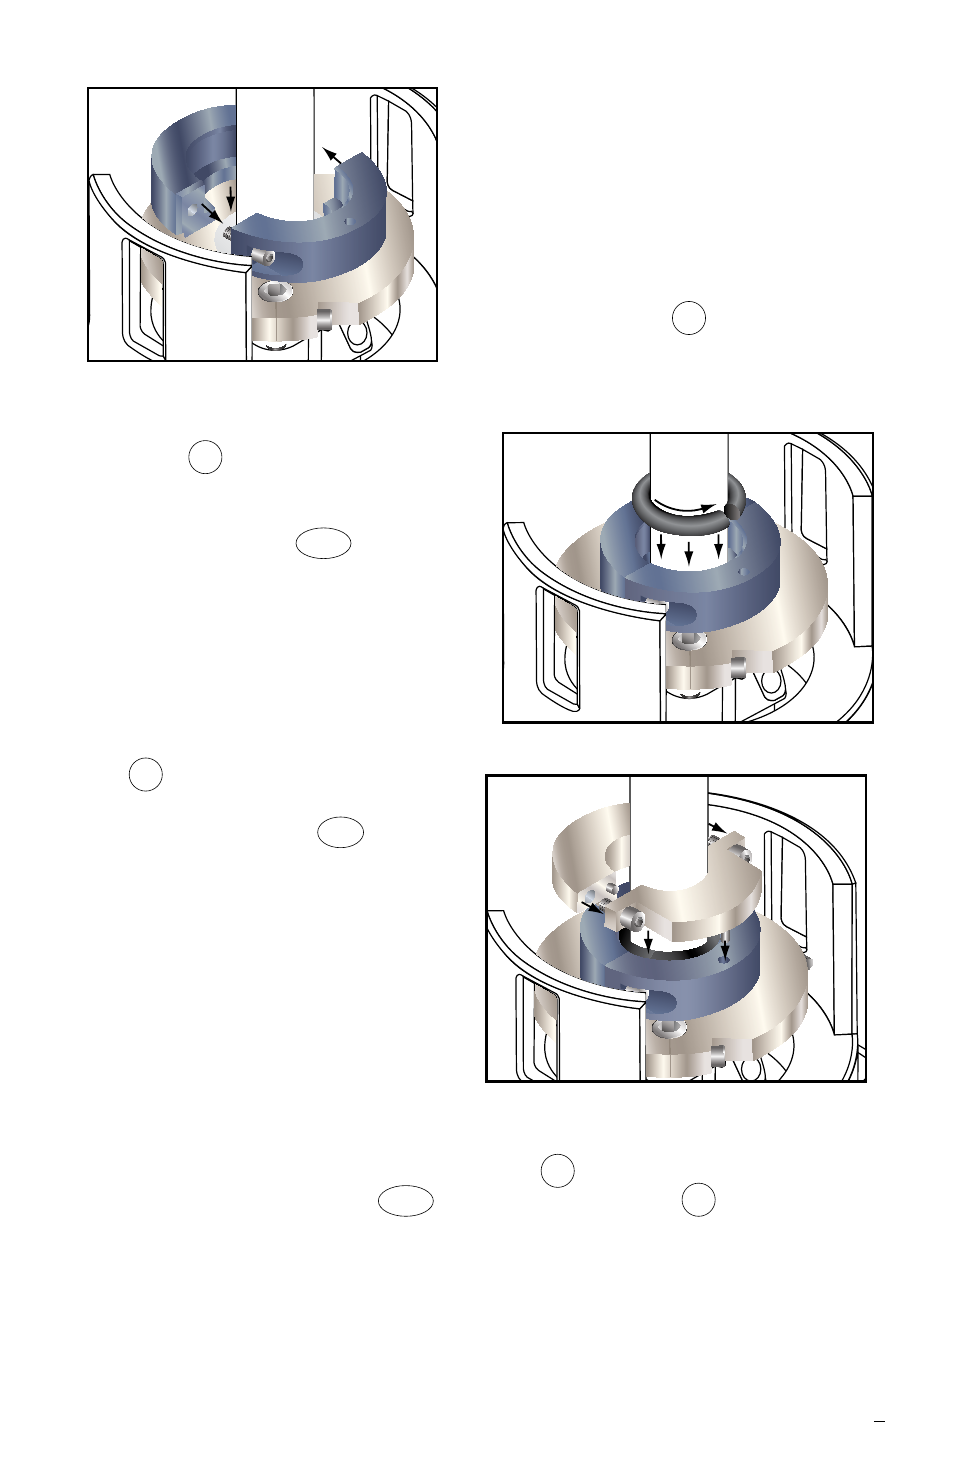
2.9 Install the white split backing
ring
44 into the rotating face
bore next to the O-ring. Install
the two black elastomer
backing rings
44.1. Be sure to
stagger
the backing ring joints
by 120°.
Do not bond the backing ring
joints together or with each
other.
2.10 Mount the seal drive halves
2 around the shaft and loosely
fasten
them together with the
shoulder screws 414 provided.
Line up the pins in the seal
drive with the holes in the
rotating face and slide the seal
drive towards the rotating face
until a 3 mm (0.12 inch) spring
gap is achieved using the two
1/8" Allen wrenches as
spacers. Tighten the shoulder
screws completely and lock
seal drive to shaft.
2.7 Clean the rubbing faces of the
rotating and stationary face with
alcohol and place the rotating
face so that its rubbing face is
against the stationary rubbing
face.
2.8 Position the split rotating face
gasket O-ring
76 around the
shaft, bond and lubricate as in
Step 2.1, and push the O-ring
into the rotating face bore.
7
Step 2.6
Mount seal drive halves and set
spring gap
Step 2.10
On designs that incorporate set screws 57 in the seal drive, after
tightening shoulder screws 414 , tighten the set screws 57 to lock the seal
drive to the shaft.
The seal is now ready for operation. See Operational Recommendations
before start-up, paragraph 4.
For special problems encountered during installation, contact your nearest
Flowserve Sales and Service Representative or Authorized Distributor.
Step 2.8