Flowserve Circulator User Manual
Page 8
8
Option 2
The safety feature kit includes:
• Accumulator, 1-1/4” NPT
• 1-1/4” NPT pipe nipple
• 1/4” tubing and tube fittings
Kit Installation Instructions:
1. Apply Teflon tape and/or Jomar pipe dope or equal to
1-1/4” pipe nipple threads. Start no closer to the end
of the threads than the 2nd thread.
2. Thread pipe nipple into the accumulator finger tight.
3. Clean any dirt or debris from the 1-1/4” NPT connec-
tion on the top of the manifold block. Remove the
1-1/4” NPT plug from the top of the manifold block.
4. Thread the nipple/accumulator assembly into the
manifold block. Tighten assembly until the 1/4” NPT
connection in the accumulator is facing the front of the
manifold block. With wrench placed on the connection
end of the accumulator tighten assembly. Do not over
tighten.
See figure 2.
5. Clean any dirt or debris from the 1/4” NPT connection
on the top of the manifold block. Remove the 1/4” NPT
plugs from the and accumulator and the top of the
manifold block.
6. Apply Teflon tape and/or Jomar pipe dope or equal to
tube fitting NPT threads. Start no closer to the end of
the threads than the 2nd thread.
7. Thread tube fittings into the accumulator and manifold
block. Tighten into accumulator and manifold block.
Do not over tighten.
See Figure 2.
8. Remove tube fitting nut and ferrule.
9. Insert tubing into fittings on accumulator and manifold
block. Verify tubing ends are the correct length. Cut to
fit if required. Proceed to the next step once tubing is
the correct length.
10. Slide tube fitting nut and ferrule onto each end of
tubing.
11. Insert tubing into fittings on accumulator and block
manifold.
12. Slide fitting nuts into place and finger tighten.
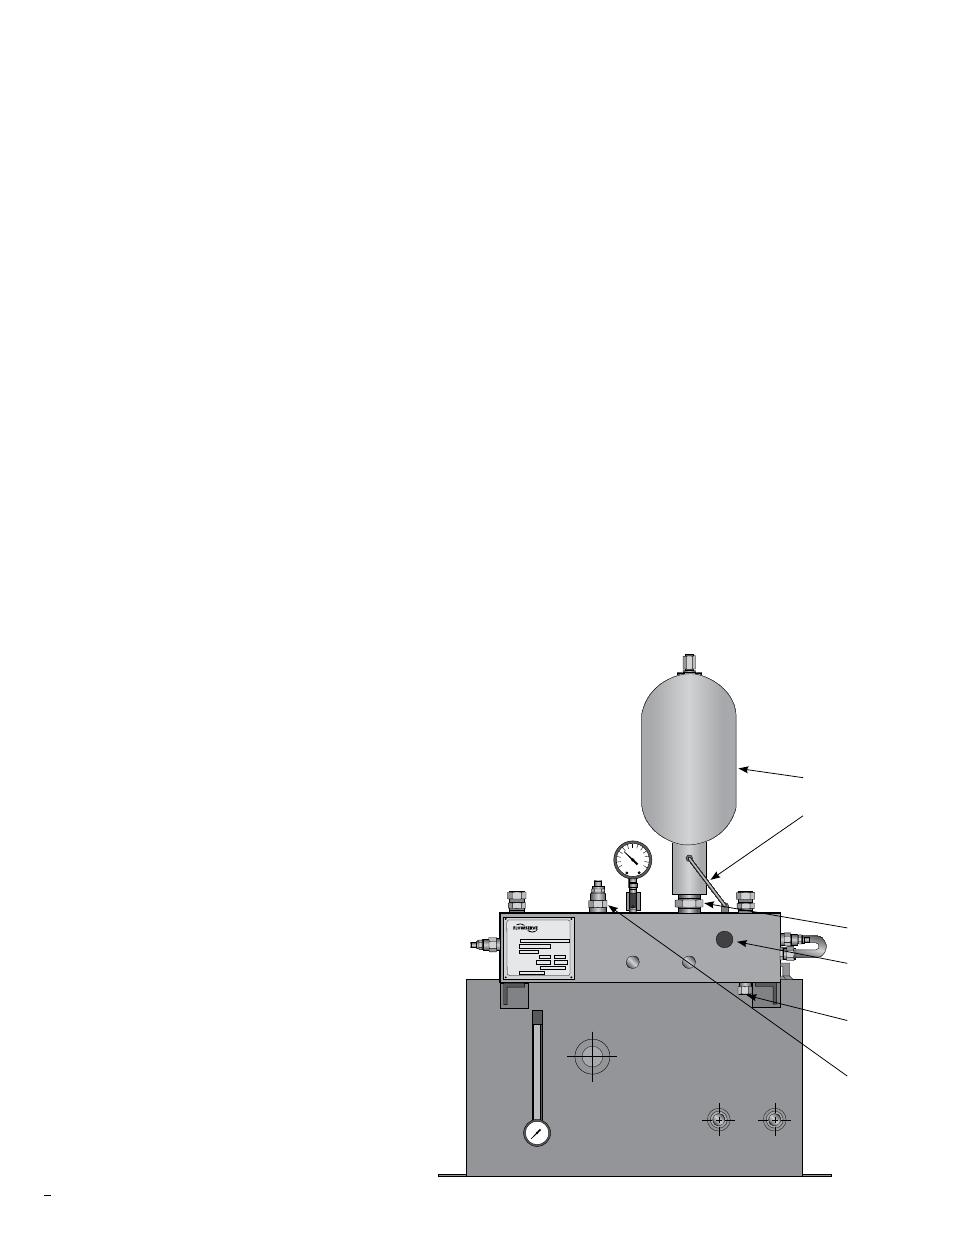
Figure 2
Seal Support System
Part No.
Part No.
PSI
to
to
Xxxxxxx
Xxxxxxx Xxxxx Xxxx Xx
Xxxxx xx xxxxxxxxx
Xxxxx xx xxxxxxxxxxx
Xxxxxx
Xxxx Xx.
Xxxx xxxxxx xxxx
xxxxxxxx xx xxxx
xxxxxx xxxxxxxxx
xxxxxx xxxxxxxxx
accumulator
tubing and
fittings
nipple
needle
valve
check
valve
pilot to
open
check
valve
13. Hold tubing into position and tighten each nut with a
wrench until tight. Do not over tighten.
14. Clean any dirt or debris from cartridge connections.
Remove cartridge plugs from manifold block.
See Figure 2.
15. Do not use Telfon tape or pipe dope on cartridge
valves.
16. Insert and finger tighten the needle valve cartridge
into the cavity on the front of the manifold block.
17. Insert and finger tighten the check valve cartridge into
the bottom of the manifold block.
18. Insert and finger tighten the check valve cartridge into
the top of the manifold block.
19. Tighten valves with open-end wrench or socket
wrench. Do not over tighten.
20. Installation is complete.
21. It is the customer’s responsibility to pre-charge the
accumulator.