Fronius String Control 250/30 DCD DF User Manual
Page 67
65
EN
Connecting solar module strings to the Fronius
String Control 250/30 DCD DF
Safety
Notes on con-
necting the solar
module strings to
the Fronius String
Control 250/30
DCD DF
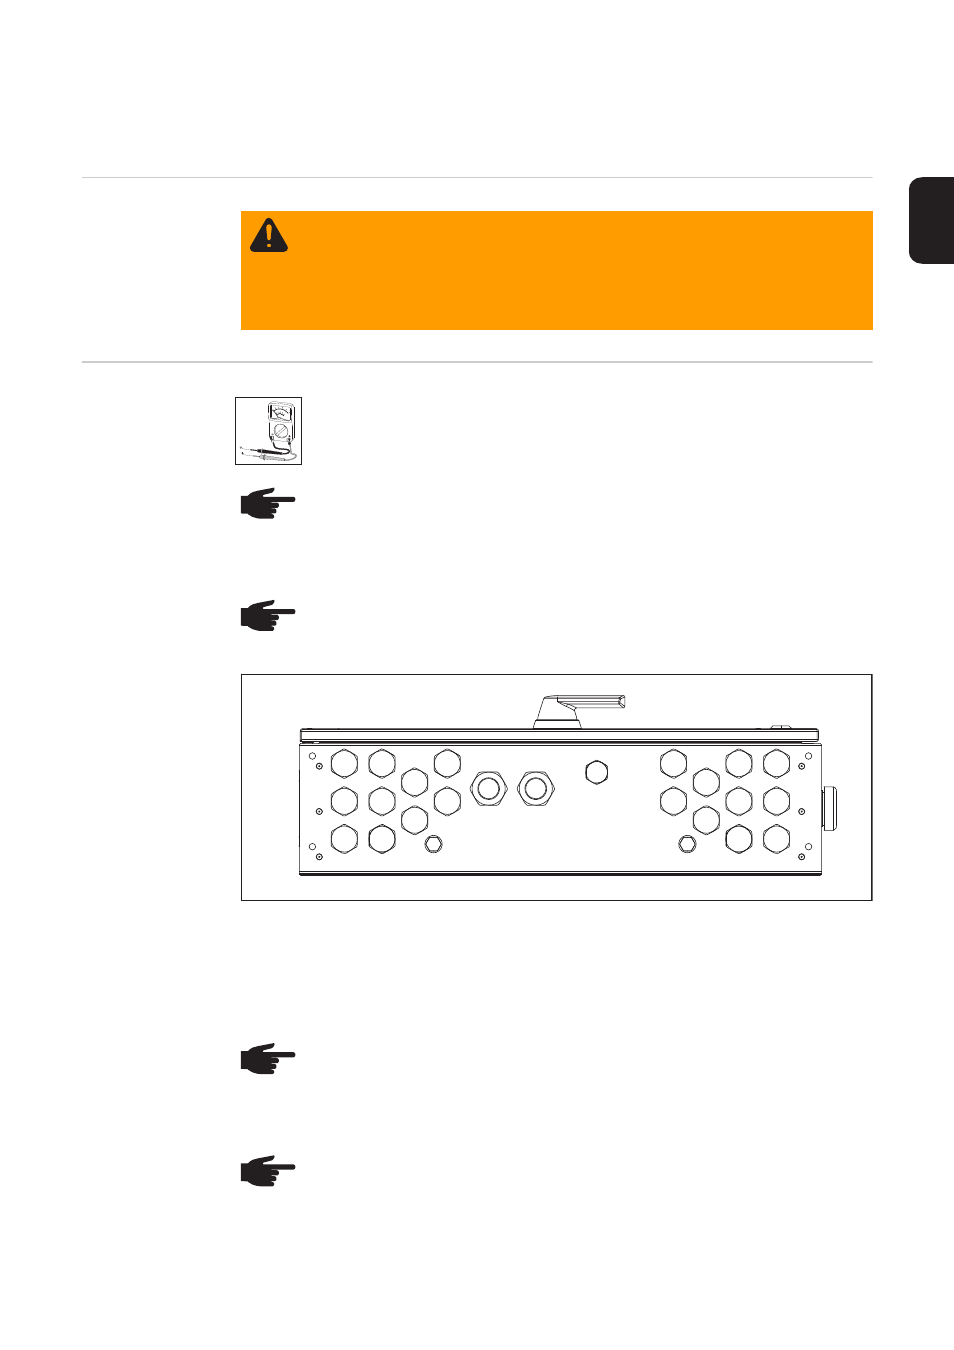
Recommended order for introducing and connecting the DC cables
The following terminal assignment is recommended:
-
Lay the cables for the terminals without fuse holders through screw connections 1 to
10
-
Lay the cables for the terminals with fuse holders through screw connections 11 to 20
WARNING! An electric shock can be fatal. Danger from DC voltage in PV mod-
ules.
-
Make sure that both the input side and output side of the device are de-ener-
gised before attaching any connections.
-
All connections must be made by qualified electricians.
-
Note the safety rules in these operating instructions.
IMPORTANT! Always connect DC cables of the same polarity to the terminals
for DC 'IN' cables and to the terminals with fuse holders for DC 'IN' cables.
NOTE! To ensure problem-free connection of the DC cables to the terminals,
note the following minimum lengths for the DC cables (measured from the inner
bottom edge of the Fronius String Control 250/30 DCD DF):
-
350 mm to the terminals for DC 'IN' cables
-
350 mm to the terminals with fuse holders for DC 'IN' cables
NOTE! Note the order for introducing and connecting the DC cables:
1.
from left to right
2.
from bottom to top
NOTE! If you are connecting fewer than 30 solar module strings, we recommend
that you distribute the DC cables as evenly as possible between the measuring
channels. For example, connect 15 solar module strings so that 3 DC cables are
connected per measuring channel. If possible, leave individual terminals free be-
tween the DC cables.
NOTE! If solar modules with different power tolerances are being connected, we
recommend that the power be distributed as equally as possible between the
measuring channels.
1
2
11
12
6
5
7
9
8
10
19
18
20
16
15
17
3
4
13
14