GAI-Tronics 231-001 Pole Mounting Kit User Manual
Page 2
Pub. 42004-099A
Model 231-001 Pole Mounting Kit
Page:
2 of 2
\\s_eng\gtcproddocs\standard ioms - current release\42004 instr. manuals\42004-099a.doc
7/97
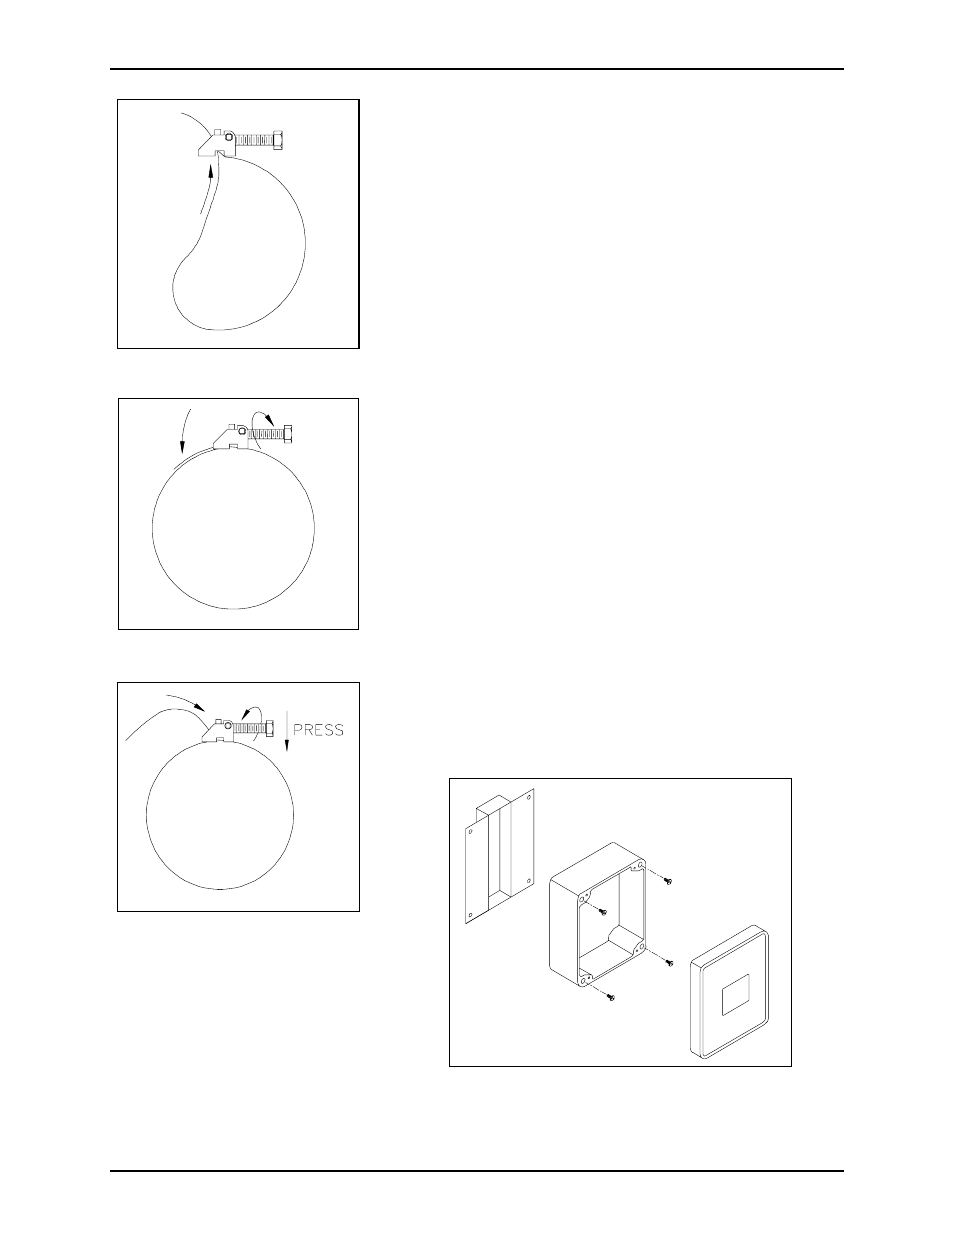
Put the band around the pole and back through the center slot in
the bracket, then through the clamp. See Figure 2.
Tightening the Band
Pull the band tight, and maintain the tension while tightening the
bolt. See Figure 3.
Removing the Band
Loosen the bolt to the fully retracted position. Press down on the
bolt, and feed the loose end of the strap back through the slots.
See Figure 4.
Mounting the Enclosure
N
OTE
: The following steps should be completed only after the
bracket has been mounted to the pole.
1. Loosen the four captive screws, and swing the front door open
to the left. Disconnect any cables or connectors, and pull the
front assembly unit away from the rear enclosure. If the unit
is equipped with hinges, remove them by pulling them out of
the rear enclosure holes.
2. Mount the rear enclosure to the bracket using the Phillips
Fillister head 1/4-20 by ½-inch machine screws. Refer to
Figure 5.
3. Replace the front assembly, and reconnect all the cables.
Tighten the four outer screws.
Figure 2. Installing the Band
Figure 3. Tightening the Band
Figure 4. Removing the Band
Figure 5. Mounting the Enclosure
- XTA0003A Radio Cable 12564-002 Party Line Knob Kit (EuroPage) 12598-004 Redundant 48 V DC Module XGM003A Gooseneck Microphone Kit 12515-007, 12515-008, 12515-009 Pressbar Handset with Hytrel Cord Replacement Kit 10959-207 and 10959-208 Rack-mount Audio Messenger Interface 10959-201 and 10959-203 Wall-mount Audio Messenger Interface 10959-903 Wall-Mount Audio Messenger Interface (AMI) 12598-002 Redundant 5 V DC Module 13340 Constant Directivity Horn XTI0001A-G3 Radio Cable 227-003 Auto-dial S.M.A.R.T. Phones 247-003 Auto-dial S.M.A.R.T. Phones 257-003 Auto-dial S.M.A.R.T. Phones 277-003 Auto-dial S.M.A.R.T. Phones 226-003 S.M.A.R.T. Phones with Keypads 256-003 S.M.A.R.T. Phones with Keypads 246-003 S.M.A.R.T. Phones with Keypads 276-003 S.M.A.R.T. Phones with Keypads 293-700 VoIP Telephone 293AL-700 VoIP Telephone 297-700 VoIP Telephone 297-702 VoIP Telephone 298-701 VoIP Telephone 294AL-702 VoIP Telephone 297-701 VoIP Telephone 297-703 VoIP Telephone 298-702 VoIP Telephone