Installing new assembly – GAI-Tronics 12512-001 Ind. Tel. Hookswitch Assembly Kit User Manual
Page 2
Pub. 42003-023E
M
ODEL
12512-001
H
OOKSWITCH
A
SSEMBLY
R
EPLACEMENT
K
IT
Page
2 of 8
f:\standard ioms - current release\42003 kit manuals\42003-023e.doc
08/14
4. Cut the cable tie used to bundle wires together.
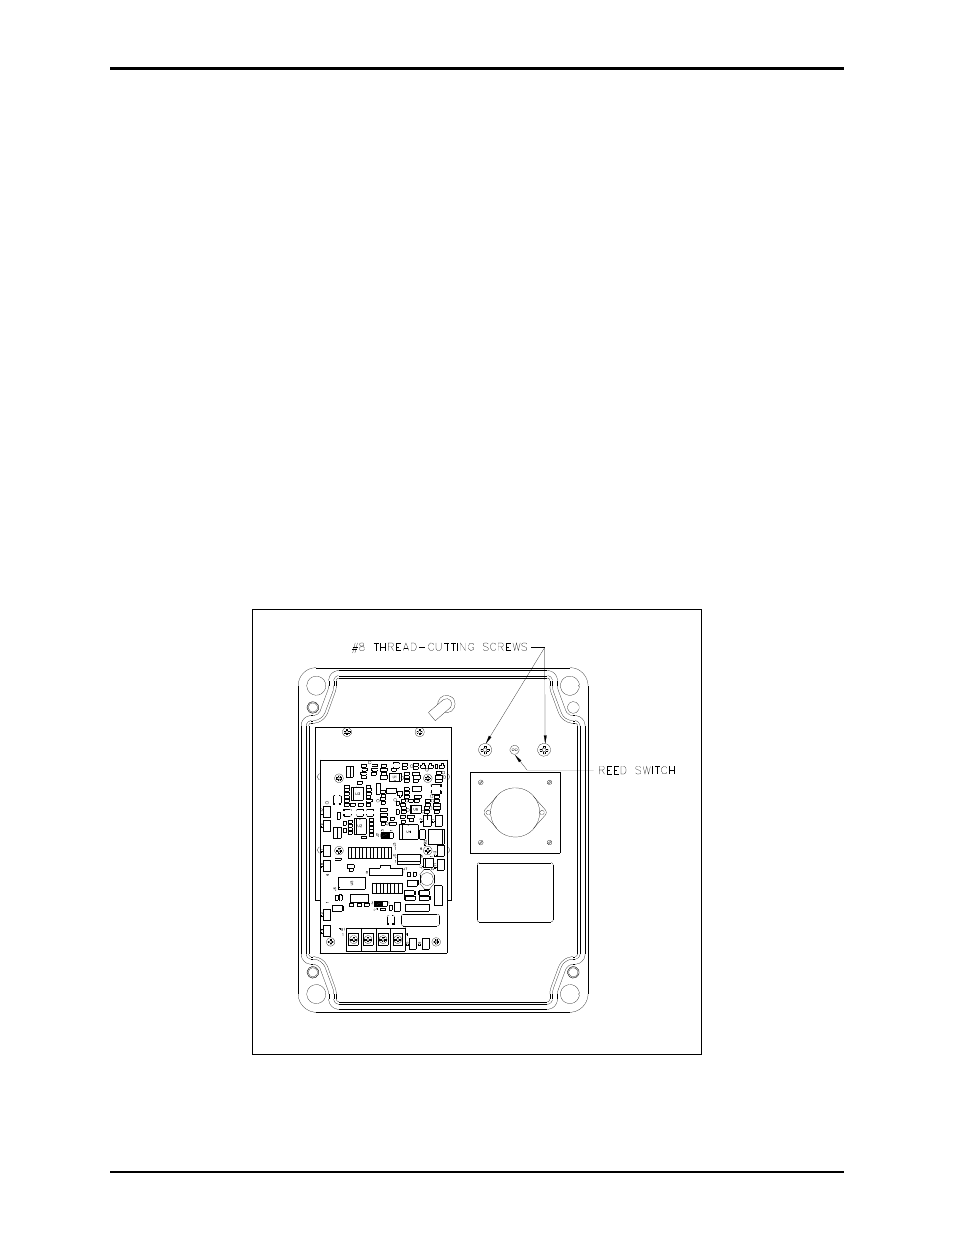
5. Remove the two screws that secure the handset cradle to the front cover. See Figure 1.
6. Pull the handset cradle with the reed switch attached away from the front panel.
7. Remove the handset cradle gasket from the front panel (if necessary).
Installing New Assembly
8. Cut the black wire lead close to the switch body and discard.
9. Thread the blue and white reed switch leads through the center top hole. See Figure 1.
10. Secure the plastic cradle on the front cover using the two #8 thread-cutting screws. See Figure 1.
11. Plug spades on the blue and white wires into E1 and E2 on the PCBA. See Figure 2.
12. Bundle the wires as before with the cable tie included in the kit.
13. Reconnect the red and green wires to TB1. See Figure 2.
14. Replace the front panel and secure using the screws retained from step 1.
15. Test the on-hook/off-hook function to ensure installation has been successful.
Figure 1.