GAI-Tronics 12564-001 Rotary Switch Knob Kit (5 pk) User Manual
Rotary switch knob replacement kit (5 pack), Confidentiality notice, Installation
Pub. 42003-125A
GAI-Tronics Corporation P.O. Box 1060, Reading, PA 19607-1060 USA
610-777-1374
800-492-1212 Fax: 610-796-5954
V
ISIT WWW
.
GAI
-
TRONICS
.
COM FOR PRODUCT LITERATURE AND MANUALS
G A I - T R O N I C S ® C O R P O R A T I O N
A H U B B E L L C O M P A N Y
Rotary Switch Knob Replacement Kit (5 Pack)
M
ODEL
12564-001
Confidentiality Notice
This manual is provided solely as an operational, installation, and maintenance guide and contains sensitive
business and technical information which is confidential and proprietary to GAI-Tronics. GAI-Tronics
retains all intellectual property and other rights in or to the information contained herein, and such
information may only be used in connection with the operation of your GAI-Tronics product or system.
This manual may not be disclosed in any form, in whole or in part, directly or indirectly, to any third party.
Installation
Suggested Tools
• 1/16-inch (#21) Allen wrench
• Adjustable torque driver
Knob Removal
To remove the knob, use a 1/16-inch (#21) Allen wrench. Loosen the two set screws in the selector knob.
One screw is to the right of the party-line indicator; the other screw is in the end of the knob. After
loosening the screws, lift the knob off, and discard it.
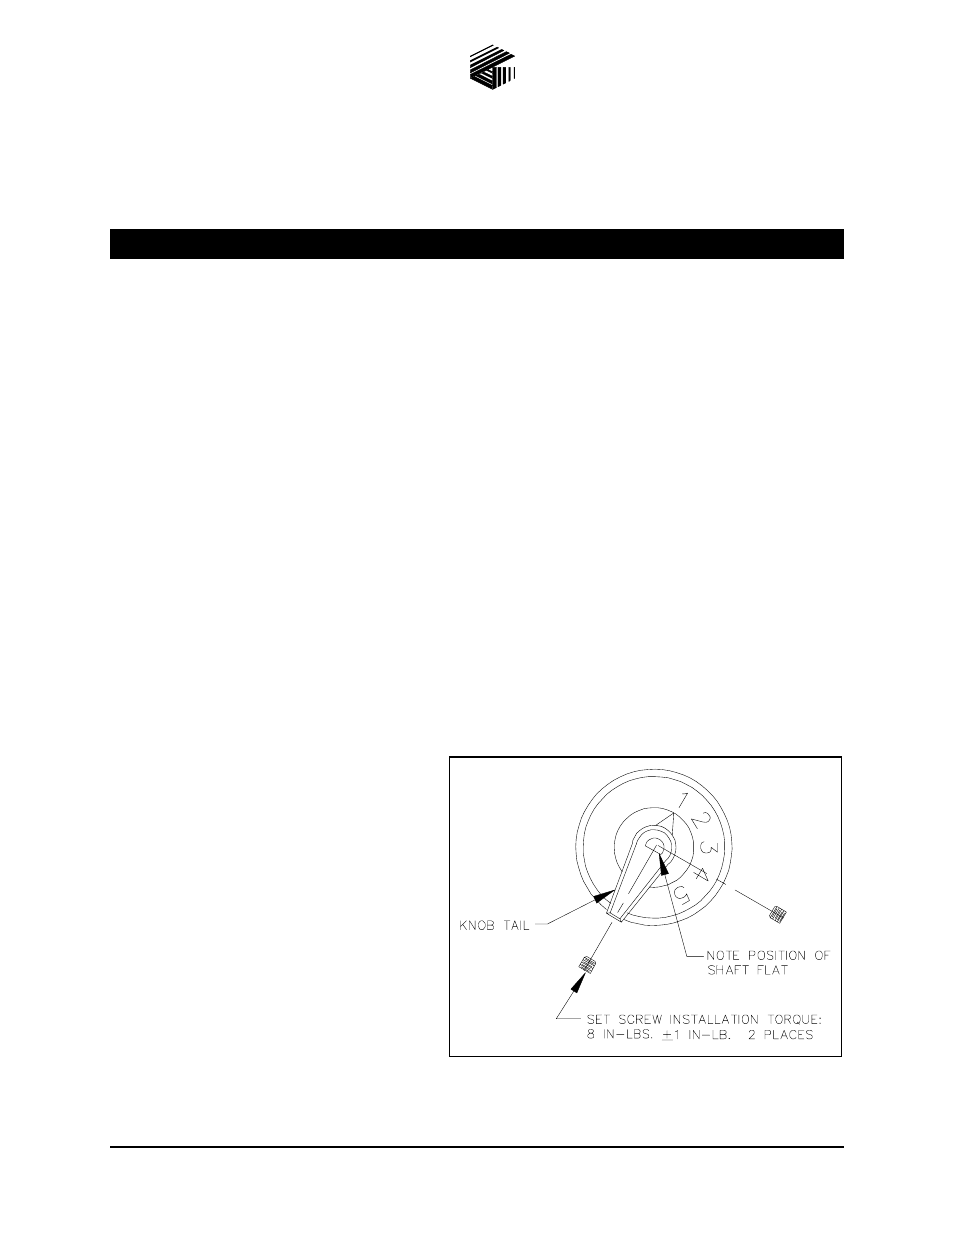
Knob Installation
1. Set the adjustable torque driver to 8 inch-
pounds.
2. Tighten the set screw at the tail end of the
switch. Note the position of shaft flat with
respect to the tail of the knob.
See Figure 1.
3. Tighten the remaining set screw.
Figure 1. Knob Installation