GAI-Tronics 12504-010 Keypad Replacement Kit for 491-201 Mine Dial Page Telephone User Manual
Page 4
Pub. 42003-218B
Model 12504-010 Keypad Replacement Kit for Model 491-204 Mine Dial Page Phone
Page:
4 of 5
f:\standard ioms - current release\42003 kit manuals\42003-218b.doc
07/09
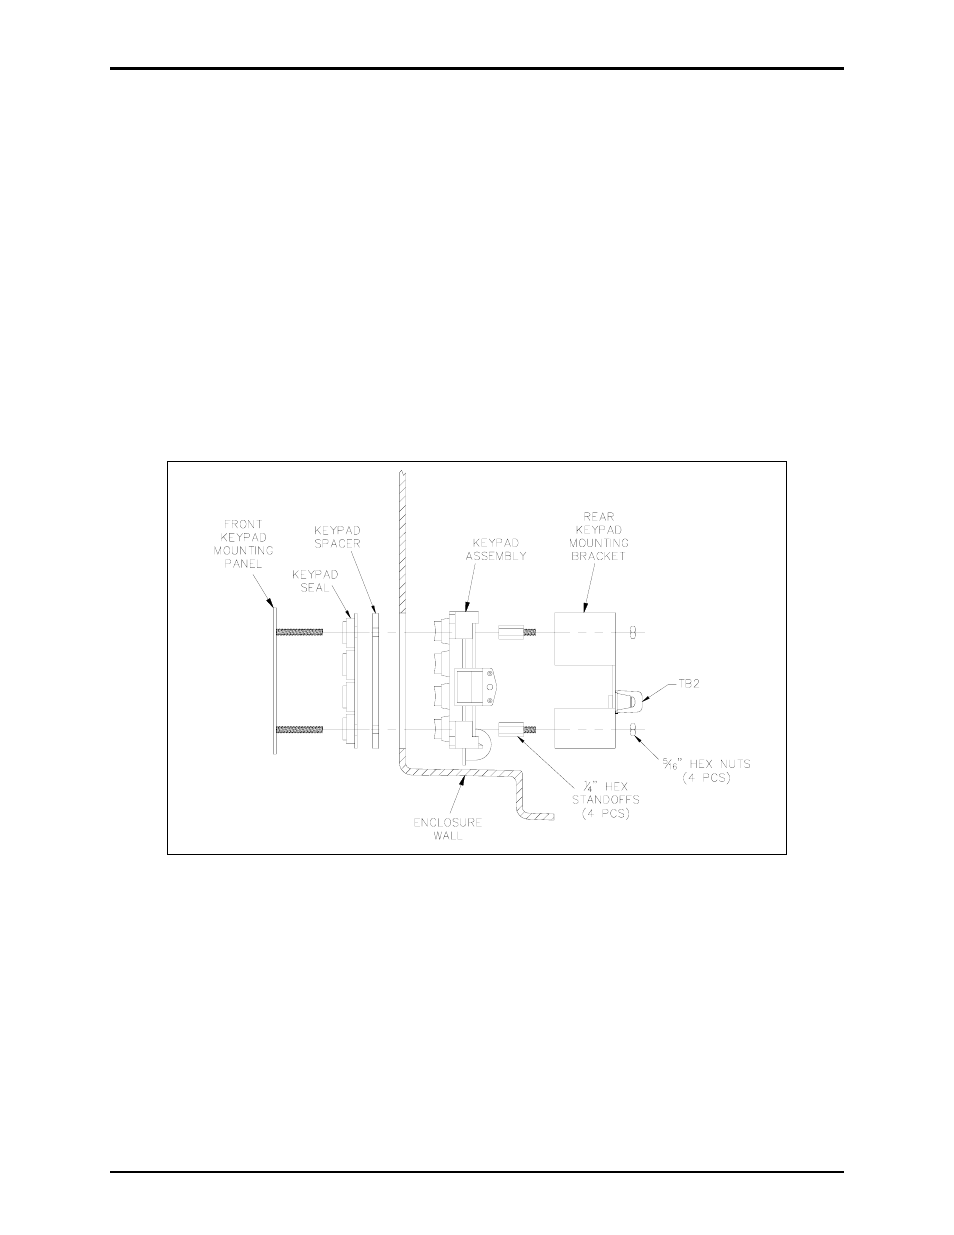
Keypad Assembly Replacement
11. Remove the four hex nuts on the rear keypad mounting bracket using the 5/16-inch nut driver. Save
the hex nuts for re-assembly.
12. Lift the rear keypad mounting bracket to expose the keypad assembly. Remove the four ¼-inch hex
standoffs using the ¼-nut driver. Save the hex standoffs for re-assembly.
13. The front keypad mounting panel can now be pulled away from the keypad assembly from the front
of the enclosure.
14. Lift the aluminum keypad spacer off the front keypad mounting panel to expose the keypad seal. See
Figure 6. Save the keypad spacer for re-assembly.
15. Pull the keypad seal off the front keypad mounting panel and dispose of the old seal.
16. Press the new keypad seal into the front keypad mounting panel as shown in Figure 6. Make sure that
each key extrusion of the seal is seating fully into the front keypad mounting panel.
Figure 6.
17. Place the aluminum keypad spacer onto the front keypad mounting bracket to cover the keypad seal.
18. Place the front keypad panel back into the front of the enclosure making sure that the keypad spacer
seats in the opening of the enclosure. Hold the front keypad panel in place and from the inside of the
enclosure, place the new keypad assembly over the studs of the front keypad panel. Use the four ¼-
inch hex standoffs to secure the keypad assembly to the studs. Tighten the hex standoffs.
19. While holding the front keypad panel and keypad assembly in place, put the rear keypad mounting
bracket over the hex standoffs. Ensure that the four wires from the keypad assembly exit out the top
(speaker side) of the rear keypad mounting bracket. See Figure 5.. Use the four 5/16-inch hex nuts to
secure the rear keypad mounting bracket. Tighten the nuts by using an “x” pattern to ensure uniform
compression of the front keypad panel.