Torch switch removal and replacement, Figure 3-6, Pac110 torch repair – Hypertherm Powermax350 Service Manual User Manual
Page 45: Service manual, Aintenance
3-21
Service Manual
M
AINTENANCE
5.
Install the new cinch strap (Tyrap) as shown.
6.
Install the torch main body assembly and torch switch into one of the handle halves. While positioning the
handle halves together, be careful not to pinch any wires, especially around the torch switch retainers.
7.
Replace the 5 screws to secure the handle halves together. If the seams do not fit together tightly, remove
the screws and check for pinched wires.
Torch Switch Removal and Replacement
To disassemble and repair the torch, refer to Figure 3-6 and perform the following procedure.
1.
Remove the 5 screws that secure the handle halves together.
2.
Remove the torch switch from the handle.
3.
Remove the torch switch by cutting the 2 splices at the torch lead (violet wires).
4.
Replace the torch switch by crimping the switch wires and the violet wires from the torch lead together with
the splices.
5.
Install the torch switch back into the handle. While positioning the handle halves together, be careful not to
pinch any wires, especially around the torch switch retainers.
6.
Replace the 5 screws to secure the handle halves together.
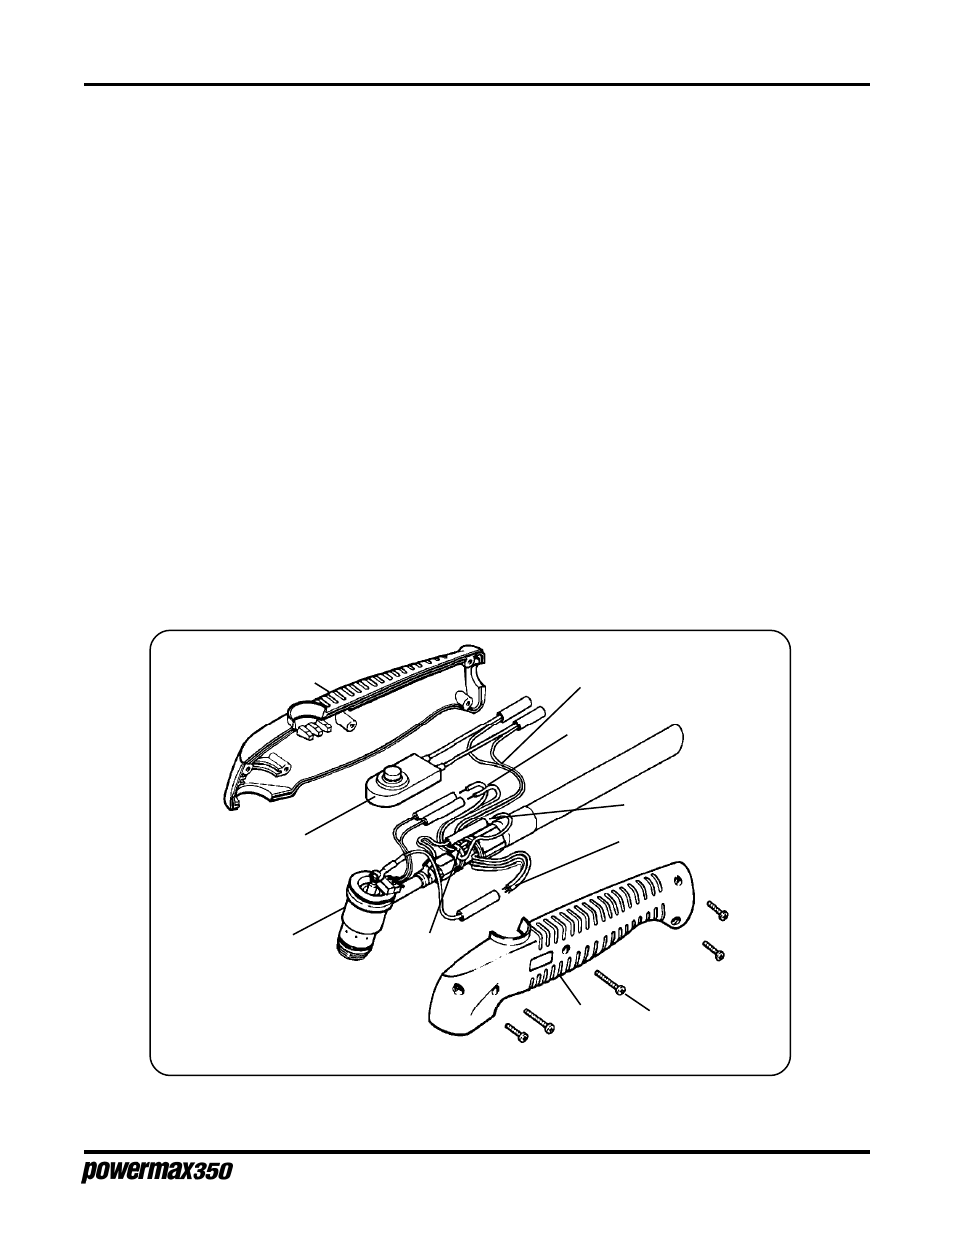
Figure 3-6 PAC110 Torch Repair
Torch Switch
Torch Main Body
White Wires (4)
Violet Wires (2)
Blue
Wires (2)
Red Wires (2)
Screws (5)
Handle
Handle
Tyrap
7-98