11 updating the firmware on the lt-hd – Lynx Studio LT-HD User Manual
Page 25
Page 22
11 Updating the firmware on the LT-HD
Updating the firmware on the LT-HD uses the same process as updating the firmware on the
Aurora. With Aurora Firmware updater revision 14 or above, a properly installed LT-HD can be
selected as the device to program.
Instructions for downloading and running the Aurora Update program for Windows or OSX are
available at:
http://www.lynxstudio.com/download.html
.
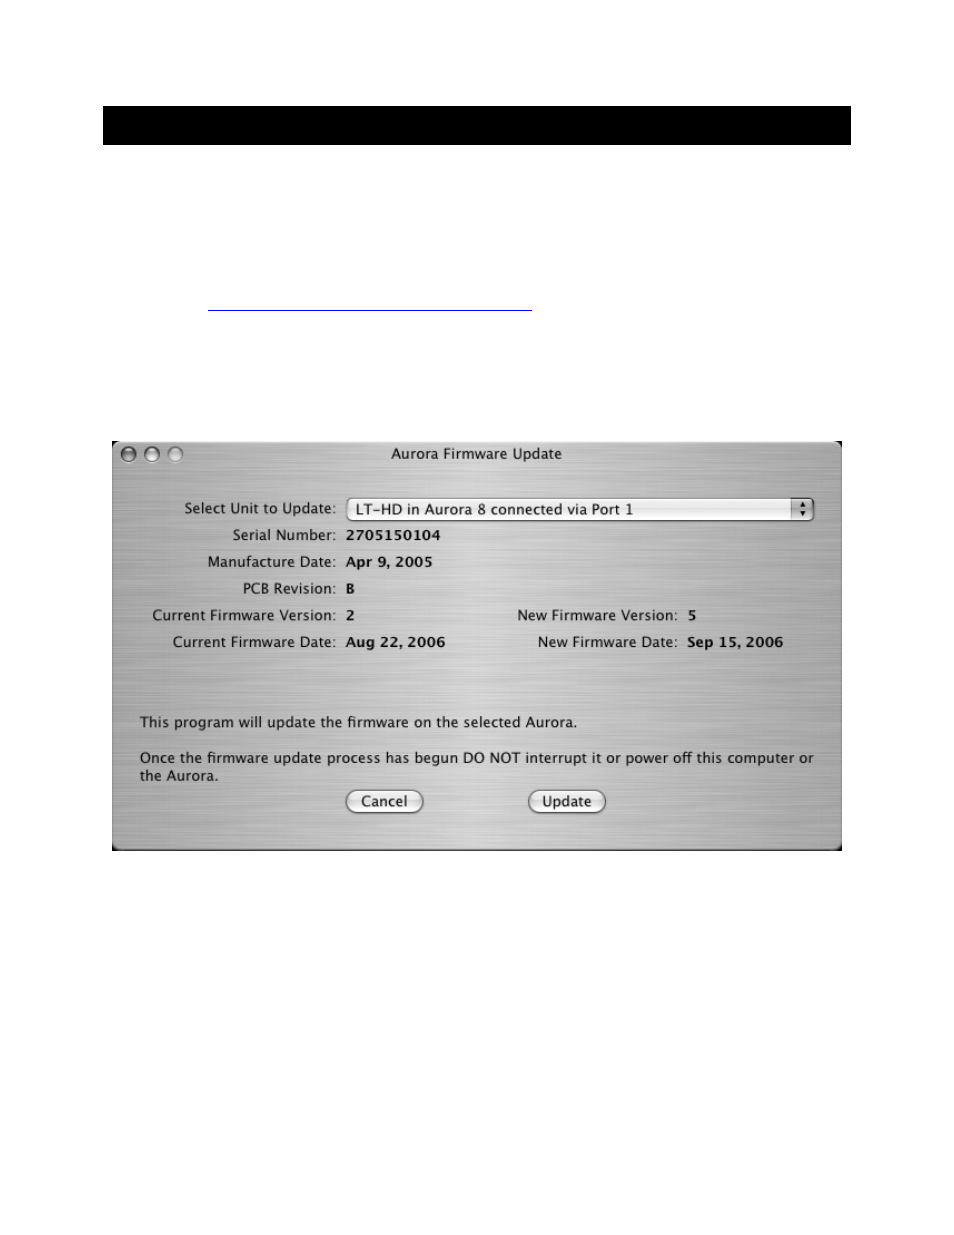
At the Aurora Firmware Update screen, simply select the LT-HD from the “Select Unit to
Update” pulldown menu, and click “Update” to run. If the LT-HD does not appear as an option
here, verify that the LT-HD is properly installed and the Current Aurora firmware revision is 14
or higher.
When the update process is complete, it is important to press the Power button to shut down the
Aurora AND then disconnect the Aurora from its power source.
The LT-HD is equipped with two EEPROMS that store the Aurora firmware. The first provides a
protected backup that has been programmed at the factory, and the second is able to be
programmed via the Aurora Update program. A jumper on the LT-HD board determines which
EEPROM is active. After programming the LT-HD for the first time, it is essential to remove the
Aurora lid and check the status of jumper block JP2. If pins 1 and 2 are capped, than the LT-HD
is operating off of the protected backup. In this case, place the jumper shunt over pins 2 and 3 for
the new firmware to become active on the LT-HD. If jumper pins 2 and 3 are already capped,
you do not need to make any change.