Manual setup, Speaker setup, Menu operation – Marantz SR6005 User Manual
Page 65: Menu, Enter, Press, Press ui to select the menu to be set or operated, Or p to enter the setting
61
Basic version
Simple version
Information
ENGLISH
DEUTSCH
FRANÇAIS
ITALIANO
ESPAÑOL
NEDERLANDS
SVENSKA
Advanced version
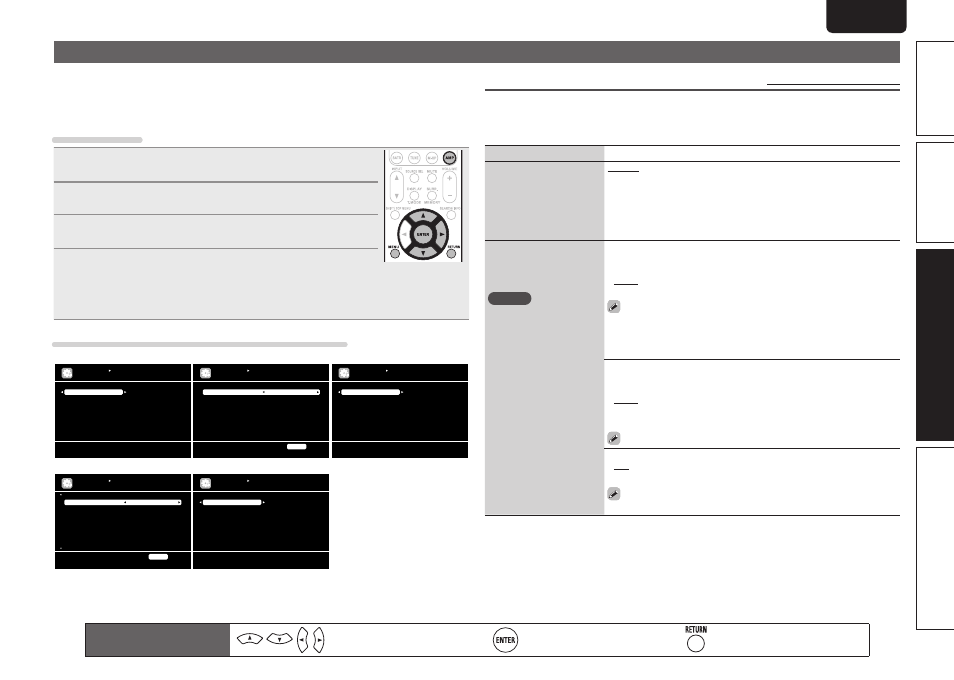
Remote control operation
buttons
Move the cursor
(Up/Down/Left/Right)
Confirm the setting
Return to previous menu
Manual Setup
Set when changing Audyssey® Auto Setup settings, or when changing the audio, video, display
or other settings.
• If you change the speaker settings after performing Audyssey Auto Setup, it will not be possible
to set MultEQ®, Dynamic EQ® and Dynamic Volume® (vpage 57, 58).
• Can be used without changing the settings. Please set if necessary.
Menu operation
1
Press
AMP
to set the remote control unit to amplifier operation
mode.
2
Press
MENU
.
The menu is displayed on the TV screen.
3
Press ui to select the menu to be set or operated.
4
Press
ENTER
or p to enter the setting.
• To return to the previous item, press
RETURN
.
• Exiting the Menu, press
MENU
while the menu is displayed.
The menu display disappears.
Items that can be set with the Manual Setup procedure
Amp Assign
Speaker Config.
Bass Setting
Distance
Channel Level
Crossover Frequency
Assign surround back AMP for other use
MANUAL SETUP
SPEAKER SETUP
RGB Range
Auto Lip Sync
HDMI Audio Out
HDMI Control
Standby Source
Power Off Control
Normal
ON
AMP
ON
Last
All
MANUAL SETUP
HDMI SETUP
Use video range from 16 (black) to 235 (white)
RETURN
Return
7.1ch IN SW Level
EQ Customize
Set subwoofer playback level in 7.1ch IN mode
MANUAL SETUP
AUDIO SETUP
Bass
Treble
HPF
Level Lch
Level Rch
Channel
0dB
0dB
OFF
0dB
0dB
Stereo
MANUAL SETUP
ZONE2 SETUP
[1/2]
Adjust low frequency range (bass)
RETURN
Return
Volume Control
Source Delete
GUI
Zone Rename
Trigger Out
Display
Setup Lock
MANUAL SETUP
OPTION SETUP
Make settings for volume control
Speaker Setup (vpage 61)
ZONE2 Setup (vpage 65)
Option Setup (vpage 66)
HDMI Setup (vpage 64)
Audio Setup (vpage 64)
Speaker Setup
Default settings are underlined.
Perform when setting the speakers manually or when changing settings made in Audyssey Auto Setup.
• If you change the speaker settings after performing Audyssey Auto Setup, it will not be possible to select
MultEQ, Dynamic EQ and Dynamic Volume (vpage 57, 58).
• Manual Setup can be used without changing the settings. Please set if necessary.
Setting items
Setting details
Amp Assign
Set the speakers connected
to this unit.
Normal : Set when using 7.1-channel (Front/Center/Surround/Surround
Back or Front height/Subwoofer) speakers.
ZONE2 : Set for connecting the speakers for ZONE2 to the SURR.BACK/
AMP ASSIGN terminals.
SPKR-C : Set for connecting a tweeter of a front speaker to the SURR.
BACK/AMP ASSIGN terminals and a woofer of a front speaker to the
FRONT terminals.
Speaker Config.
Select speaker configuration
and size (bass reproduction
capability).
NOTE
Do not use the outward
shape of the speaker to
determine selection of a
“Large” or “Small” speaker.
Instead, use the frequencies
set in “Crossover
Frequency” (vpage 63) as
the standard for determining
bass reproduction capability.
Front : Set the front speaker size.
• Large : Use a large speaker that can adequately play back low
frequencies.
• Small : Use a small speaker that has inadequate playback capacity for
low frequencies.
• When “Subwoofer” is set to “No”, “Front” is automatically set to
“Large”.
• When “Front” is set to “Small”, “Center”, “Surround“, “S.Back” and
“F.Height” can not be set to “Large”.
Center : Set the presence and size of the center speaker.
• Large : Use a large speaker that can adequately play back low
frequencies.
• Small : Use a small speaker that has inadequate playback capacity for
low frequencies.
• None : Select when a center speaker is not connected.
“Large” is not displayed when “Front” is set to “Small”.
Subwoofer : Set the presence of a subwoofer.
• Yes : Use a subwoofer.
• No : Select when a subwoofer is not connected.
When “Front” is set to “Small”, “Subwoofer” is automatically set to
“Yes”.